Open up the peonyP1050255framecs image
in your PSP workspace
WINDOW >>> DUPLICATE
Close the original Image
LAYERS >>> Promote background Layer
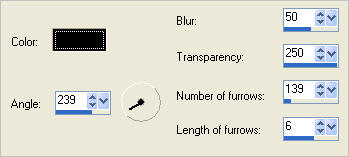
EFFECTS >>> TEXTURE EFFECTS >>> FINE LEATHER
Save as bgd.pspimage
(so you don't lose it should your PSP hiccup)
Minimize this image
|
|
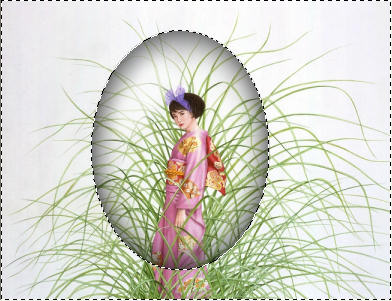
Open up the NX229.jpg image
in your PSP workspace
WINDOW >>> DUPLICATE
Close the original Image
LAYERS >>> Promote background Layer
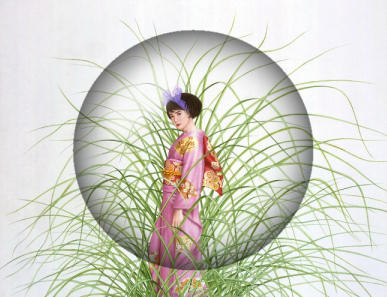
Maximize your globe1 image
Right click on the Title Bar and select COPY from the options
Right click on the Title Bar of your NX229 image
and select PASTE AS NEW LAYER from the options.
|
|
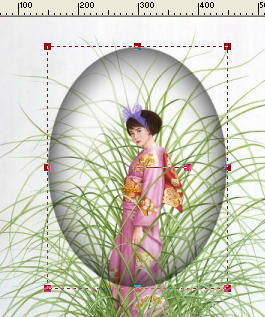
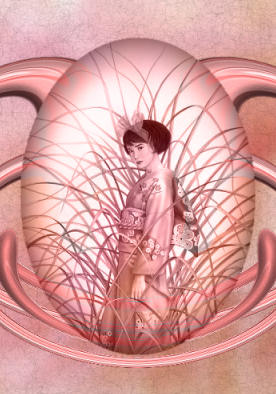
We'll make it 'egg shaped' to go with the image being used.
Select your DEFORMATION tool
Mode = SCALE
use default settings
PSPX-X3:Select your PICK tool
Drag the centre left node to the right
to the 150 pixel mark on your top ruler
Drag the centre right node to the right
to the 450 pixel mark on your top ruler
|
|
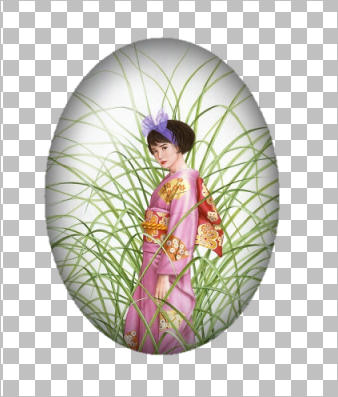
Click the RESET RECTANGLE arrow
Select your MOVER tool to disengage
the Deformation / Pick tool
With your MAGIC WAND
Mode = Replace
Match Mode = RGB Value
Tolerance = 5
Feather = 2
Antialias = Checked
Sample Merged = UNCHECKED
PSP9 - X3: Check CONTIGUOUS
PSPX - X3: There is no " Sample Merged"
PSPX - X3: Use all layers = UNChecked
PSP9 - X3: ANTIALIAS = Outside
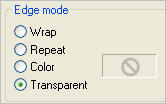
Select the OUTER transparent area on the globe layer
|
|
SELECTIONS >>> MODIFY >>> EXPAND = 2
Depress your DELETE key 3 times
ACTIVATE
RASTER 1
Depress your DELETE key 3 times
DESELECT
LAYERS >>> MERGE >>> MERGE VISIBLE
Save as oriental.pspimage
(so you don't lose it should your PSP hiccup)
Minimize this image
|
|
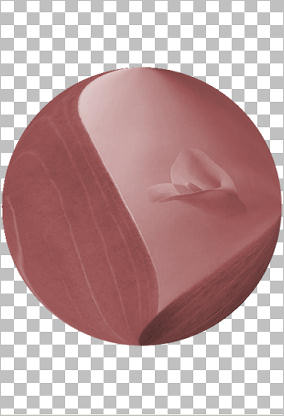
Open up the u9mdA3jL.51.jpgimage
in your PSP workspace
WINDOW >>> DUPLICATE
Close the original Image
LAYERS >>> Promote background Layer
ADJUST >>> HUE & SATURATION >>> COLORIZE
HUE = 0
SATURATION = 70
EFFECTS>>> GEOMETRIC EFFECTS >>> CIRCLE
|
|
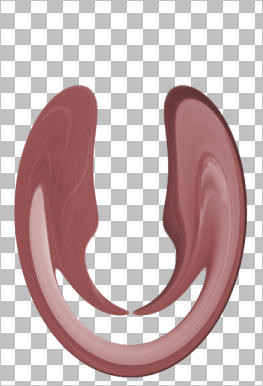
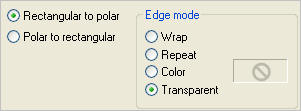
EFFECTS >>> DISTORTION EFFECTS >>> POLAR COORDINATES
EDIT >>> Repeat Polar Coordinates
EDIT >>> Repeat Polar Coordinates
|
|
IMAGE >>> ROTATE >>> ROTATE CLOCKWISE 90
EFFECTS >>> DISTORTION EFFECTS >>> POLAR COORDINATES
Same settings
EDIT >>> Repeat Polar Coordinates
EDIT >>> Repeat Polar Coordinates
|
|
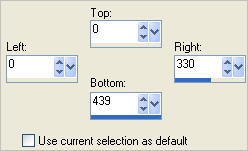
Choose your SELECTION TOOL then click on the
CUSTOM SELECTION symbol
and enter these coordinates. |
|
Depress your DELETE key
DESELECT
LAYERS >>> DUPLICATE
IMAGE >>> MIRROR
Reposition with your MOVER tool so the images meet
LAYERS >>> MERGE >>> MERGE VISIBLE
Right click on the Title Bar and select COPY from the options
|
|
Maximize the bgd.pspimage
Right click on the Title Bar
and select PASTE AS NEW LAYER from the options.
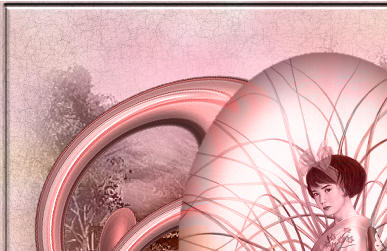
EFFECTS >>> EDGE EFFECTS >>> ENHANCE
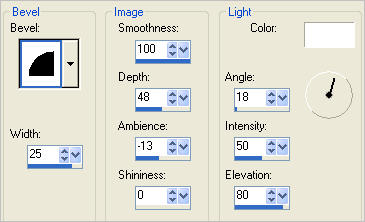
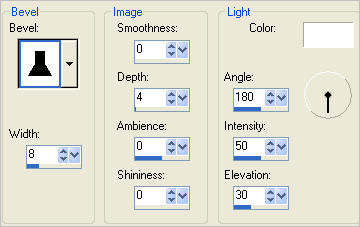
EFFECTS >>> 3D EFFECTS >>> INNER BEVEL
|
|
LAYERS >>> DUPLICATE
IMAGE >>> RESIZE = 80%
Ensure "Resize all layers" is UNCHECKED
Resample using WEIGHTED AVERAGE
Reposition down with your MOVER tool
|
|
Maximize the oriental.pspimage
Right click on the Title Bar
and select PASTE AS NEW LAYER from the options.
In your LAYER PALETTE change
the BLEND MODE to LUMINANCE (L)
|
|
ACTIVATE RASTER 1
LAYERS >>> NEW RASTER LAYER
SELECTIONS >>> SELECT ALL
Open up the Chinese_Landscape_15 image
in your PSP workspace
Right click on the Title Bar and select COPY from the options
Right click on the Title Bar of your tag image
and select PASTE INTO SELECTION from the options.
DESELECT
EFFECTS >>> EDGE EFFECTS >>> ENHANCE
In your LAYER PALETTE change
the BLEND MODE to LUMINANCE (L)
|
|
ACTIVATE RASTER 1
SELECTIONS >>> SELECT ALL
SELECTIONS >>> MODIFY >>> CONTRACT = 4
SELECTIONS >>> INVERT
EFFECTS >>> 3D EFFECTS >>> OUTER BEVEL
|
|
SELECTIONS >>> INVERT
SELECTIONS >>> MODIFY >>> CONTRACT = 4
EFFECTS >>> 3D EFFECTS >>> OUTER BEVEL
Same settings
DESELECT
|
|
ACTIVATE RASTER 2
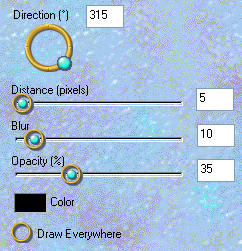
EFFECTS >>> PLUGINS >>> EYE CANDY 3 >>> DROP SHADOW
|
|
ACTIVATE Copy of RASTER 2
EDIT >>> Repeat Drop Shadow..
EDIT >>> Repeat Drop Shadow.. change DIRECTION to 135
ACTIVATE RASTER 2
EDIT >>> Repeat Drop Shadow..
|
|
ACTIVATE RASTER 3
With your MAGIC WAND.... Same settings.
Select the OUTER transparent area on the globe layer
SELECTIONS >>> INVERT
SELECTIONS >>> MODIFY >>> CONTRACT = 5
LAYERS >>> NEW RASTER LAYER
LAYERS >>> ARRANGE >>> MOVE DOWN
EFFECTS >>> PLUGINS >>> EYE CANDY 3 >>> DROP SHADOW
Same settings
EDIT >>> Repeat Drop Shadow.. change DIRECTION to 315
DESELECT
|
|
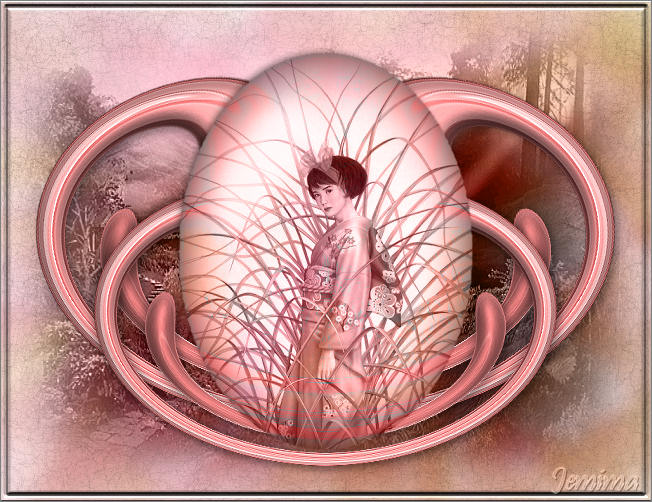
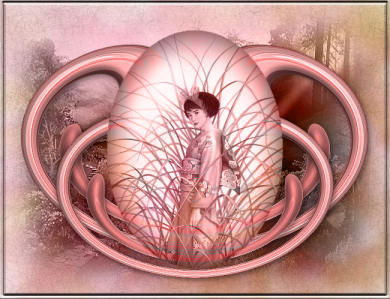
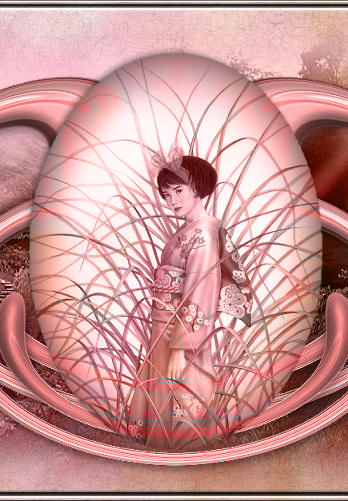
LAYERS >>> MERGE >>> MERGE ALL (Flatten)
IMAGE >>> ADD BORDERS = SYMMETRIC 1
COLOUR =
#808080
Save as .jpg image |
|
|