CREATING SHAPES FROM ANYTHING
PSP8 to PSPX3
Page 2
 . . 
This tutorial was written by Jemima ~ FEBRUARY 2012
Copyright © 2012 ~ Jemima ~ All rights reserved
This was created using PSP9 but can be adapted for other versions of PSP.
********************************
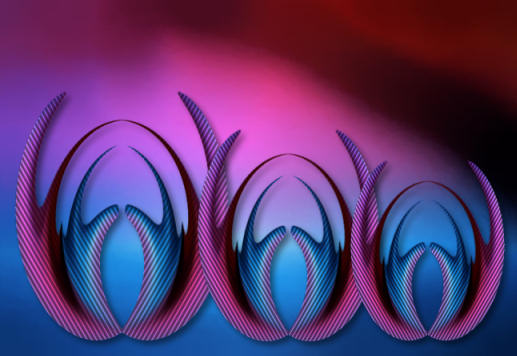
OK... still on the Shape3.pspimage
WINDOW >>> DUPLICATE
Close the saved image
On your duplicated image
LAYERS >>> MERGE >>> MERGE VISIBLE
Maximize the duplicated scene3.jpg image
Right click on the Title Bar and select COPY from the options
Right click on the Title Bar of your Shape3.pspimage
and select PASTE AS NEW LAYER from the options.
LAYERS >>> ARRANGE >>> MOVE DOWN
ACTIVATE THE MERGED LAYER
Reposition with your MOVER tool
Open up the Mira_helz cuppleditch_01image in your PSP workspace
Right click on the Title Bar and select COPY from the options
Right click on the Title Bar of your Shape3.pspimage
and select PASTE AS NEW LAYER from the options.
IMAGE >>> RESIZE = 55%
Ensure "Resize all layers" is UNCHECKED
Resample using WEIGHTED AVERAGE
ADJUST >>> SHARPNESS >>> SHARPEN
EFFECTS >>> PLUGINS >>> EYE CANDY 3 >>> DROP SHADOW
Same settings
Reposition with your MOVER tool
Open up the EasterTexts~CMP image in your PSP workspace
Activate the "Happy Easter" layer
Right click on the Title Bar and select COPY from the options
Right click on the Title Bar of your Shape3.pspimage
and select PASTE AS NEW LAYER from the options.
EFFECTS >>> PLUGINS >>> EYE CANDY 3 >>> DROP SHADOW
Same settings
Reposition with your MOVER tool

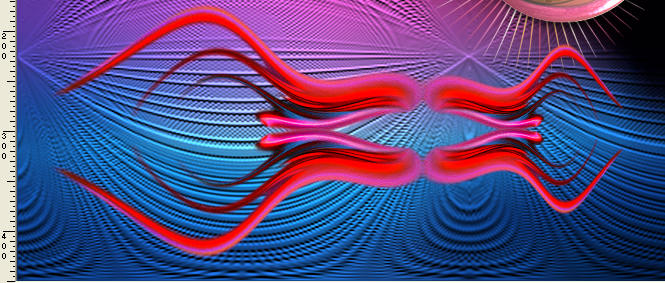
ACTIVATE RASTER 1
SELECTIONS >>> SELECT ALL
SELECTIONS >>> MODIFY >>> CONTRACT = 7
SELECTIONS >>> INVERT
EFFECTS >>> ARTISTIC EFFECTS >>> CHROME
COLOUR = #9637e7
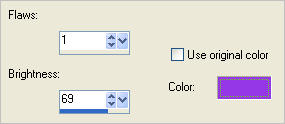
EFFECTS >>> ARTISTIC EFFECTS >>> HALF TONE
Same settings
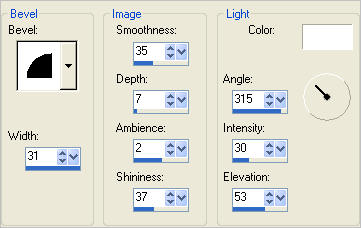
EFFECTS >>> 3D EFFECTS >>> INNER BEVEL
EFFECTS >>> 3D EFFECTS >>> DROP SHADOW
Vertical & Horizontal offsets = 1
Colour = Black
Opacity = 70
Blur = 0
Repeat Drop Shadow effect changing
Vertical & Horizontal Offsets to - ( minus ) 1
Click OK
EFFECTS >>> PLUGINS >>> EYE CANDY 3 >>> DROP SHADOW
Same settings
DESELECT
LAYERS >>> MERGE >>> MERGE ALL (Flatten)
Save as .jpg image
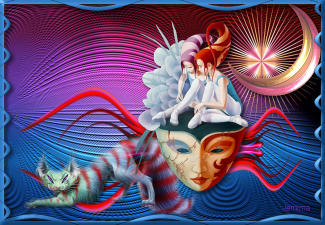
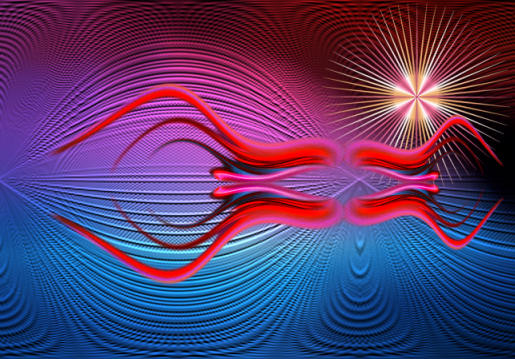
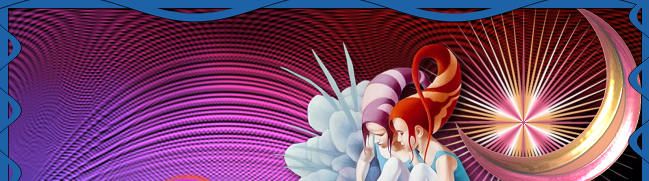
Finished result

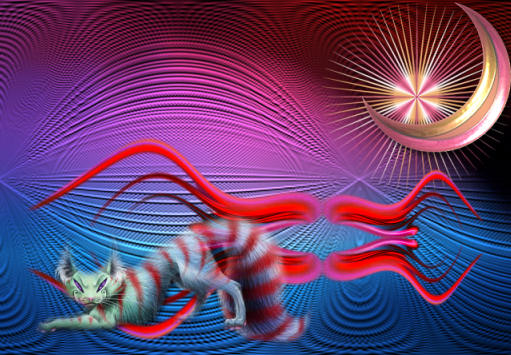
Maximize the Shape2.pspimage
WINDOW >>> DUPLICATE
Close the saved image
Maximize the duplicated scene3.jpg image
Right click on the Title Bar and select COPY from the options
Right click on the Title Bar of your Shape2.pspimage
and select PASTE AS NEW LAYER from the options.
LAYERS >>> ARRANGE >>> MOVE DOWN
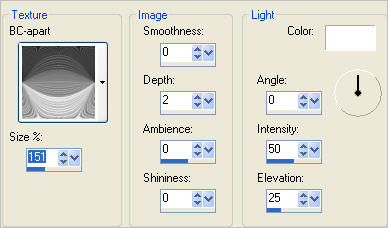
EFFECTS >>> TEXTURE EFFECTS >>> TEXTURE
Open up the pinkgoldimage in your PSP workspace
Activate layer 2
Right click on the Title Bar and select COPY from the options
Right click on the Title Bar of your Shape2.pspimage
and select PASTE AS NEW LAYER from the options.
Carefully move it with your MOVER tool to the top right corner
Again with the pinkgoldimage in your PSP workspace
Activate layer 1
Right click on the Title Bar and select COPY from the options
Right click on the Title Bar of your Shape2.pspimage
and select PASTE AS NEW LAYER from the options.
IMAGE >>> RESIZE = 55%
Ensure "Resize all layers" is UNCHECKED
Resample using WEIGHTED AVERAGE
ADJUST >>> SHARPNESS >>> SHARPEN
EFFECTS >>> PLUGINS >>> EYE CANDY 3 >>> DROP SHADOW
Same settings
Carefully move it with your MOVER tool to the top right corner
ACTIVATE THE TOP LAYER
Reposition the shape with your mover tool
Open up the Fantasy_Cat_misted_na image in your PSP workspace
Right click on the Title Bar and select COPY from the options
Right click on the Title Bar of your Shape2.pspimage
and select PASTE AS NEW LAYER from the options.
IMAGE >>> RESIZE = 75%
Ensure "Resize all layers" is UNCHECKED
Resample using WEIGHTED AVERAGE
ADJUST >>> SHARPNESS >>> SHARPEN
Reposition with your MOVER tool
Open up the TReagen_2644 image in your PSP workspace
Right click on the Title Bar and select COPY from the options
Right click on the Title Bar of your Shape2.pspimage
and select PASTE AS NEW LAYER from the options.
IMAGE >>> RESIZE = 65%
Ensure "Resize all layers" is UNCHECKED
Resample using WEIGHTED AVERAGE
ADJUST >>> SHARPNESS >>> SHARPEN
EFFECTS >>> PLUGINS >>> EYE CANDY 3 >>> DROP SHADOW
Same settings
Reposition with your MOVER tool
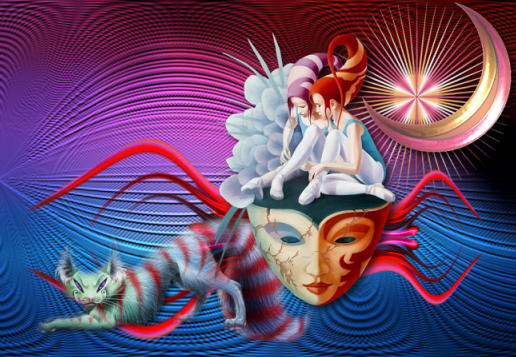
LAYERS >>> MERGE >>> MERGE VISIBLE
LAYERS >>> NEW RASTER LAYER
Flood fill with BLUE #1d62a6
SELECTIONS >>> SELECT ALL
SELECTIONS >>> MODIFY >>> CONTRACT = 8
EDIT >>> CLEAR
SELECTIONS >>> INVERT
EFFECTS >>> 3D EFFECTS >>> DROP SHADOW
Vertical & Horizontal offsets = 1
Colour = Black
Opacity = 70
Blur = 0
Repeat Drop Shadow effect changing
Vertical & Horizontal Offsets to - ( minus ) 1
Click OK
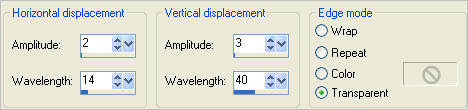
LAYERS >>> DUPLICATE
EFFECTS >>> DISTORTION EFFECTS >>> WAVE
LAYERS >>> MERGE >>> MERGE DOWN
EFFECTS >>> PLUGINS >>> EYE CANDY 3 >>> DROP SHADOW
Same settings
EFFECTS >>> 3D EFFECTS >>> INNER BEVEL

LAYERS >>> MERGE >>> MERGE ALL (Flatten)
Save as .jpg image
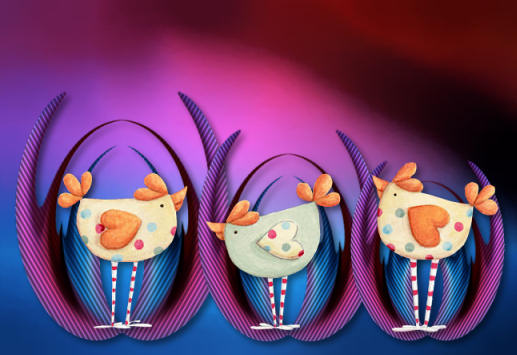
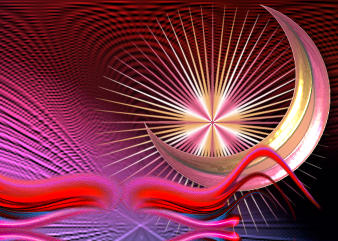
Finished result

I hope you enjoyed this adventure into my 'fiddling' *S*
Now it's YOUR turn... *S*
You still have your saved
Shape1.pspimage
Let's see what you can do with it *S*
Page designed by

for
http://www.artistrypsp.com/
Copyright © 2003-2012 Artistry In PSP / PSP Artistry
All rights reserved.
Unless specifically made available for download,
no graphics or text may be removed from this site for any reason
without written permission from Artistry In PSP / PSP Artistry
|