STEP 1
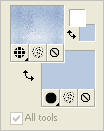
In your MATERIALS PALETTE
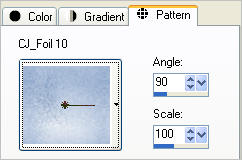
Load the ' CJ_Foil 10 ' pattern in your foreground
using these settings.
Load PALE BLUE ' #b9c9df ' in your background
|
|
STEP 2
Open a new image 600 x 450
Transparent background
PSPX - X2: Colour Depth = 8bits/channel
PSPX3: Colour Depth RGB = 8bits/channel
Flood fill with PALE BLUE
LAYERS >>> NEW RASTER LAYER
Flood fill with pattern
|
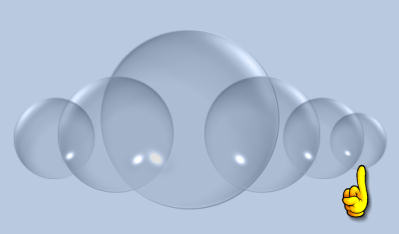
STEP 3
LAYERS >>> NEW RASTER LAYER
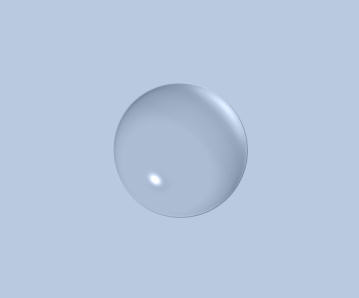
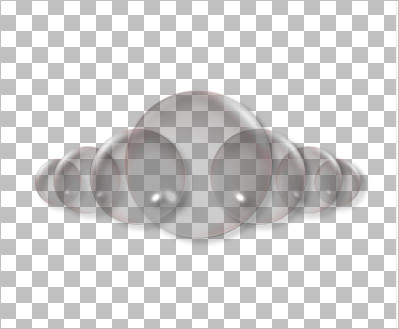
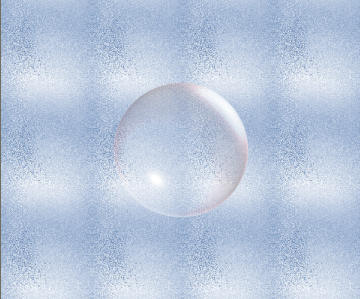
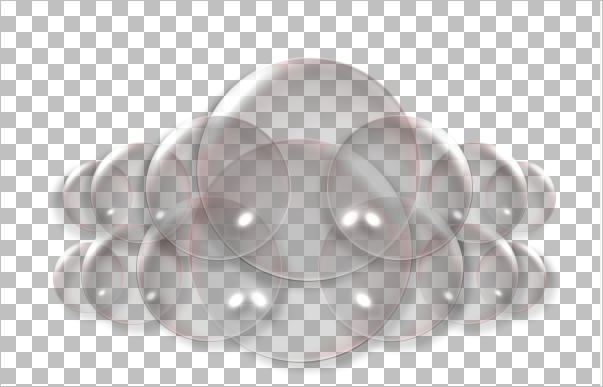
EFFECTS >>> ARTISTIC EFFECTS >>> BALLS & BUBBLES
Select the "Clear Bubbles" Preset then select the "Single ball or bubble" and check "Maximum possible size.
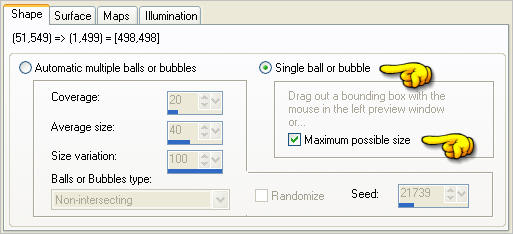
IMAGE >>> RESIZE = 45 %
Ensure "Resize all layers" is UNCHECKED
Resample using WEIGHTED AVERAGE
|
STEP 4
Close RASTER 2
Still working on RASTER 3
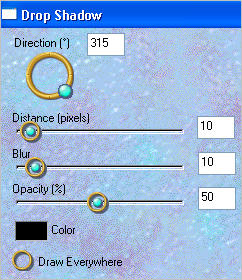
EFFECTS >>> 3D EFFECTS >>> DROP SHADOW
Vertical & Horizontal offsets = 1
Colour = Black
Opacity = 70
Blur = 0
In your LAYER PALETTE change the BLEND MODE to LUMINANCE (L)
|
|
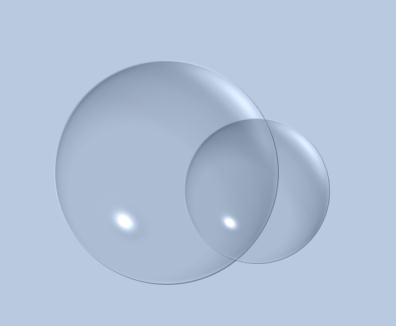
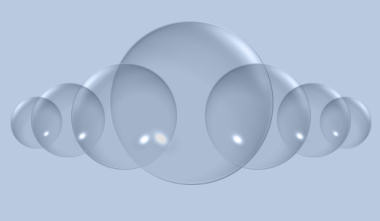
STEP 5
LAYERS >>> DUPLICATE
IMAGE >>> RESIZE = 65 %
Ensure "Resize all layers" is UNCHECKED
Resample using WEIGHTED AVERAGE
Reposition with your MOVER tool
|
|
STEP 6
LAYERS >>> DUPLICATE
IMAGE >>> MIRROR |
|
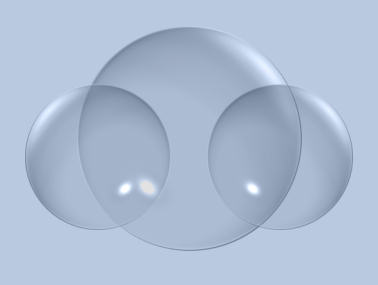
STEP 7
LAYERS >>> DUPLICATE
IMAGE >>> RESIZE = 70 %
Ensure "Resize all layers" is UNCHECKED
Resample using WEIGHTED AVERAGE
Reposition with your MOVER tool |
|
STEP 8
LAYERS >>> DUPLICATE
IMAGE >>> MIRROR |
|
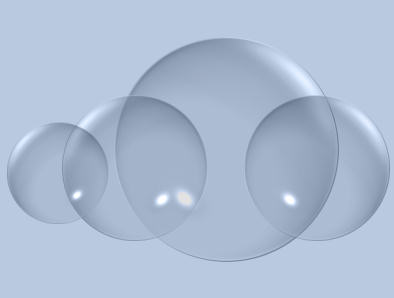
STEP 9
LAYERS >>> DUPLICATE
IMAGE >>> RESIZE = 70 %
Ensure "Resize all layers" is UNCHECKED
Resample using WEIGHTED AVERAGE
Reposition with your MOVER tool
|
|
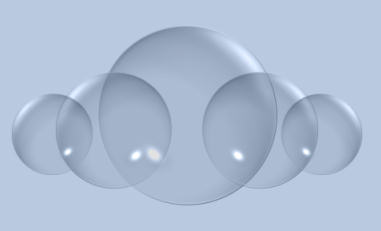
STEP 10
LAYERS >>> DUPLICATE
IMAGE >>> MIRROR
LAYERS >>> MERGE >>> MERGE DOWN
|
|
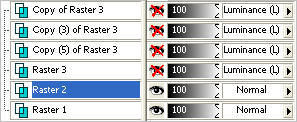
STEP 11
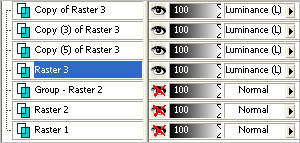
ACTIVATE Copy (4) of Raster 3
LAYERS >>> MERGE >>> MERGE DOWN
ACTIVATE Copy (2) of Raster 3
LAYERS >>> MERGE >>> MERGE DOWN
Rearrange layers as shown
CLOSE top 4 layers
ACTIVATE RASTER 2
|
|
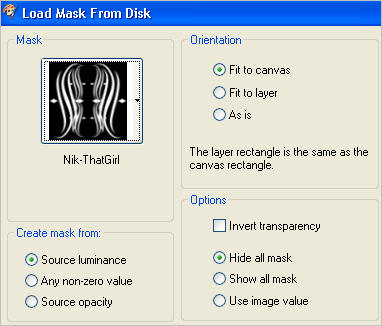
STEP 12
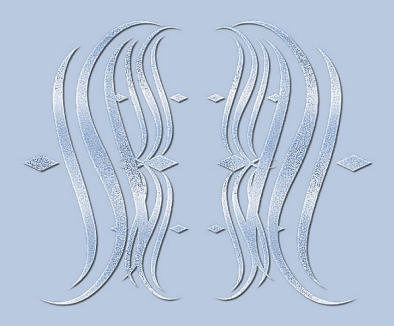
LAYERS >>> LOAD/SAVE MASK >>> LOAD MASK FROM DISK
Locate the Nik-ThatGirl mask |
|
STEP 13
Right click on Group Raster 2 layer
MERGE >>> MERGE GROUP
ADJUST >>> SHARPNESS >>> SHARPEN MORE
EFFECTS >>> 3D EFFECTS >>> DROP SHADOW
Vertical & Horizontal offsets = 2
Colour = Black
Opacity = 70
Blur = 0
IMAGE >>> RESIZE = 90%
Ensure "Resize all layers" is UNCHECKED
Resample using WEIGHTED AVERAGE
ADJUST >>> SHARPNESS >>> SHARPEN
|
|
STEP 14
ACTIVATE RASTER 1
Open up the 12283242424_divers image in your PSP workspace
Right click on the Title Bar and select COPY from the options
Right click on the Title Bar of your tag image
and select PASTE AS NEW LAYER from the options.
LAYERS >>> DUPLICATE
LAYERS >>> MERGE >>> MERGE DOWN
|
|
STEP 15
OPEN ALL LAYERS
ACTIVATE Copy of Raster 3
EFFECTS >>> PLUGINS >>> EYE CANDY 3 >>> DROP SHADOW
|
|
STEP 16
ACTIVATE Copy (3) of Raster 3
EDIT >>> Repeat Drop Shadow.
ACTIVATE Copy (5) of Raster 3
EDIT >>> Repeat Drop Shadow.
ACTIVATE Raster 3
EDIT >>> Repeat Drop Shadow.
CLOSE BOTTOM 3 LAYERS
|
|
STEP 17
LAYERS >>> MERGE >>> MERGE VISIBLE
In your LAYER PALETTE change the BLEND MODE to LUMINANCE (L)
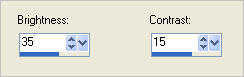
ADJUST >>> BRIGHTNESS and CONTRAST >>> BRIGHTNESS/CONTRAST
LAYERS >>> DUPLICATE
IMAGE >>> MIRROR
Reposition UP with your MOVER tool
LAYERS >>> MERGE >>> MERGE VISIBLE
In your LAYER PALETTE change the BLEND MODE to LUMINANCE (L)
|
STEP 18
OPEN ALL LAYERS
Still on the MERGED layer
Open up the Mira_ClaireStoner_PureofHeart_08[1].01_kkat47_a image
in your PSP workspace
Right click on the Title Bar and select COPY from the options
Right click on the Title Bar of your tag image
and select PASTE AS NEW LAYER from the options.
IMAGE >>> RESIZE = 50%
Ensure "Resize all layers" is UNCHECKED
Resample using WEIGHTED AVERAGE
ADJUST >>> SHARPNESS >>> SHARPEN
Reposition with your MOVER tool
|
|
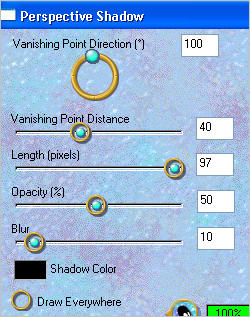
STEP 19
EFFECTS >>> PLUGINS >>> EYE CANDY 3 >>>
PERSPECTIVE SHADOW |
|
STEP 20
LAYERS >>> NEW RASTER LAYER
Flood fill with pattern
SELECTIONS >>> SELECT ALL
SELECTIONS >>> MODIFY >>> CONTRACT = 25
EDIT >>> CLEAR
SELECTIONS >>> INVERT
EFFECTS >>> 3D EFFECTS >>> DROP SHADOW
Vertical & Horizontal offsets = 1
Colour = Black
Opacity = 70
Blur = 0
Repeat Drop Shadow effect changing
Vertical & Horizontal Offsets to - ( minus ) 1
Click OK
ADJUST >>> SHARPNESS >>> SHARPEN MORE
SELECTIONS >>> MODIFY >>> CONTRACT = 6
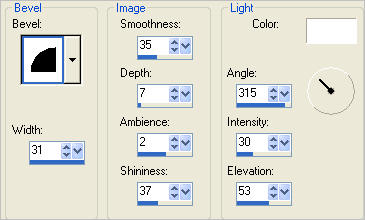
EFFECTS >>> 3D EFFECTS >>> INNER BEVEL
|
|
STEP 21
EFFECTS >>> 3D EFFECTS >>> OUTER BEVEL |
|
STEP 22
DESELECT
EFFECTS >>> PLUGINS >>> EYE CANDY 3 >>> DROP SHADOW
Same settings
ADJUST >>> SHARPNESS >>> SHARPEN
|
|
STEP 23
Open up the SE_wordART_Christmas_Quote_05 image
in your PSP workspace
Right click on the Title Bar and select COPY from the options
Right click on the Title Bar of your tag image
and select PASTE AS NEW LAYER from the options.
IMAGE >>> RESIZE = 50%
Ensure "Resize all layers" is UNCHECKED
Resample using WEIGHTED AVERAGE
LAYERS >>> DUPLICATE
LAYERS >>> MERGE >>> MERGE DOWN
Reposition with your MOVER tool |
|
STEP 24
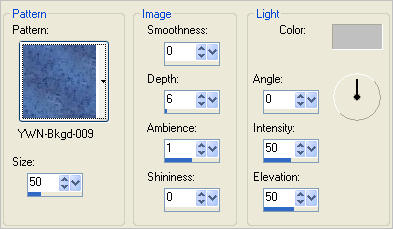
EFFECTS >>> TEXTURE EFFECTS >>> SCULPTURE
COLOUR = #c0c0c0
|
|
STEP 25
LAYERS >>> DUPLICATE
LAYERS >>> MERGE >>> MERGE DOWN
EFFECTS >>> 3D EFFECTS >>> DROP SHADOW
Vertical & Horizontal offsets = - ( minus ) 1
Colour = Black
Opacity = 70
Blur = 0
|
|
STEP 26
Open up the Ladyintheblue1112010BellsBlueNoseFriiend image
in your PSP workspace
Right click on the Title Bar and select COPY from the options
Right click on the Title Bar of your tag image
and select PASTE AS NEW LAYER from the options.
IMAGE >>> RESIZE = 50%
Ensure "Resize all layers" is UNCHECKED
Resample using WEIGHTED AVERAGE
IMAGE >>> MIRROR
ADJUST >>> SHARPNESS >>> SHARPEN
EFFECTS >>> PLUGINS >>> EYE CANDY 3 >>>
PERSPECTIVE SHADOW
Same settings
Reposition with your MOVER tool |
|
STEP 27
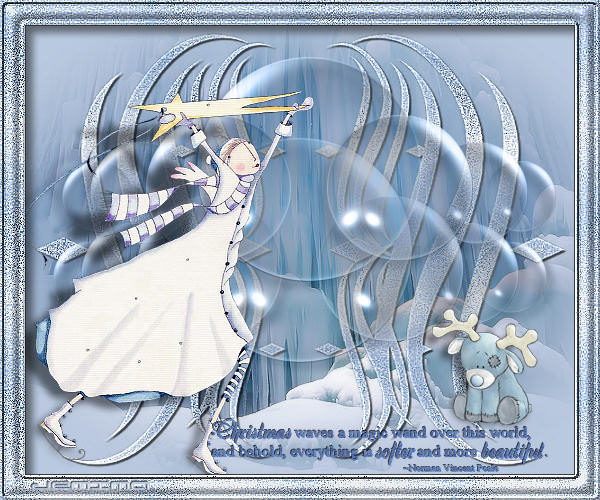
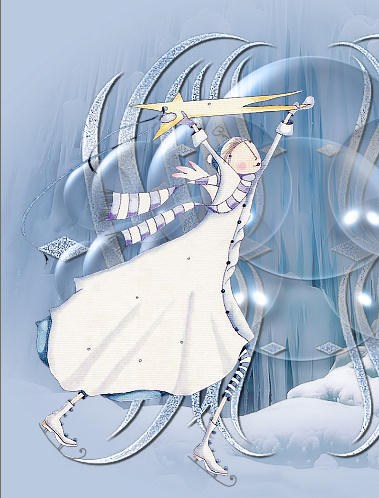
LAYERS >>> MERGE >>> MERGE ALL (Flatten)
Save as .jpg image
|
|
|