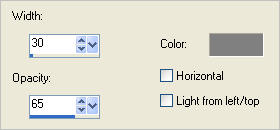
In your MATERIALS PALETTE
Load TAUPE ' #caa59f ' in your foreground
Load BLUE ' #cdddff ' in your background
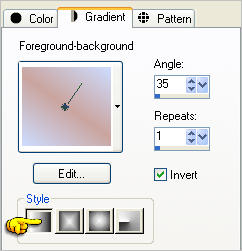
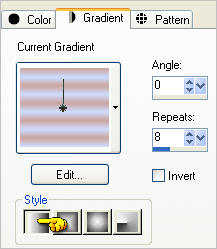
Select the GRADIENT option on your foreground |
|
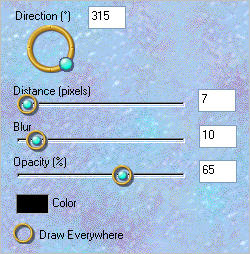
Locate the 'Foreground-Background' gradient
and use these settings
|
|
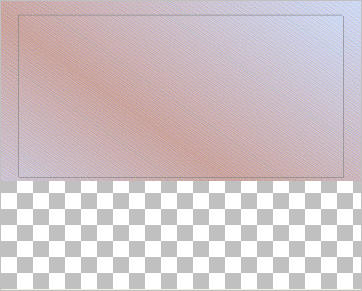
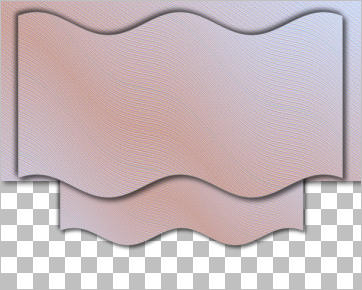
Open a new image 600 x 480
Transparent background
PSPX - X2: Colour Depth = 8bits/channel
PSPX3: Colour Depth RGB = 8bits/channel
Flood fill with the gradient
EFFECTS >>> EDGE EFFECTS >>> ENHANCE MORE
EDIT >>> Repeat Enhance Edges More
ADJUST >>> SHARPNESS >>> SHARPEN MORE
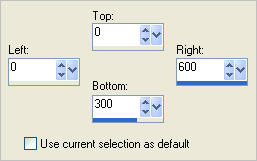
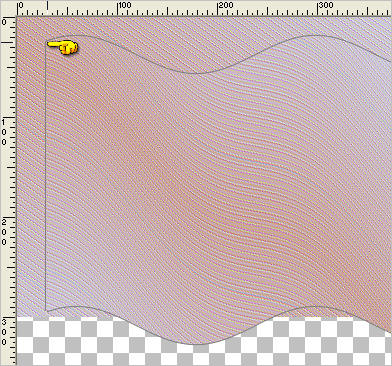
Choose your SELECTION TOOL then click on the CUSTOM SELECTION symbol
and enter these coordinates.
|
|
SELECTIONS >>> INVERT
EDIT >>> CLEAR
DESELECT
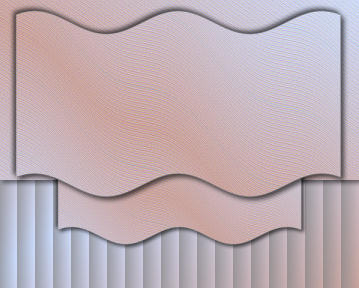
LAYERS >>> DUPLICATE
IMAGE >>> RESIZE = 90%
Ensure "Resize all layers" is UNCHECKED
Resample using WEIGHTED AVERAGE
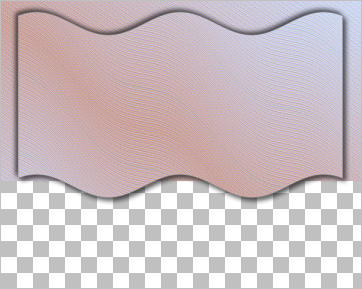
EFFECTS >>> 3D EFFECTS >>> DROP SHADOW
Vertical & Horizontal offsets = 1
Colour = #808080
Opacity = 100
Blur = 0
Repeat Drop Shadow effect changing
Vertical & Horizontal Offsets to - ( minus ) 1
Click OK
|
|
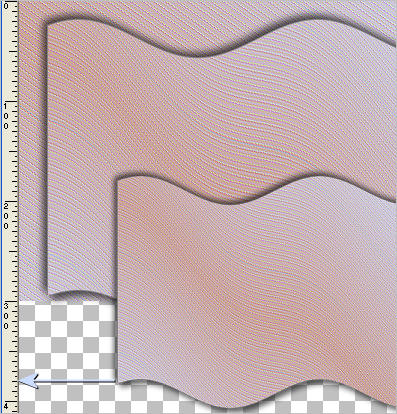
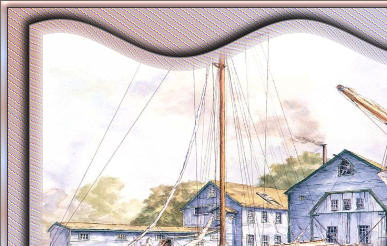
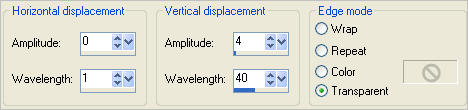
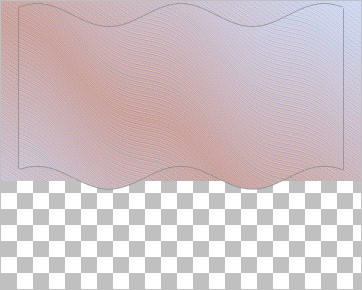
EFFECTS >>> DISTORTION EFFECTS >>> WAVE
|
Reposition down with your MOVER tool
Level with the 25 pixel mark on your left ruler
|
|
EFFECTS >>> PLUGINS >>> EYE CANDY 3 >>> DROP SHADOW |
|
EDIT >>> Repeat Drop Shadow.. change DIRECTION to 135
|
|
LAYERS >>> DUPLICATE
IMAGE >>> RESIZE = 75%
Ensure "Resize all layers" is UNCHECKED
Resample using WEIGHTED AVERAGE
Reposition down with your MOVER tool
Level with the 380 pixel mark on your left ruler
|
|
LAYERS >>> ARRANGE >>> MOVE DOWN
ACTIVATE RASTER 1
EFFECTS >>> PLUGINS >>> EYE CANDY 3 >>> DROP SHADOW
Same settings BUT
change Opacity to 50%
|
|
LAYERS >>> NEW RASTER LAYER
Flood fill with the gradient
EFFECTS >>> TEXTURE EFFECTS >>> BLINDS
COLOUR =
#808080
|
|
LAYERS >>> ARRANGE >>> MOVE DOWN |
|
ACTIVATE Copy of Raster 1
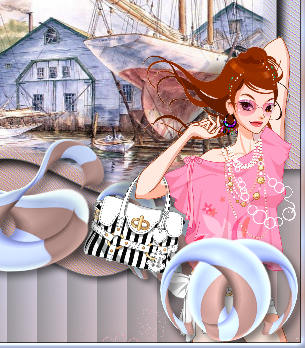
Open up the 2.pspimage in your PSP workspace
Right click on the Title Bar and select COPY from the options
Right click on the Title Bar of your tag image
and select PASTE AS NEW LAYER from the options.
IMAGE >>> RESIZE = 75%
Ensure "Resize all layers" is UNCHECKED
Resample using WEIGHTED AVERAGE
ADJUST >>> BRIGHTNESS and CONTRAST >>> CLARIFY
Strength of effect = 5
PSPX3: BRIGHTNESS and CONTRAST >>> LOCAL TONE
Mapping strength = 5
Reposition UP with your MOVER tool
|
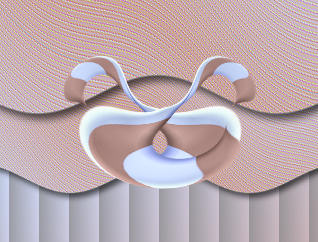
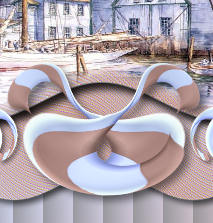
EFFECTS >>> DISTORTION EFFECTS >>> POLAR COORDINATES |
|
Reposition with your MOVER tool
|
|
ACTIVATE Copy of Raster 1
SELECTIONS >>> SELECT ALL
SELECTIONS >>> FLOAT
SELECTIONS >>> DEFLOAT
SELECTIONS >>> MODIFY >>> CONTRACT = 14
LAYERS >>> NEW RASTER LAYER
Open up the BlueWater_csg103-ScottKennedy
in your PSP workspace
Right click on the Title Bar and select COPY from the options
Right click on the Title Bar of your tag image
and select PASTE INTO SELECTION from the options.
DESELECT
|
|
Open up the 4.pspimage
in your PSP workspace
Right click on the Title Bar and select COPY from the options
Right click on the Title Bar of your tag image
and select PASTE AS NEW LAYER from the options.
Reposition with your MOVER tool
|
|
LAYERS >>> DUPLICATE
IMAGE >>> MIRROR
LAYERS >>> MERGE >>> MERGE DOWN
EFFECTS >>> PLUGINS >>> EYE CANDY 3 >>> DROP SHADOW
Same settings
|
LAYERS >>> DUPLICATE
IMAGE >>> RESIZE = 75%
Ensure "Resize all layers" is UNCHECKED
Resample using WEIGHTED AVERAGE
ADJUST >>> SHARPNESS >>> SHARPEN
LAYERS >>> ARRANGE >>> MOVE DOWN
|
|
LAYERS >>> DUPLICATE
IMAGE >>> RESIZE = 75%
Ensure "Resize all layers" is UNCHECKED
Resample using WEIGHTED AVERAGE
LAYERS >>> ARRANGE >>> MOVE DOWN |
|
ACTIVATE RASTER 3
EFFECTS >>> PLUGINS >>> EYE CANDY 3 >>> DROP SHADOW
Same settings
|
|
In your MATERIALS PALETTE
Change the settings for the GRADIENT
|
|
LAYERS >>> NEW RASTER LAYER
Flood fill with the gradient
SELECTIONS >>> SELECT ALL
SELECTIONS >>> MODIFY >>> CONTRACT = 6
EDIT >>> CLEAR
DESELECT
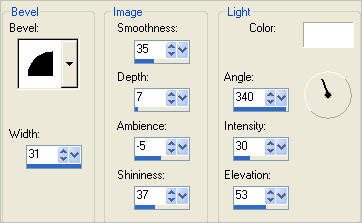
EFFECTS >>> 3D EFFECTS >>> INNER BEVEL
|
|
EFFECTS >>> 3D EFFECTS >>> DROP SHADOW
Vertical & Horizontal offsets = 1
Colour = Black
Opacity = 70
Blur = 0
Repeat Drop Shadow effect changing
Vertical & Horizontal Offsets to - ( minus ) 1
Click OK
|
|
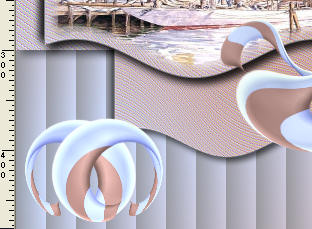
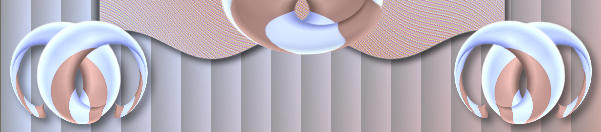
Open up the mtfp_tube_138 image in your PSP workspace
Right click on the Title Bar and select COPY from the options
Right click on the Title Bar of your tag image
and select PASTE AS NEW LAYER from the options.
IMAGE >>> MIRROR
IMAGE >>> RESIZE = 60%
Ensure "Resize all layers" is UNCHECKED
Resample using WEIGHTED AVERAGE
ADJUST >>> SHARPNESS >>> SHARPEN
LAYERS >>> ARRANGE >>> MOVE DOWN
4 TIMES
Reposition with your MOVER tool
|
|
EFFECTS >>> PLUGINS >>> EYE CANDY 3 >>>
PERSPECTIVE SHADOW |
|
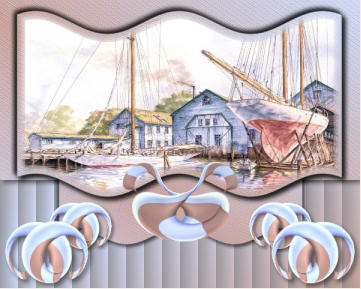
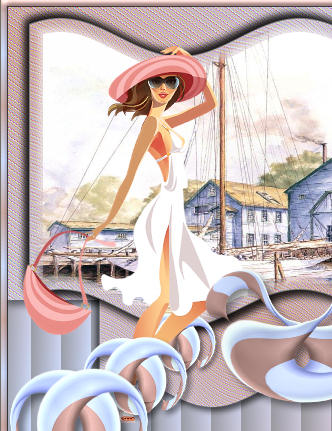
Open up the gd~VectorGirlz18 image in your PSP workspace
Right click on the Title Bar and select COPY from the options
Right click on the Title Bar of your tag image
and select PASTE AS NEW LAYER from the options.
IMAGE >>> RESIZE = 50%
Ensure "Resize all layers" is UNCHECKED
Resample using WEIGHTED AVERAGE
LAYERS >>> ARRANGE >>> MOVE UP
EFFECTS >>> PLUGINS >>> EYE CANDY 3 >>>
PERSPECTIVE SHADOW
Same settings
Reposition with your MOVER tool
|
|
In your MATERIALS PALETTE
Load TAUPE ' #caa59f ' in your foreground
Load BLUE ' #cdddff ' in your background
|
|
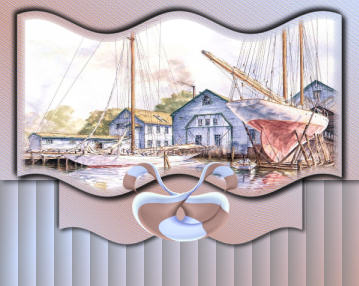
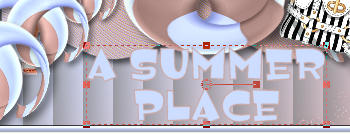
ACTIVATE RASTER 3
Select your TEXT tool
Locate the "Jemima' font

Enter the text
A SUMMER
PLACE
as shown below
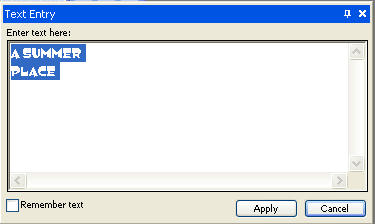
Click APPLY |
Reposition down at the bottom of your tag |
|
In your LAYER PALETTE
RIGHT CLICK on the Vector layer
and select
Convert to Raster layer
from the options
EFFECTS >>> 3D EFFECTS >>> DROP SHADOW
Vertical & Horizontal offsets = 1
Colour = Black
Opacity = 70
Blur = 0
|
|
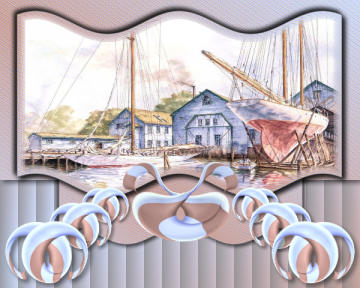
LAYERS >>> MERGE >>> MERGE ALL (Flatten)
Save as .jpg image
.
|