DRAGON FANTASY
PSP8 to PSPX3
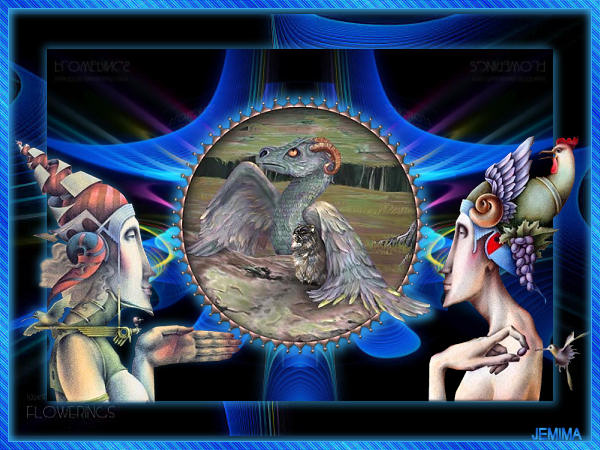
This tutorial was written by Jemima ~ MARCH 2012
Copyright © 2012 ~ Jemima ~ All rights reserved
********************************
This was created using PSP9 but can be adapted for other versions of PSP.
No artists or copyright infringement is intended on any of the tubes used in this tutorial.
The tubes were acquired in good faith as to their legality.
If there is a problem, please contact the author and the image/s will be removed.
You will need the
following to complete this tutorial
Materials
flowerings88bylove100857116.jpg
JF_Spivak1.psp
JF_Spivak2.psp
Dragon3.psp
Save to a folder on your computer
Plugins
** EYE CANDY3 **
http://www.pircnet.com/downloads.html
********************************
VIEW >>> RULERS
Open a new image 600 x 450
Transparent background
PSPX - X2: Colour Depth = 8bits/channel
PSPX3: Colour Depth RGB = 8bits/channel
SELECTIONS >>> SELECT ALL
Open up the flowerings88bylove100857116 image in your PSP workspace
Right click on the Title Bar and select COPY from the options
Right click on the Title Bar of your tag image
and select PASTE INTO SELECTION from the options.
DESELECT
LAYERS >>> DUPLICATE
CLOSE RASTER 1
IMAGE >>> RESIZE = 85%
Ensure "Resize all layers" is UNCHECKED
Resample using WEIGHTED AVERAGE
Reposition carefully with your MOVER tool to the left
(top left corner placed at 30 pixels across and 30 pixels down)
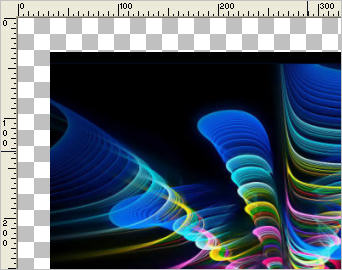
LAYERS >>> DUPLICATE
IMAGE >>> MIRROR
Choose your SELECTION TOOL then click on the CUSTOM SELECTION symbol
and enter these coordinates.
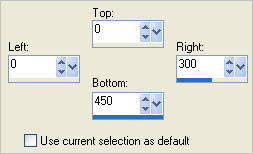
EDIT >>> CLEAR
DESELECT
LAYERS >>> MERGE >>> MERGE DOWN
LAYERS >>> DUPLICATE
IMAGE >>> RESIZE = 80%
Ensure "Resize all layers" is UNCHECKED
Resample using WEIGHTED AVERAGE
IMAGE >>> FLIP
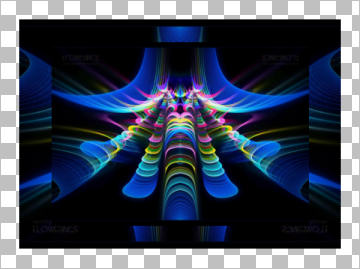
OPEN RASTER 1
Still on Copy (2) of Raster 1
EFFECTS>>> GEOMETRIC EFFECTS >>> CIRCLE
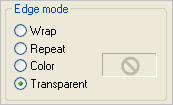
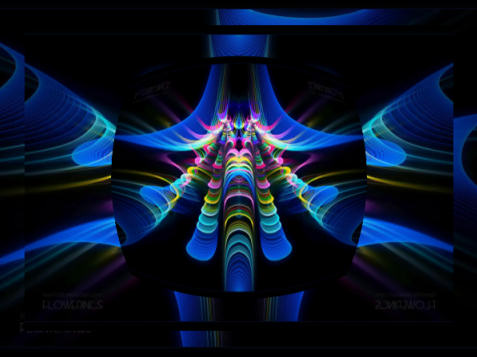
ACTIVATE Copy of Raster 1
SELECTIONS >>> SELECT ALL
SELECTIONS >>> FLOAT
SELECTIONS >>> DEFLOAT
SELECTIONS >>> MODIFY >>> CONTRACT = 15
SELECTIONS >>> INVERT
EDIT >>> CLEAR
DESELECT
IMAGE >>> FLIP
EFFECTS >>> PLUGINS >>> EYE CANDY 3 >>> DROP SHADOW
COLOUR = #37a9ec
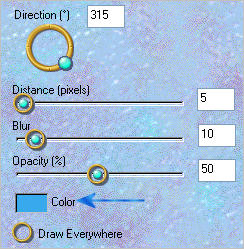
EDIT >>> Repeat Drop Shadow.. change DIRECTION to 135
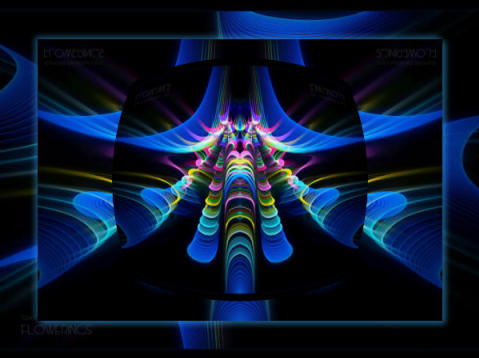
ACTIVATE RASTER 1
ADJUST >>> SHARPNESS >>> SHARPEN MORE
ACTIVATE Copy (2) of Raster 1
Open up the Dragon3 image in your PSP workspace
Right click on the Title Bar and select COPY from the options
Right click on the Title Bar of your tag image
and select PASTE AS NEW LAYER from the options.
IMAGE >>> RESIZE = 75%
Ensure "Resize all layers" is UNCHECKED
Resample using WEIGHTED AVERAGE
ADJUST >>> SHARPNESS >>> SHARPEN
In your LAYER PALETTE on layer 'Copy (2) of Raster 1' change
the BLEND MODE to SCREEN
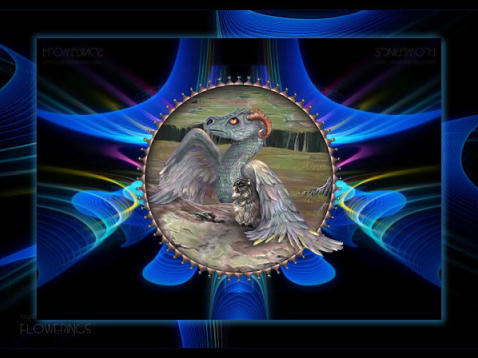
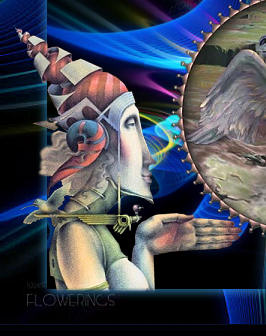
Open up the JF_Spivak1 image in your PSP workspace
Right click on the Title Bar and select COPY from the options
Right click on the Title Bar of your tag image
and select PASTE AS NEW LAYER from the options.
IMAGE >>> RESIZE = 60%
Ensure "Resize all layers" is UNCHECKED
Resample using WEIGHTED AVERAGE
ADJUST >>> SHARPNESS >>> SHARPEN
Reposition with your MOVER tool
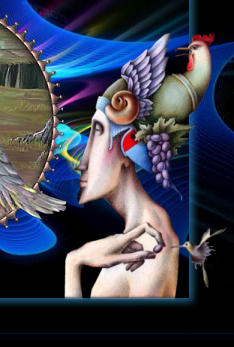
Open up the JF_Spivak2 image in your PSP workspace
Right click on the Title Bar and select COPY from the options
Right click on the Title Bar of your tag image
and select PASTE AS NEW LAYER from the options.
IMAGE >>> RESIZE = 60%
Ensure "Resize all layers" is UNCHECKED
Resample using WEIGHTED AVERAGE
ADJUST >>> SHARPNESS >>> SHARPEN
Reposition with your MOVER tool
EFFECTS >>> PLUGINS >>> EYE CANDY 3 >>> DROP SHADOW
Same settings
ACTIVATE RASTER 3
EDIT >>> Repeat Drop Shadow.. change DIRECTION to 315
In your MATERIALS PALETTE
Load DARK BLUE " #0e59d5" in your foreground
Load LIGHT BLUE " #37a9ec" in your background
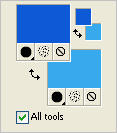
Then click on the GRADIENT option in your foreground palette
Locate the 'Foreground-background' gradient
and use these settings
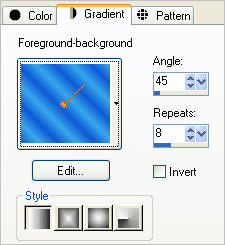
ACTIVATE RASTER 4
LAYERS >>> NEW RASTER LAYER
Flood fill with the gradient
EFFECTS >>> EDGE EFFECTS >>> ENHANCE MORE
EDIT >>> Repeat Enhance Edges More
SELECTIONS >>> SELECT ALL
SELECTIONS >>> MODIFY >>> CONTRACT = 8
EDIT >>> CLEAR
SELECTIONS >>> INVERT
EFFECTS >>> ARTISTIC EFFECTS >>> HALF TONE
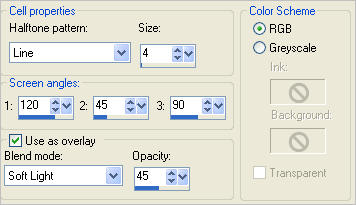
EFFECTS >>> 3D EFFECTS >>> DROP SHADOW
Vertical & Horizontal offsets = 1
Colour = LIGHT BLUE " #37a9ec"
Opacity = 100
Blur = 0
Repeat Drop Shadow effect changing
Vertical & Horizontal Offsets to - ( minus ) 1
Click OK
EFFECTS >>> PLUGINS >>> EYE CANDY 3 >>> DROP SHADOW
Colour = LIGHT BLUE " #37a9ec"
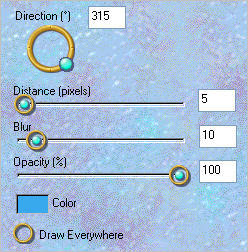
EDIT >>> Repeat Drop Shadow.. change DIRECTION to 135
DESELECT

ACTIVATE RASTER 2
EDIT >>> Repeat Drop Shadow..
EDIT >>> Repeat Drop Shadow.. change DIRECTION to 315
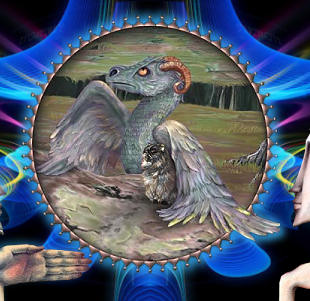
Save as .psp image
or
.pspimage
To get the same result as I did...
WINDOW >>> DUPLICATE
On your duplicated image
LAYERS >>> MERGE >>> MERGE ALL (Flatten)
Save as .jpg image
*****************
To vary your results... go to the NEXT page
Page designed by

for
http://www.artistrypsp.com/
Copyright ©
2003-2012 Artistry In PSP / PSP Artistry
All rights reserved.
Unless specifically made available for
download,
no graphics or text may be removed from
this site for any reason
without written permission from Artistry
In PSP / PSP Artistry
|