NATIVE AMERICAN
PSP8 - PSPX3

This tutorial was
created by Jemima using PSP9 ~MARCH 2012
BUT should be creatable using all versions of PSP
Copyright © 2012 ~ Jemima
~ All rights reserved
********************************
No artists or copyright infringement is intended on any of the tubes used in this tutorial.
The tubes were acquired in good faith as to their legality.
If there is a problem, please contact the author and the image/s will be removed.
You will need the
following to complete this tutorial
Materials
feather5.tub
feather7.psp
NA_dividers.tub
kTs_kEv0140 copie.pspimage
Save to a folder on your computer
t094.gif
Save to your PSP Textures folder
PSP8: C:\Program Files\Jasc Software\Paint Shop Pro 8\Textures
PSP9: C:\Program Files\Jasc Software\Paint Shop Pro 9\Textures
PSPX: C:\Program Files\Corel\Corel Paint Shop Pro X\Textures
PSPXI / X2: C:\Program Files\Corel\Corel Paint Shop Pro Photo X2\Corel_15
PSPX3: C:\Program Files\Corel\X3\PSPClassic\Corel_15
Plugins
** EYE CANDY3 **
http://www.pircnet.com/downloads.html
** MURA'S FILTER MEISTER **
MuRa's Filter Meister - Copies & Clouds
** SIMPLE FILTERS **
download
********************************
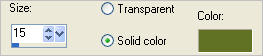
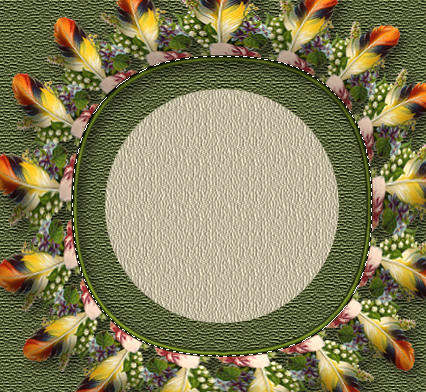
Open a new image 600 x 600
Transparent background
PSPX - X2: Colour Depth = 8bits/channel
PSPX3: Colour Depth RGB = 8bits/channel
Flood fill with BEIGE #e4d5a4
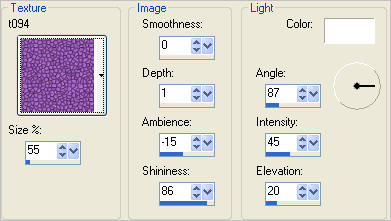
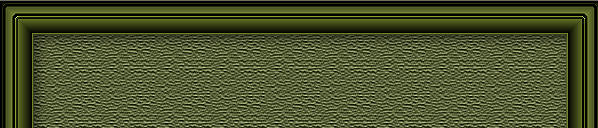
EFFECTS >>> TEXTURE EFFECTS >>> TEXTURE
LAYERS >>> NEW RASTER LAYER
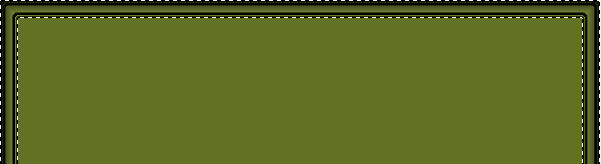
Flood fill with GREEN #627224
SELECTIONS >>> SELECT ALL
SELECTIONS >>> MODIFY >>> CONTRACT = 15
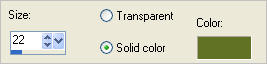
EFFECTS >>> 3D EFFECTS >>> CHISEL
COLOUR = GREEN #627224
SELECTIONS >>> INVERT
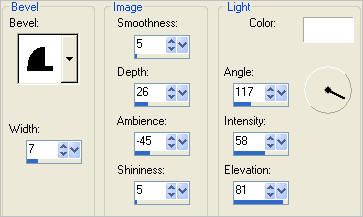
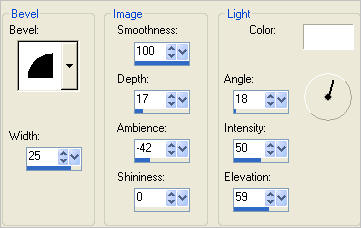
EFFECTS >>> 3D EFFECTS >>> INNER BEVEL
ADJUST >>> SHARPNESS >>> SHARPEN
EFFECTS >>> 3D EFFECTS >>> CHISEL
SELECTIONS >>> INVERT
SELECTIONS >>> MODIFY >>> CONTRACT = 15
EFFECTS >>> TEXTURE EFFECTS >>> TEXTURE
Same settings EXCEPT CHANGE ANGLE to = 0
ADJUST >>> SHARPNESS >>> SHARPEN MORE
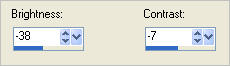
ADJUST >>> BRIGHTNESS and CONTRAST >>> BRIGHTNESS/CONTRAST
SELECTIONS >>> INVERT
ADJUST >>> SHARPNESS >>> SHARPEN
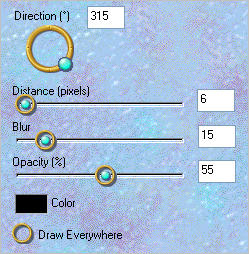
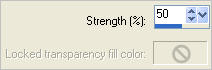
EFFECTS >>> PLUGINS >>> EYE CANDY 3 >>> DROP SHADOW
DESELECT
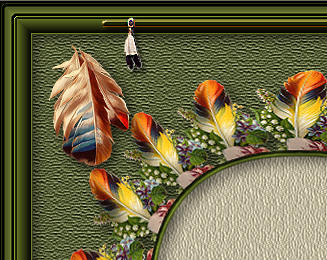
Open up the feather5 image in your PSP workspace
Right click on the Title Bar and select COPY from the options
Right click on the Title Bar of your frame image
and select PASTE AS NEW LAYER from the options.
IMAGE >>> RESIZE = 50%
Ensure "Resize all layers" is UNCHECKED
Resample using WEIGHTED AVERAGE
ADJUST >>> SHARPNESS >>> SHARPEN
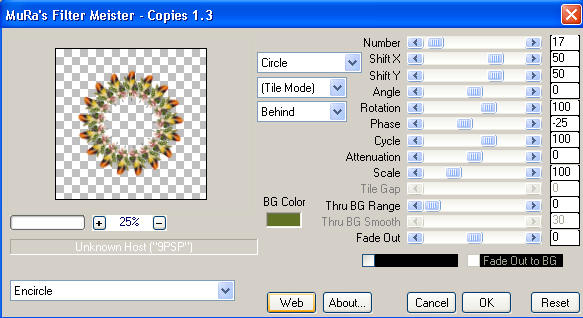
EFFECTS >>> PLUGINS >>> MuRa's Filter Meister >>> Copies
Choose your SELECTION TOOL
Selection Type = circle
Mode = Replace
Feather = 1
Antialias = Checked
Starting at 300 pixels across and 300 pixels down
drag your cursor to bottom edge of bow and release
EDIT >>> CLEAR
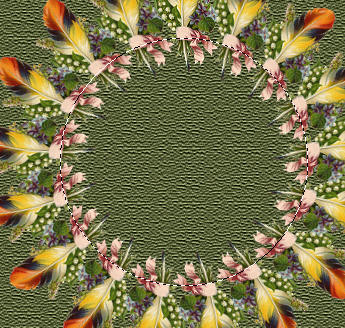
Flood fill with GREEN
SELECTIONS >>> MODIFY >>> CONTRACT = 6
EDIT >>> CLEAR
ACTIVATE RASTER 2
EDIT >>> CLEAR
DESELECT
ACTIVATE RASTER 3
With your MAGIC WAND
Mode = Replace
Match Mode = RGB Value
Tolerance = 0
Feather = 0
Antialias = UNchecked
Sample Merged = CHECKED
PSP9 - X3: Check CONTIGUOUS
PSPX - X3: There is no " Sample Merged"
PSPX - X3: Use all layers = UNChecked
PSP9 - X3: ANTIALIAS = Inside
Select the green circle
EFFECTS >>> 3D EFFECTS >>> INNER BEVEL
Same settings
DESELECT
EFFECTS >>> 3D EFFECTS >>> INNER BEVEL
EFFECTS >>> PLUGINS >>> EYE CANDY 3 >>> DROP SHADOW
Same settings
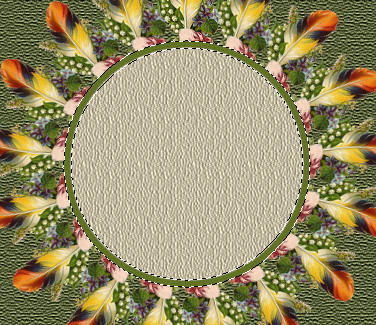
EFFECTS >>> DISTORTION EFFECTS >>> PUNCH
With your MAGIC WAND.... Same settings.... BUT change Tolerance = 35
Select the centre of your image
Use your SHIFT key to selct the shadowed area
SELECTIONS >>> MODIFY >>> EXPAND = 5
ACTIVATE RASTER 2
EDIT >>> CLEAR
DESELECT
ACTIVATE RASTER 3
ADJUST >>> SHARPNESS >>> SHARPEN
Open up the feather7 image in your PSP workspace
Right click on the Title Bar and select COPY from the options
Right click on the Title Bar of your frame image
and select PASTE AS NEW LAYER from the options.
IMAGE >>> RESIZE = 50%
Ensure "Resize all layers" is UNCHECKED
Resample using WEIGHTED AVERAGE
IMAGE >>> FLIP
ADJUST >>> SHARPNESS >>> SHARPEN
Reposition with your MOVER tool to top left corner
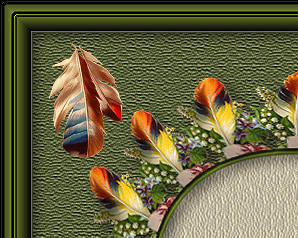
EFFECTS >>> PLUGINS >>> SIMPLE >>> TOP LEFT MIRROR
EFFECTS >>> PLUGINS >>> EYE CANDY 3 >>> DROP SHADOW
Same settings
Open up the NA_dividers image in your PSP workspace
Select the bottom divider
Right click on the Title Bar and select COPY from the options
Right click on the Title Bar of your frame image
and select PASTE AS NEW LAYER from the options.
Select your RASTER DEFORM tool
Mode = SCALE
use default settings
PSPX - X3:Select your PICK tool
Drag the centre side nodes inwards as shown below
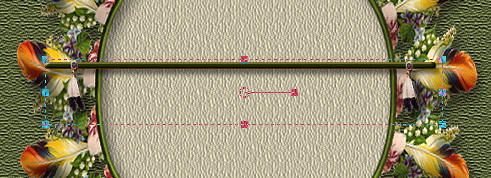
Click the RESET RECTANGLE arrow
Reposition with your MOVER tool to the top of your frame
ADJUST >>> SHARPNESS >>> SHARPEN MORE
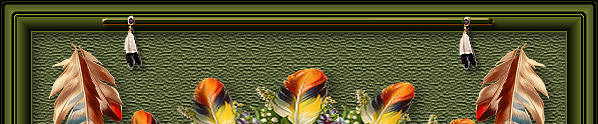
LAYERS >>> DUPLICATE
Reposition with your MOVER tool to the bottom of your frame
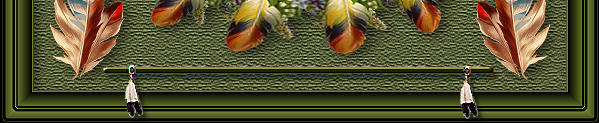
ACTIVATE RASTER 4
LAYERS >>> DUPLICATE
IMAGE >>> RESIZE = 96%
Ensure "Resize all layers" is UNCHECKED
Resample using WEIGHTED AVERAGE
ADJUST >>> SHARPNESS >>> SHARPEN
CLOSE RASTER 1
LAYERS >>> MERGE >>> MERGE VISIBLE
OPEN RASTER 1
Save as .pspimage image
ACTIVATE RASTER 1
Open up the kTs_kEv0140 copie image in your PSP workspace
Select the bottom divider
Right click on the Title Bar and select COPY from the options
Right click on the Title Bar of your frame image
and select PASTE AS NEW LAYER from the options.
IMAGE >>> RESIZE = 55%
Ensure "Resize all layers" is UNCHECKED
Resample using WEIGHTED AVERAGE
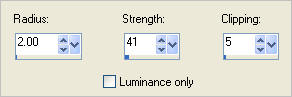
ADJUST >>> SHARPNESS >>> UNSHARP MASK
LAYERS >>> MERGE >>> MERGE ALL (Flatten)
Save as .jpg image
Testers Results
Page designed by

for

http://www.artistrypsp.com/
Copyright ©
2003-2012 Artistry In PSP / PSP Artistry
All rights reserved.
Unless specifically made available for
download,
no graphics or text may be removed from
this site for any reason
without written permission from Artistry
In PSP / PSP Artistry
|