INDEPENDENCE - 2012
PSP8 - PSPX3
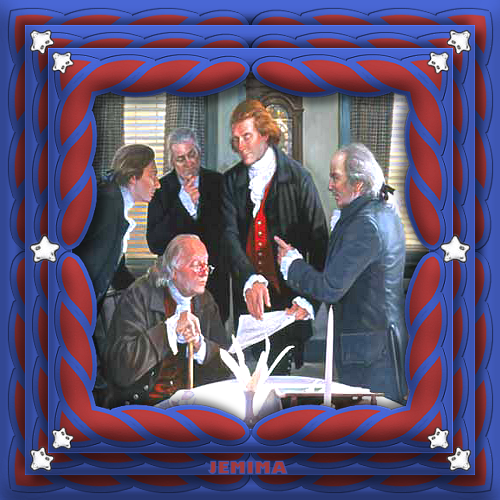
This tutorial was
created by Jemima using PSP9 ~MARCH 2012
BUT should be creatable using all versions of PSP
Copyright © 2012 ~ Jemima
~ All rights reserved
********************************
No artists or copyright infringement is intended on any of the tubes used in this tutorial.
The tubes were acquired in good faith as to their legality.
If there is a problem, please contact the author and the image/s will be removed.
You will need the
following to complete this tutorial
Materials
Darcie_American004_btf.tub
b_founding_fathers
Save to a folder on your computer
rolly121304.PspShape
Save to your PSP Preset Shapes folder
PSP8: C:\Program Files\Jasc Software\Paint Shop Pro 8\Shapes
PSP9: C:\Program Files\Jasc Software\Paint Shop Pro 9\Shapes
PSPX: C:\Program Files\Corel\Corel Paint Shop Pro X\Shapes
PSPXI / X2: C:\Program Files\Corel\Corel Paint Shop Pro Photo X2\Corel_11
PSPX3: C:\Program Files\Corel\X3\PSPClassic\Corel_11
Plugins
** EYE CANDY3 **
http://www.pircnet.com/downloads.html
********************************
VIEW >>> RULERS
In your MATERIALS PALETTE
Load BLUE ' #415bba ' in your foreground
Load RED ' #a33939 ' in your background
Open a new image 500 x 500
Transparent background
PSPX - X2: Colour Depth = 8bits/channel
PSPX3: Colour Depth RGB = 8bits/channel
Select your PRESET SHAPES tool
Locate the "rolly" preset

and use these settings
JOIN = Round Joins

Starting at 5 pixels from the left on top ruler and 230 pixels down on left ruler
drag your cursor to
495 pixels on your top ruler and 285 pixels on left ruler

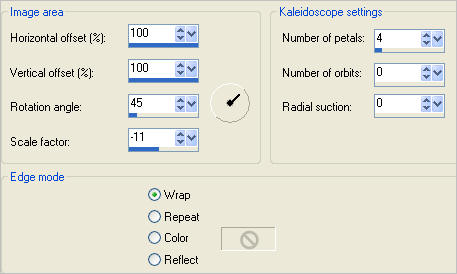
EFFECTS >>> REFLECTION EFFECTS >>> KALEIDOSCOPE
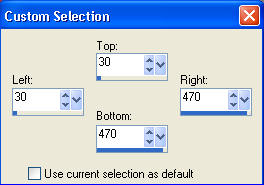
Choose your SELECTION TOOL then click on the CUSTOM SELECTION
symbol
and enter these coordinates.
SELECTIONS >>> INVERT
LAYERS >>> NEW RASTER LAYER
Flood fill with BLUE
LAYERS >>> ARRANGE >>> MOVE DOWN
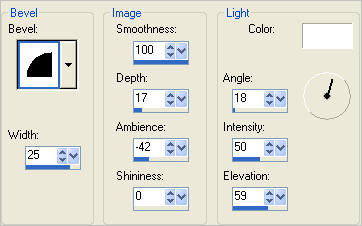
EFFECTS >>> 3D EFFECTS >>> INNER BEVEL
DESELECT
ACTIVATE RASTER 1
EFFECTS >>> 3D EFFECTS >>> INNER BEVEL
Same settings
EFFECTS >>> 3D EFFECTS >>> DROP SHADOW
Vertical & Horizontal offsets = 1
Colour = Black
Opacity = 50
Blur = 0
Repeat Drop Shadow effect changing
Vertical & Horizontal Offsets to - ( minus ) 1
Click OK
LAYERS >>> MERGE >>> MERGE DOWN
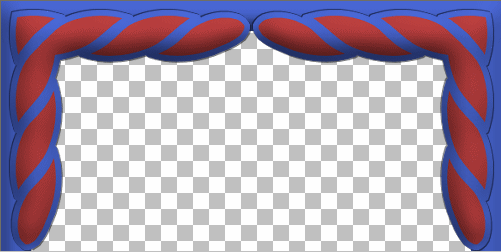
LAYERS >>> DUPLICATE
IMAGE >>> RESIZE = 90%
Ensure "Resize all layers" is UNCHECKED
Resample using WEIGHTED AVERAGE
ADJUST >>> SHARPNESS >>> SHARPEN
LAYERS >>> DUPLICATE
IMAGE >>> RESIZE = 90%
Ensure "Resize all layers" is UNCHECKED
Resample using WEIGHTED AVERAGE
ADJUST >>> SHARPNESS >>> SHARPEN
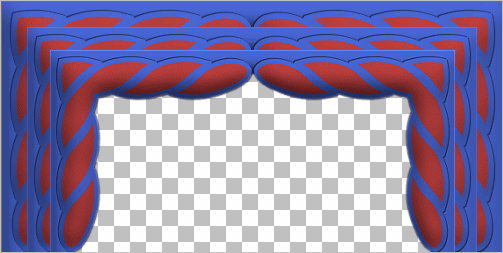
ACTIVATE
Copy of Raster 2
EFFECTS >>> PLUGINS >>> EYE CANDY 3 >>> DROP SHADOW
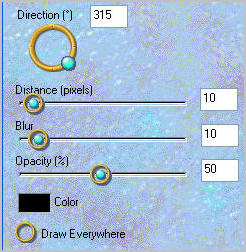
EDIT >>> Repeat Drop Shadow.. change DIRECTION to 135
ACTIVATE Copy (2) of Raster 2
EDIT >>> Repeat Drop Shadow..
EDIT >>> Repeat Drop Shadow.. change DIRECTION to 315
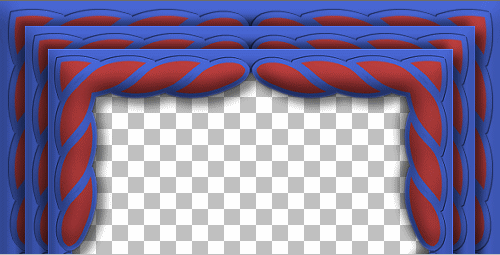
LAYERS >>> MERGE >>> MERGE VISIBLE
Open up the Darcie_American004_btf image in your PSP workspace
(With the white star selected)
Right click on the Title Bar and select COPY from the options
Right click on the Title Bar of your frame image
and select PASTE AS NEW LAYER from the options.
EFFECTS >>> REFLECTION EFFECTS >>> KALEIDOSCOPE
Same settings

LAYERS >>> DUPLICATE
IMAGE >>> RESIZE = 90%
Ensure "Resize all layers" is UNCHECKED
Resample using WEIGHTED AVERAGE
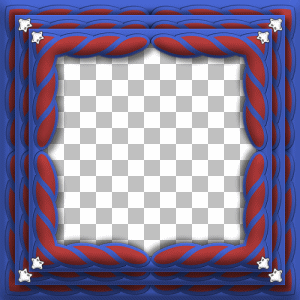
Open up the Darcie_American004_btf image again in your PSP workspace
(Still with the white star selected)
Right click on the Title Bar and select COPY from the options
Right click on the Title Bar of your frame image
and select PASTE AS NEW LAYER from the options.
Reposition with your MOVER tool
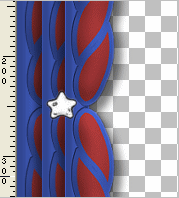
LAYERS >>> DUPLICATE
IMAGE >>> MIRROR
LAYERS >>> MERGE >>> MERGE VISIBLE
Open up the b_founding_fathers image in your PSP workspace
Right click on the Title Bar and select COPY from the options
Right click on the Title Bar of your frame image
and select PASTE AS NEW LAYER from the options.
LAYERS >>> ARRANGE >>> MOVE DOWN
Select your DEFORMATION tool
Mode = SCALE
use default settings
PSPX - X3:Select your PICK tool
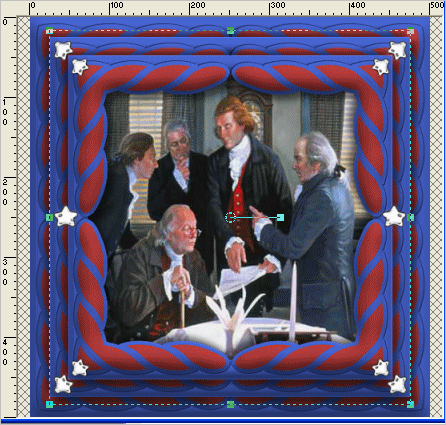
Drag the edges of your image out so the left and right nodes are visible.
Drag the centre left and centre right nodes towards the centre of your image
as shown below.
Click the RESET RECTANGLE arrow
ADJUST >>> SHARPNESS >>> SHARPEN
ADJUST >>> BRIGHTNESS and CONTRAST >>> BRIGHTNESS/CONTRAST

LAYERS >>> MERGE >>> MERGE ALL (Flatten)
I saved this as a .png file so the colours don't 'bleed'
and the image is crisp and clean.
Testers Results
Page designed by

for

http://www.artistrypsp.com/
Copyright ©
2003-2012 Artistry In PSP / PSP Artistry
All rights reserved.
Unless specifically made available for
download,
no graphics or text may be removed from
this site for any reason
without written permission from Artistry
In PSP / PSP Artistry
|