This is a quick and easy tutorial *S*
Open a new image 600 x 600
Transparent background
RASTER BACKGROUND
PSPX - X2: Colour Depth = 8bits/channel
PSPX3: Colour Depth RGB = 8bits/channel
.
|
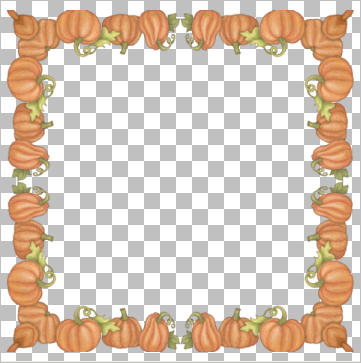
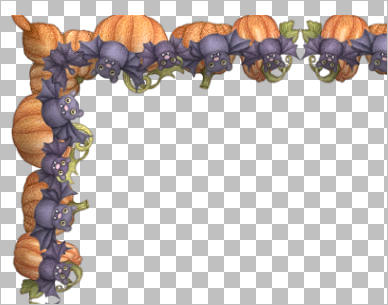
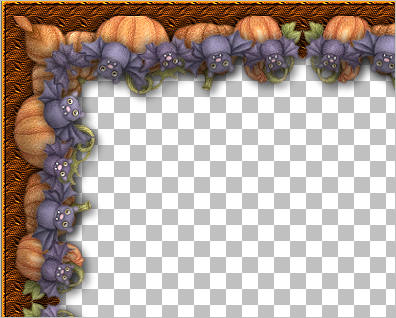
Open up the HalloweenDividersSmall9-06~LM image
in your PSP workspace
Activate the "Pumpkins" layer
Right click on the Title Bar and select COPY from the options
Right click on the Title Bar of your tag image
and select PASTE AS NEW LAYER from the options.
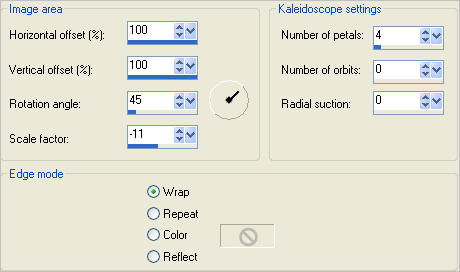
EFFECTS >>> REFLECTION EFFECTS >>> KALEIDOSCOPE
|
IMAGE >>> RESIZE = 95%
Ensure "Resize all layers" is UNCHECKED
Resample using WEIGHTED AVERAGE
|
|
PSP8 - PSPX2:ADJUST >>> BRIGHTNESS and CONTRAST >>> CLARIFY
Strength of effect = 5
PSPX3: ADJUST >>> BRIGHTNESS and CONTRAST >>> LOCAL TONE
Mapping strength = 5
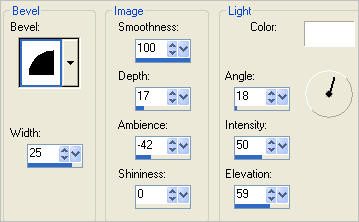
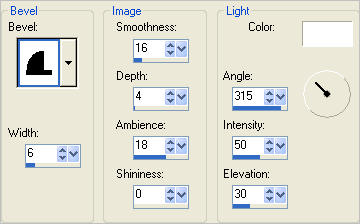
EFFECTS >>> 3D EFFECTS >>> INNER BEVEL
ADJUST >>> SHARPNESS >>> SHARPEN
|
|
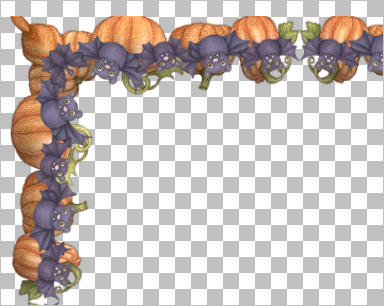
Open up the HalloweenDividersSmall9-06~LM image
in your PSP workspace
Activate the "Bats" layer
Right click on the Title Bar and select COPY from the options
Right click on the Title Bar of your tag image
and select PASTE AS NEW LAYER from the options.
EFFECTS >>> REFLECTION EFFECTS >>> KALEIDOSCOPE
Same settings
IMAGE >>> RESIZE = 96%
Ensure "Resize all layers" is UNCHECKED
Resample using WEIGHTED AVERAGE
ADJUST >>> SHARPNESS >>> SHARPEN
|
|
PSP8 - PSPX2:ADJUST >>> BRIGHTNESS and CONTRAST >>> CLARIFY
Strength of effect = 5
PSPX3: ADJUST >>> BRIGHTNESS and CONTRAST >>> LOCAL TONE
Mapping strength = 5
EFFECTS >>> 3D EFFECTS >>> INNER BEVEL
Same settings
|
|
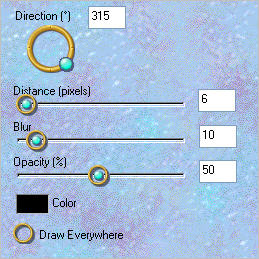
With your MAGIC WAND
Mode = Replace
Match Mode = RGB Value
Tolerance = 0
Feather = 0
Antialias = UNchecked
Sample Merged = UNCHECKED
PSP9 - X3: Check CONTIGUOUS
PSPX - X3: There is no " Sample Merged"
PSPX - X3: Use all layers = UNChecked
Select the CENTRE transparent area
SELECTIONS >>> MODIFY >>> EXPAND = 3
SELECTIONS >>> INVERT
ACTIVATE RASTER 1
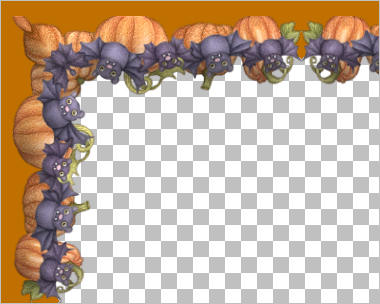
Flood fill with Orange #c07000
DESELECT
|
|
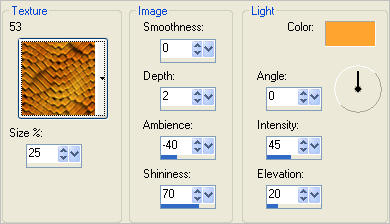
EFFECTS >>> TEXTURE EFFECTS >>> TEXTURE
COLOUR = #ffa42f
ADJUST >>> SHARPNESS >>> SHARPEN
|
|
SELECTIONS >>> SELECT ALL
SELECTIONS >>> MODIFY >>> CONTRACT = 4
SELECTIONS >>> INVERT
EFFECTS >>> 3D EFFECTS >>> INNER BEVEL
EDIT >>> Repeat Inner Bevel
DESELECT
|
|
ACTIVATE RASTER 2
EFFECTS >>> PLUGINS >>> EYE CANDY 3 >>> DROP SHADOW
ACTIVATE RASTER 3
EDIT >>> Repeat Drop Shadow
|
|
EDIT >>> Repeat Drop Shadow.. change DIRECTION to 135
ACTIVATE RASTER 2
EDIT >>> Repeat Drop Shadow
LAYERS >>> MERGE >>> MERGE VISIBLE
ADJUST >>> SHARPNESS >>> SHARPEN
Save as .psp image
or
.pspimage
|
|
.
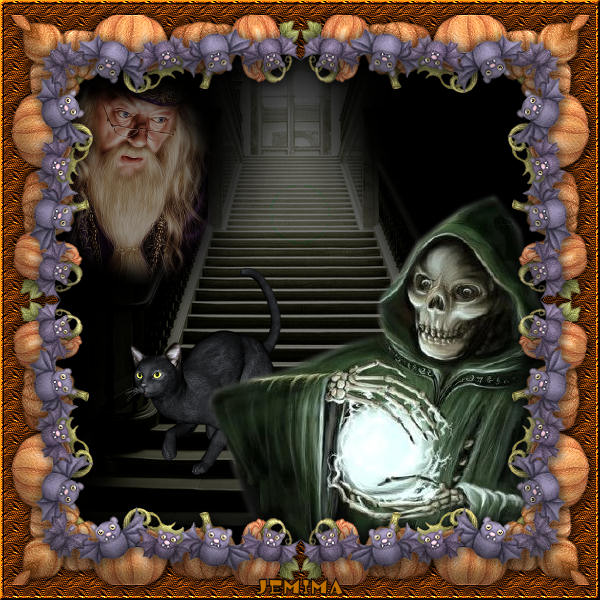
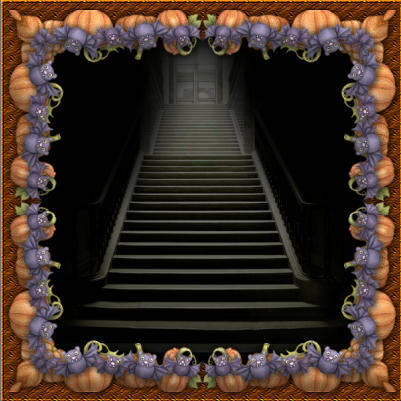
Now, you can use the images I supplied or create a picture of your own in the frame
.
|
LAYERS >>> NEW RASTER LAYER
LAYERS >>> ARRANGE >>> MOVE DOWN
Flood fill with BLACK
Open up the 1252520162_halloween_nikita image
in your PSP workspace
Activate the 'calque2' layer
Right click on the Title Bar and select COPY from the options
Right click on the Title Bar of your tag image
and select PASTE AS NEW LAYER from the options.
In your LAYER PALETTE change the OPACITY to 50%
|
|
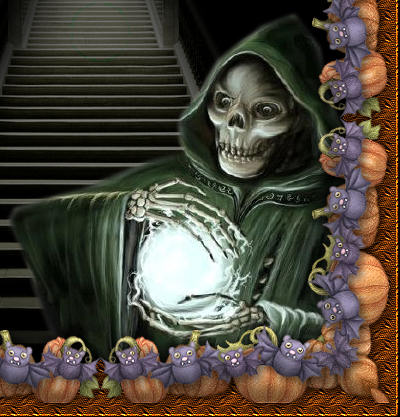
Open up the UNTITL~186 Misted Suzan M image
in your PSP workspace
Activate Raster 1
Right click on the Title Bar and select COPY from the options
Right click on the Title Bar of your tag image
and select PASTE AS NEW LAYER from the options.
Reposition with your MOVER tool
|
|
ACTIVATE RASTER 2
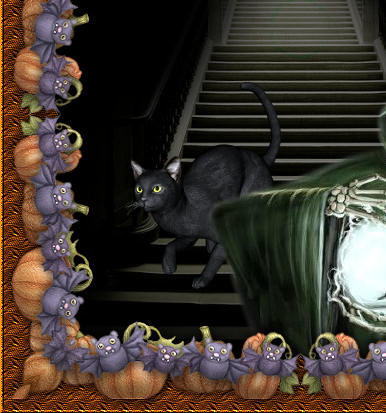
Open up the animal006 image
in your PSP workspace
Right click on the Title Bar and select COPY from the options
Right click on the Title Bar of your tag image
and select PASTE AS NEW LAYER from the options.
IMAGE >>> RESIZE = 50%
Ensure "Resize all layers" is UNCHECKED
Resample using WEIGHTED AVERAGE
Reposition with your MOVER tool
|
|
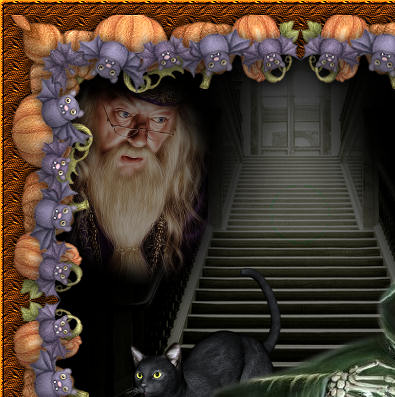
Open up the isharimal_wizard image
in your PSP workspace
Right click on the Title Bar and select COPY from the options
Right click on the Title Bar of your tag image
and select PASTE AS NEW LAYER from the options.
IMAGE >>> MIRROR
IMAGE >>> RESIZE = 50%
Ensure "Resize all layers" is UNCHECKED
Resample using WEIGHTED AVERAGE
In your LAYER PALETTE change the OPACITY to 60%
Change the BLEND MODE to EXCLUSION
Reposition with your MOVER tool |
|
LAYERS >>> MERGE >>> MERGE ALL (Flatten)
Save as .jpg image
|
|
|