ANGELIC
PSP8 - PSPX3
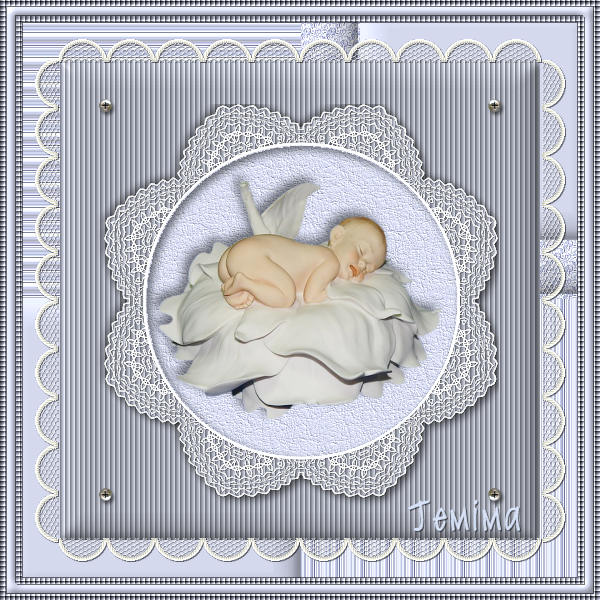
This tutorial was
created by Jemima using PSP9 ~ OCTOBER 2011
BUT should be creatable using all versions of PSP
Copyright © 2010/11 ~ Jemima
~ All rights reserved
********************************
You will need the
following to complete this tutorial
Materials
lace.pspimage
JF_screws.psp
KaraT6812.psp
jule_lace_4a_8_11.psp
Save to a folder on your computer
JF101.jpg
Save to your PSP Patterns folder
PSP8: C:\Program Files\Jasc Software\Paint Shop Pro 8\Patterns
PSP9: C:\Program Files\Jasc Software\Paint Shop Pro 9\Patterns
PSPX: C:\Program Files\Corel\Corel Paint Shop Pro X\Patterns
PSPXI / X2: C:\Program Files\Corel\Corel Paint Shop Pro Photo X2\Corel_08
PSPX3: C:\Program Files\Corel\X3\PSPClassic\Corel_08
Plugins
** EYE CANDY3 **
http://www.pircnet.com/downloads.html
** SIMPLE FILTERS **
download
********************************
Open a new image 600 x 600
Transparent background
PSPX - X2: Colour Depth = 8bits/channel
PSPX3: Colour Depth RGB = 8bits/channel
Open up the jule_lace_4a_8_11 image in your PSP workspace
Right click on the Title Bar and select COPY from the options
Right click on the Title Bar of your tag image
and select PASTE AS NEW LAYER from the options.
IMAGE >>> RESIZE = 65 %
Ensure "Resize all layers" is UNCHECKED
Resample using WEIGHTED AVERAGE
ADJUST >>> SHARPNESS >>> SHARPEN MORE
With your MAGIC WAND
Mode = Replace
Match Mode = RGB Value
Tolerance = 0
Feather = 0
Antialias = UNchecked
Sample Merged = UNCHECKED
PSP9 - X3: Check CONTIGUOUS
PSPX - X3: There is no " Sample Merged"
PSPX - X3: Use all layers = UNChecked
Select the transparent area outside the lace
SELECTIONS >>> INVERT
SELECTIONS >>> MODIFY >>> CONTRACT = 2
LAYERS >>> NEW RASTER LAYER
LAYERS >>> ARRANGE >>> MOVE DOWN
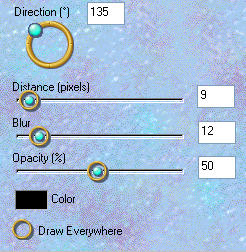
EFFECTS >>> PLUGINS >>> EYE CANDY 3 >>> DROP SHADOW
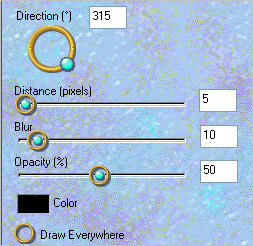
EDIT >>> Repeat Drop Shadow.. change DIRECTION to 135
DESELECT
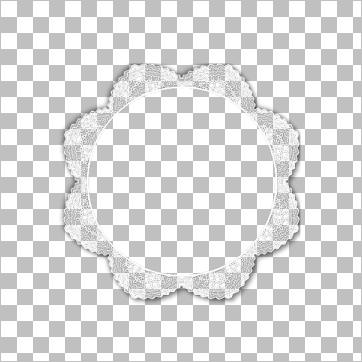
ACTIVATE RASTER 1
Flood fill with #dadfee
IMAGE >>> RESIZE = 80 %
Ensure "Resize all layers" is UNCHECKED
Resample using WEIGHTED AVERAGE
EFFECTS >>> TEXTURE EFFECTS >>> BLINDS
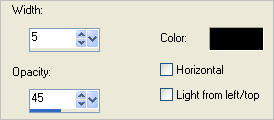
EFFECTS >>> 3D EFFECTS >>> INNER BEVEL
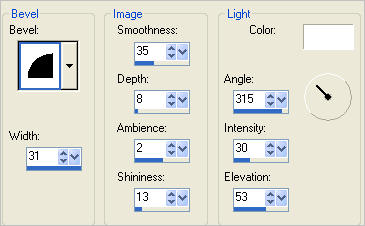
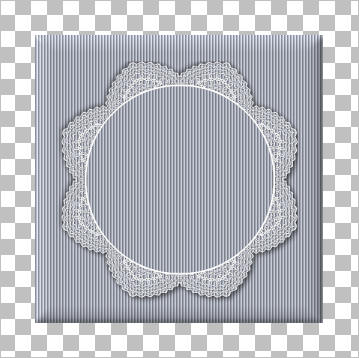
LAYERS >>> NEW RASTER LAYER
LAYERS >>> ARRANGE >>> MOVE DOWN
CLOSE Raster 1, 2 and 3
Flood fill with LIGHT BLUE #dae9ff
EFFECTS >>> TEXTURE EFFECTS >>> SCULPTURE
COLOUR = #c0c0c0
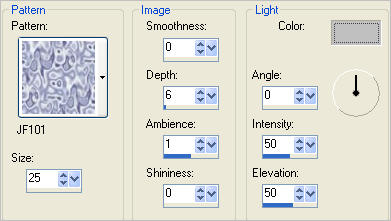
EFFECTS >>> IMAGE EFFECTS >>> OFFSET
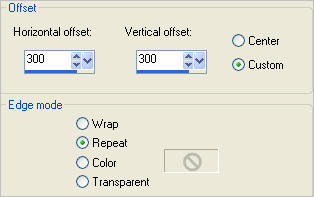
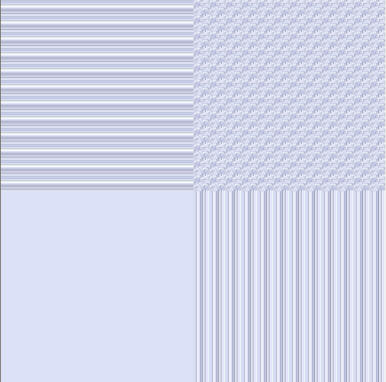
Choose your SELECTION TOOL then click on the CUSTOM SELECTION symbol
and enter these coordinates.
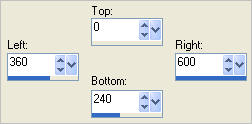
EDIT >>> CLEAR
Flood fill with LILAC #dce1f7
With your MAGIC WAND.... Same settings.
and while depressing your SHIFT KEY...
Select the lower left plain area
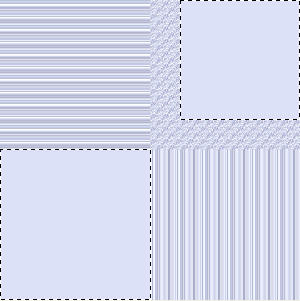
Flood fill with LILAC #dce1f7
EFFECTS >>> 3D EFFECTS >>> INNER BEVEL
Same settings
DESELECT
Choose your SELECTION TOOL
Selection Type = Rectangle
Mode = Replace
Feather = 0
Antialias = UNChecked
Select the area shown
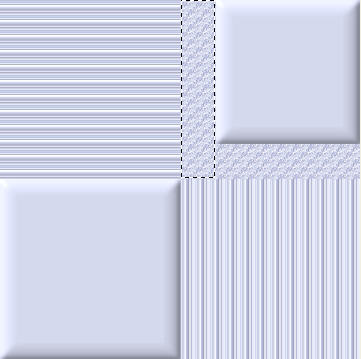
EFFECTS >>> 3D EFFECTS >>> INNER BEVEL
Same settings
DESELECT
Choose your SELECTION TOOL
Same settings
Select the area shown
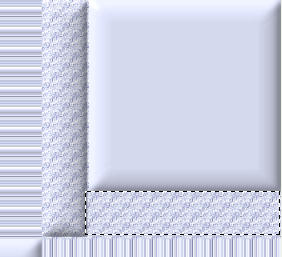
EFFECTS >>> 3D EFFECTS >>> INNER BEVEL
Same settings
DESELECT
OPEN ALL LAYERS
ACTIVATE RASTER 2
With your MAGIC WAND.... Same settings.
Select the CENTRE of your image
SELECTIONS >>> MODIFY >>> EXPAND = 2
ACTIVATE RASTER 1
EDIT >>> CLEAR
ACTIVATE RASTER 4
EDIT >>> CLEAR
DESELECT
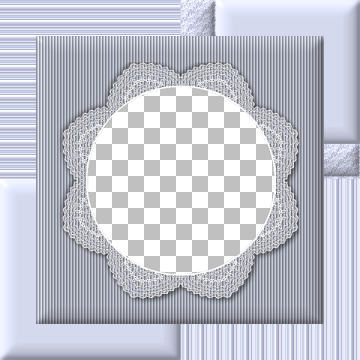
ACTIVATE RASTER 2
LAYERS >>> NEW RASTER LAYER
Flood fill with LILAC
SELECTIONS >>> SELECT ALL
SELECTIONS >>> MODIFY >>> CONTRACT = 6
EDIT >>> CLEAR
SELECTIONS >>> MODIFY >>> CONTRACT = 10
Flood fill with LILAC
SELECTIONS >>> MODIFY >>> CONTRACT = 6
EDIT >>> CLEAR
DESELECT
EFFECTS >>> TEXTURE EFFECTS >>> BLINDS
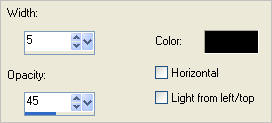
EFFECTS >>> TEXTURE EFFECTS >>> BLINDS
This time check HORIZONTAL
EFFECTS >>> 3D EFFECTS >>> DROP SHADOW
Vertical & Horizontal offsets = 1
Colour = Black
Opacity = 55
Blur = 0
Repeat Drop Shadow effect changing
Vertical & Horizontal Offsets to - ( minus ) 1
Click OK

With your MAGIC WAND.... Same settings.
Select the area between the borders you just created
SELECTIONS >>> MODIFY >>> EXPAND = 2
LAYERS >>> NEW RASTER LAYER
LAYERS >>> ARRANGE >>> MOVE DOWN
Flood fill with LILAC
EFFECTS >>> 3D EFFECTS >>> INNER BEVEL
Same settings
DESELECT

Open up the lace image in your PSP workspace
Right click on the Title Bar and select COPY from the options
Right click on the Title Bar of your tag image
and select PASTE AS NEW LAYER from the options.
Reposition with your MOVER tool

LAYERS >>> DUPLICATE
IMAGE >>> FLIP
LAYERS >>> DUPLICATE
PSP8 - PSP9:IMAGE >>> ROTATE >>> FREE ROTATE = RIGHT 90
Ensure "All layers" is UNCHECKED
PSPX - PSPX3: IMAGE >>> FREE ROTATE = RIGHT 90
Ensure "All layers" is UNCHECKED
Reposition with your MOVER tool to the left ...
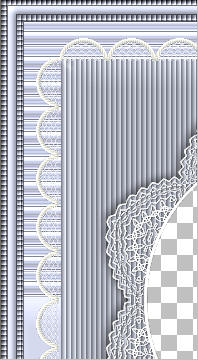
.
LAYERS >>> DUPLICATE
IMAGE >>> MIRROR
LAYERS >>> MERGE >>> MERGE DOWN
EDIT >> Repeat Merge Down
EDIT >> Repeat Merge Down
EFFECTS >>> 3D EFFECTS >>> DROP SHADOW
Vertical & Horizontal offsets = 1
Colour = Black
Opacity = 55
Blur = 0

Open up the JF_screws image in your PSP workspace
Activate the "top left" layer
Right click on the Title Bar and select COPY from the options
Right click on the Title Bar of your tag image
and select PASTE AS NEW LAYER from the options.
Reposition with your MOVER tool to the top left corner
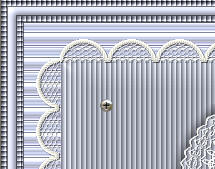
EFFECTS >>> PLUGINS >>> SIMPLE >>> TOP LEFT MIRROR
Click OK
EFFECTS >>> 3D EFFECTS >>> DROP SHADOW
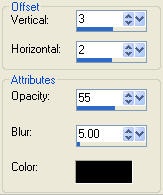
LAYERS >>> MERGE >>> MERGE VISIBLE
Save as .psp image
This is your frame.
LAYERS >>> NEW RASTER LAYER
LAYERS >>> ARRANGE >>> MOVE DOWN
Flood fill with LILAC
EFFECTS >>> TEXTURE EFFECTS >>> FINE LEATHER
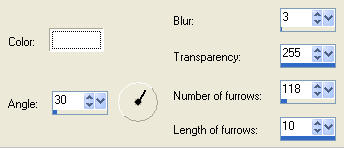
ACTIVATE THE MERGED LAYER
With your MAGIC WAND.... Same settings.
Select the CENTRE of your image
SELECTIONS >>> INVERT
LAYERS >>> NEW RASTER LAYER
LAYERS >>> ARRANGE >>> MOVE DOWN
EFFECTS >>> PLUGINS >>> EYE CANDY 3 >>> DROP SHADOW
Same settings BUT change DIRECTION to 315
DESELECT
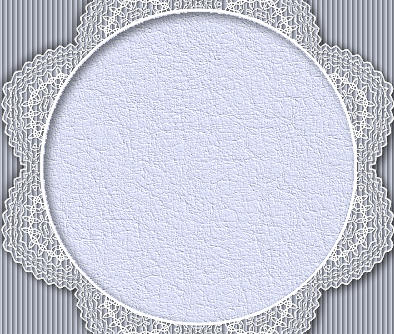
Open up the KaraT6812 image in your PSP workspace
Right click on the Title Bar and select COPY from the options
Right click on the Title Bar of your frame image
and select PASTE AS NEW LAYER from the options.
IMAGE >>> RESIZE = 65%
Ensure "Resize all layers" is UNCHECKED
Resample using WEIGHTED AVERAGE
EFFECTS >>> PLUGINS >>> EYE CANDY 3 >>> DROP SHADOW
LAYERS >>> MERGE >>> MERGE ALL (Flatten)
Save as .jpg image
Testers Results
Page designed by

for

http://www.artistrypsp.com/
Copyright ©
2000-2012 Artistry In PSP / PSP Artistry
All rights reserved.
Unless specifically made available for
download,
no graphics or text may be removed from
this site for any reason
without written permission from Artistry
In PSP / PSP Artistry
|