This tutorial was written by Rebba to be shared with the Artistry Master Group.
APRIL 2011
I have created the animation to have fun with but also to teach perhaps a
different way of doing it, I call My Way. I'm not a tutorial writer so this is more in
steps and doesn't expound on the design or PSP part of the tutorial. If you have any
STEP 1
Open up the downloaded images in your PSP workspace and minimize.
Open a new image 500 x 520
Transparent background
PSPX - X2: Colour Depth = 8bits/channel
PSPX3: Colour Depth RGB = 8bits/channel
Flood fill with white #ffffff
This is your 'working image'
|
STEP 2
SELECTIONS >> SELECT ALL
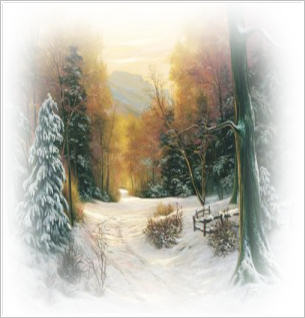
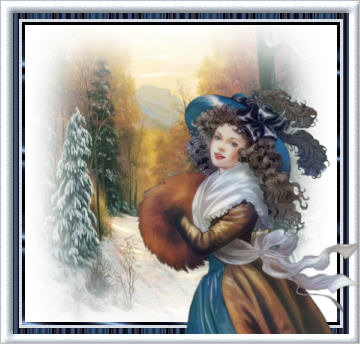
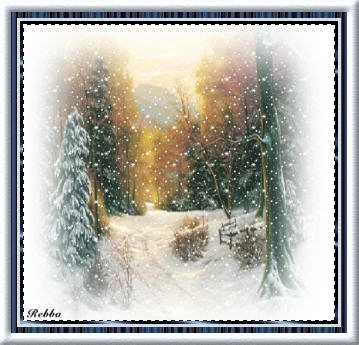
Open up the blb-winter.psp image
in your PSP workspace
Right click on the Title Bar and
select COPY from the options.
Right click on the Title Bar of
your 'working' image
and select PASTE INTO SELECTION
from the options.
DESELECT
|
|
STEP 3
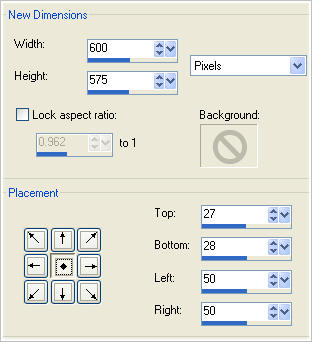
IMAGE >>> CANVAS SIZE
600x575
center |
|
STEP 4
LAYERS >> NEW RASTER LAYER
Flood fill with white #ffffff
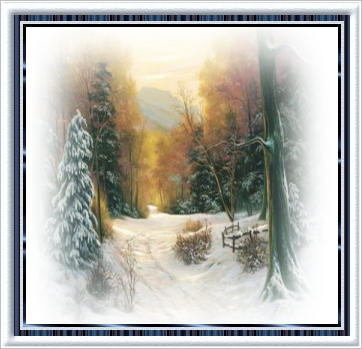
LAYERS >> ARRANGE >> SEND TO BOTTOM
LAYERS >> MERGE >> VISIBLE.
Rename this layer "bgd"
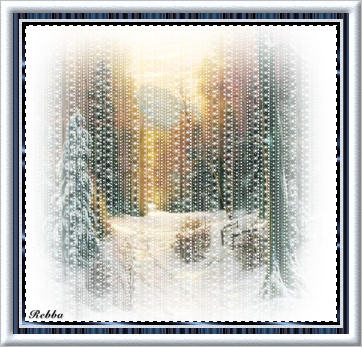
Open up the frame image
in your PSP workspace
Right click on the Title Bar and
select COPY from the options.
Right click on the Title Bar
of your 'working' image
and select
PASTE AS NEW LAYER from the options.
Rename this layer "frame" |
|
STEP 5
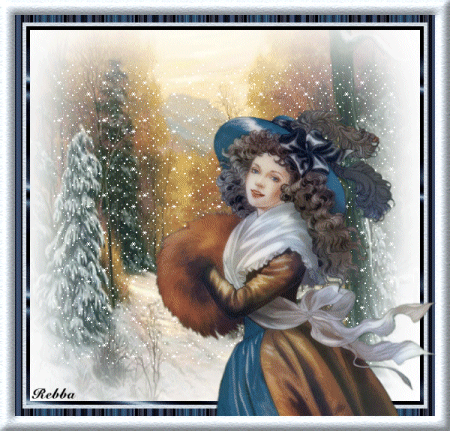
Open up the CJ-vintage girl.psp image
in your PSP workspace
Right click on the Title Bar and
select COPY from the options.
Right click on the Title Bar
of your 'working' image
and select
PASTE AS NEW LAYER from the options
IMAGE >> RESIZE = 75%
Ensure "Resize all layers" is UNCHECKED
Move to the bottom right side
Rename this layer "tube" |
|
STEP 6
LAYERS >> NEW RASTER LAYER
Select your TEXT TOOL
With font and settings of your choice
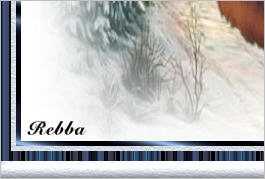
add your name to the bottom left corner
of the layer.
Rename this layer "name" |
|
STEP 7
Activate the frame layer
Close the tube layer
With your MAGIC WAND
Mode = Replace
Match Mode = RGB Value
Tolerance = 0
Feather = 0
Antialias = UNchecked
Sample Merged = UNCHECKED
PSP9 - X3: Check CONTIGUOUS
PSPX - X3: There is no " Sample Merged"
PSPX - X3: Use all layers = UNChecked
Click inside the frame
LAYERS >> NEW RASTER LAYER
Rename this layer AS1 |
STEP 8
Add 4 more new raster layers
name them AS2- AS5
Close layers AS2- AS5
ACTIVATE AS1 |
|
STEP 9
Open Animation Shop
File>> Open
find the complete snow.gif and open
Edit >> Select All
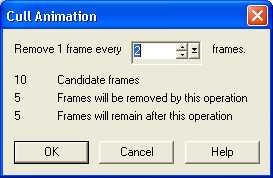
Animation>>cull animation
Click Ok
File >> Export frames to PSP
|
|
NOTE 1:
If you can't "FILE >> Export Frames to PSP
Because the instruction is 'greyed out'
Then do the following:
In ANIMATION SHOP
EDIT >> SELECT ALL
Hold down the SHIFT key and depress the letter "X"
Go back to PSP
Right click in your workspace amd select
PASTE AS NEW IMAGE
.
All the layers will be named "Frame 1"
So... begin with the bottom layer and work your way up all 5 layers
following the instructions for
STEP 10 to STEP 12 below.
Then follow the instructions for NOTE 2
|
STEP 10
Back to PSP.
On Snow Image
Activate frame 1 layer
and
close all others
Right click on the Title Bar and select
COPY from the options.
Right click on the Title Bar
of your 'working' image
and select PASTE INTO SELECTION
from the options
|
|
STEP 11
On Snow Image
Activate frame 2 layer
and
close all others
Right click on the Title Bar and select
COPY from the options.
Activate 'working image'
Activate layer AS2
Right click on the Title Bar
of your 'working' image
and select PASTE INTO SELECTION
from the options |
|
STEP 12
Continue until the 5 snow frames are copied
into the selections on the working image.
Make sure that all frame numbers are copied
into the same layer number on working image.
Then DESELECT
|
|
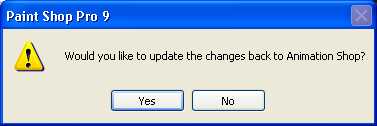
NOTE 2
Go back to ANIMATION SHOP
FILE >>> CLOSE
Click "NO"
Now proceed to STEP 16
|
STEP 13
On Snow Image
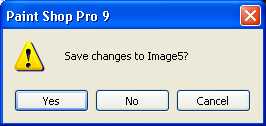
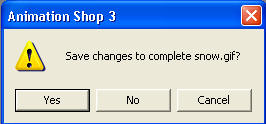
Open all layers
Click X
Click NO |
|
STEP 14
Click YES |
 |
STEP 15
You are back in AS
so just minimize the snow for now.
Note: when you close the snow animation at end of tutorial
don't save the changes or you will lose 5 frames.
|
STEP 16
Back to PSP.
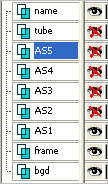
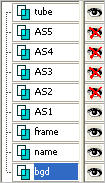
Set up LAYER PALETTE as shown |
|
STEP 17
Right click on Title Bar and select
Copy merged from the options
In ANIMATION SHOP
Right click the workspace and select
'Paste As New Animation' from the options.
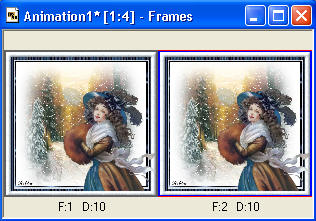
|
STEP 18
Back to PSP.
Close AS1
Open AS2
Right click on Title Bar and select
Copy merged from the options
In ANIMATION SHOP
Right click top of frame image and select
'Paste After Current Frame' from the options.
|
STEP 19
Back to PSP.
Continue copy merge all
AS layers on the working image
in the same manner
and in ANIMATION SHOP "Paste after current frame"
.
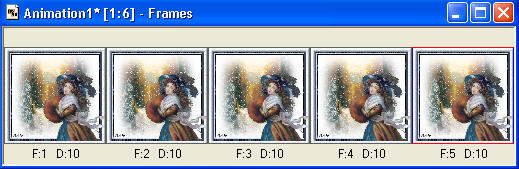
When all 5 layers (now called Frames)
are in ANIMATION SHOP
Edit >> Select All
View animation... 
Stop animation by clicking the same button
|
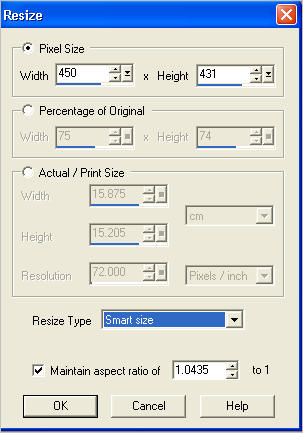
STEP 20
Menu >> Animations
Resize 450 pixels wide ( or size you want )
View >> Animation
and while it is still running,
File >> Save As
Locate the folder in which you wish to save it.
Name your animation.
With the Gif Optimizer keep pressing NEXT
until you get to the last one... click FINISH
Close the Animation
Close the frames.
Close Animation Shop |
| |
I hope you enjoyed this animation.
Rebba |
| |