STEP 1
Open up the downloaded images in your PSP workspace and minimize.
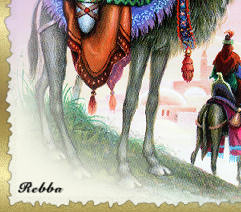
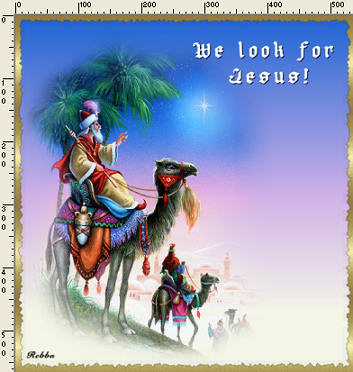
Open up the christmas card 1-3 king image in your PSP workspace
WINDOW >>> DUPLICATE
Close the original Image
DELETE Layer 2
Move the tube to bottom left ( we will adjust later)
Rename this layer tube
|
STEP 2
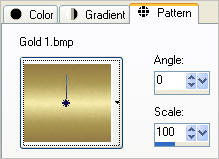
In your MATERIALS PALETTE
Load the ' Gold 1 ' pattern
in your background
using these settings
|
|
STEP 3
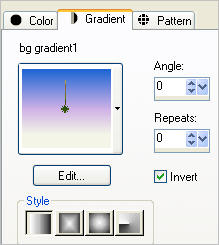
In your MATERIALS PALETTE
Load the ' bg gradient1 ' gradient in your foreground
using these settings.
LAYERS >> NEW RASTER LAYER
LAYERS >> ARRANGE >> SEND TO BOTTOM
Flood Fill with gradient
Rename this layer bgd
|
|
STEP 4
LAYERS >> NEW RASTER LAYER
LAYERS >> ARRANGE >> SEND TO BOTTOM
Flood Fill with gold pattern
Rename this layer gold
|
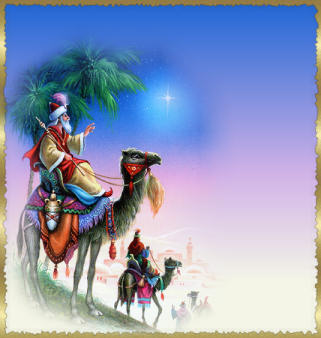
STEP 5
ACTIVATE the bgd layer
EFFECTS >> PLUGINS >> <I.C. NET Software> >> Filters Unlimited 2
use these settings.
Edges Square >> Edge #17
 . 
|
STEP 6
ACTIVATE the tube layer
LAYERS >> NEW RASTER LAYER
Select your TEXT TOOL
with font and settings of your choice
add your name to the bottom left corner of the layer.
Rename this layer Name.
|
|
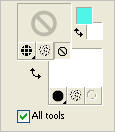
STEP 7
In your MATERIALS PALETTE
Load WHITE in your background
NULL the foreground
|
|
STEP 8
LAYERS >> NEW RASTER LAYER
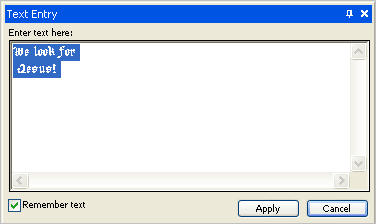
Select your TEXT TOOL
********************************** A3
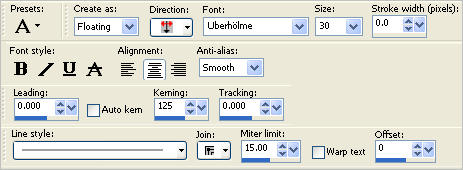
Type text of choice
SELECTIONS >> SELECT NONE
|
STEP 9
Effects >> 3D Effects >> Drop Shadow
Vertical and Horizontal =1
Opacity =100
Blur = 0.00
Color = Black.
Now place the images as shown
|
|
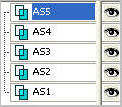
STEP 10
LAYERS >>> MERGE >> VISIBLE.
Rename this layer AS1
LAYERS >> DUPLICATE 4 Times
Rename these layers AS2-AS5
|
|
NOTE
If you have your VM Starmaker filter installed in your usual Plugins folder
go to STEP 16 (The PINK coloured steps)
If you have your VM Starmaker filter installed in your Filters Unlimited folder
follow STEP 11 to STEP 15 (The BLUE coloured steps)
Then go to STEP 21
|
STEP 11
Activate layer AS1
Close all other layers
NOTE: Please read the tips for the VM Starmaker Filter
for more information. This tutorial will only give you the setting
and not explain how to save and use them.
EFFECTS >> PLUGINS >> <I.C. NET Software> >> VM Natural >> Starmaker
Save preset
then apply these settings.
|
STEP 12
Activate layer AS2
Close layer AS1
EFFECTS >> PLUGINS >> VM Natural Starmaker
Save preset
then apply these settings.
|
STEP 13
Activate layer AS3
Close layer AS2
EFFECTS >> PLUGINS >> VM Natural Starmaker
Save preset
then apply these settings.
|
STEP 14
Activate layer AS4
Close layer AS3
EFFECTS >> PLUGINS >> VM Natural Starmaker
Save preset
then apply these settings.
|
STEP 15
Activate layer AS5
Close layer AS4
EFFECTS >> PLUGINS >> VM Natural Starmaker
Save preset
then apply these settings
|
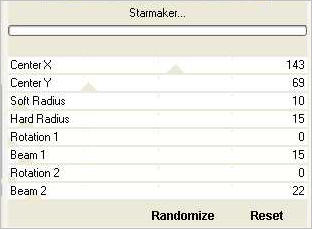
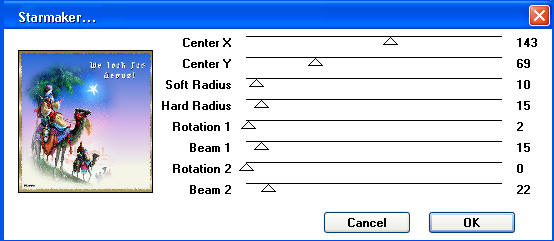
STEP 16
Activate layer AS1
Close all other layers
EFFECTS >> PLUGINS >> VM Natural >> Starmaker
|
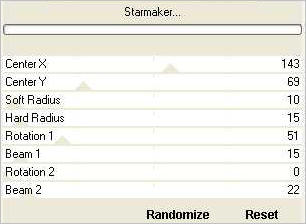
STEP 17
OPEN & Activate layer AS2
Close layer AS1
EFFECTS >> PLUGINS >> VM Natural >> Starmaker
Same settings EXCEPT change
ROTATION 1 to 51
BEAM 1 to 15
|
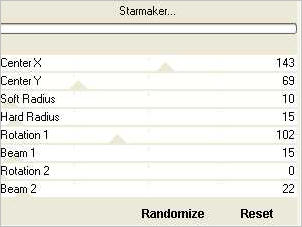
STEP 18
OPEN & Activate layer AS3
Close layer AS2
EFFECTS >> PLUGINS >> VM Natural >> Starmaker
Same settings EXCEPT change
ROTATION 1 to 102
|
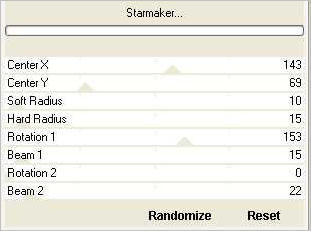
STEP 19
OPEN & Activate layer AS4
Close layer AS3
EFFECTS >> PLUGINS >> VM Natural >> Starmaker
Same settings EXCEPT change
ROTATION 1 to 153
|
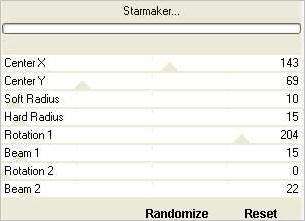
STEP 20
OPEN & Activate layer AS5
Close layer AS4
EFFECTS >> PLUGINS >> VM Natural >> Starmaker
Same settings EXCEPT change
ROTATION 1 to 204
|
STEP 21
OPEN & Activate layer AS1
Close all other layers
NOTE: At this point I added some small stars
randomly to each layer from my star tube.
Open up the sparkle white.tub image in your PSP workspace
Right click on the Title Bar
and select COPY from the options.
Right click on the Title Bar of your 'working' image
and select PASTE AS NEW SELECTION from the options. (4 or 5 times)
(Change the sizes if you wish.)
DESELECT
 CLOSE AS1
OPEN & ACTIVATE AS2
Right click on the Title Bar
and select COPY from the options.
Repeat the process
DESELECT
CLOSE AS2
OPEN & ACTIVATE AS3
Right click on the Title Bar
and select COPY from the options.
Repeat the process
DESELECT
Continue in this manner until all layers have small stars placed randomly.
When finished with the stars make sure AS1 is open
and all others closed.
Right click on the Title Bar and
select COPY from the options.
|
STEP 22
In ANIMATION SHOP
Right click the workspace and select
'Paste As New Animation' from the options.
Back to PSP.
Open & Activate layer AS2
Close layer AS1
Right click on the Title Bar and select COPY from the options.
|
STEP 23
In ANIMATION SHOP
Right click top of frame image and select
'Paste After Current Frame' from the options.
Continue with these step until all 5 layers are
pasted into ANIMATION SHOP.
I left my speed setting on 10 (default).
|
STEP 24
View >> Animation
and while it is still running,
File >> Save As
Locate the folder in which you wish to save it.
Name your animation.
With the Gif Optimiser keep pressing NEXT
until you get to the last one... click FINISH
Close the Animation
Close the frames.
Close Animation Shop |
|
I hope you have enjoyed the tutorial.
Rebba |
|