STEP 1
Open a new image 400 x 400
Transparent background
PSPX - X2: Colour Depth = 8bits/channel
PSPX3: Colour Depth RGB = 8bits/channel
In the Materials Palette
make the background WHITE
and foreground BLUE #282b98
Flood fill with BLUE #282b98
In the Materials Palette
make the foreground closed. (NULL)

|
STEP 2
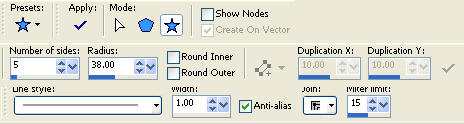
Select Preset Shapes Tool
choose the Star shape
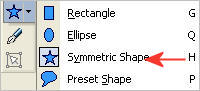
with these settings.
|
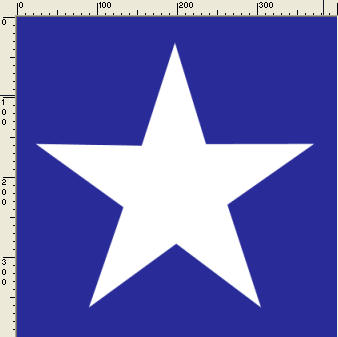
STEP 3
Draw out a star
Starting at 30 pixels down & 30 pixels across..
drag to 365 pixels down & 365 pixels across.
In your Layer Palette
Right click on this layer and select
"Convert to Raster Layer "
from the options
|
|
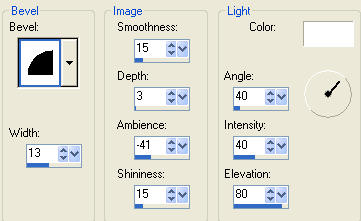
STEP 4
EFFECTS >> 3D EFFECTS >> INNER BEVEL
with these settings |
|
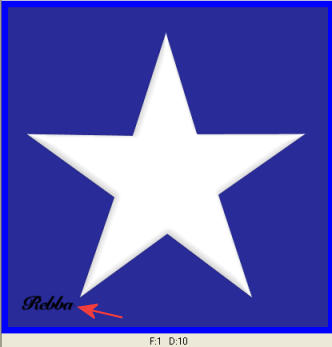
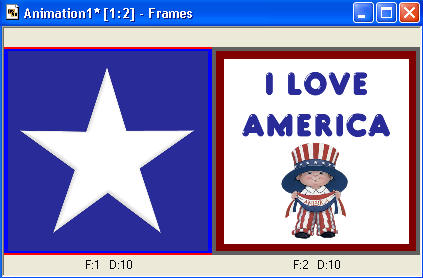
This will be the star image.
We will be working on 2 different images.
|
|
STEP 5
Open a new image 400 x 400
Transparent background
PSPX - X2: Colour Depth = 8bits/channel
PSPX3: Colour Depth RGB = 8bits/channel
Flood fill with with WHITE.
SELECTIONS >> SELECT ALL
SELECTIONS > MODIFY >CONTRACT = 15
SELECTIONS >>> INVERT
LAYERS >> NEW RASTER LAYER
Flood fill with #800000
DESELECT
This will be the background image.
|
|
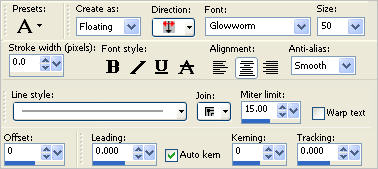
STEP 6
Select your TEXT TOOL
Use the Glowworm font
and enter
I LOVE AMERICA
in the text box
Click APPLY
Selections >>
Select None
|
|
STEP 7
Open the America Boy tube
Right click on the Title Bar and select COPY from the options.
Right click on the Title Bar of your 'working' image and select
PASTE AS NEW LAYER from the options.
IMAGE >>> RESIZE = 35%
Ensure "Resize all layers" is UNCHECKED
Resample using WEIGHTED AVERAGE
ADJUST >>> SHARPNESS >>> SHARPEN
Arrange like this.
|
|
STEP 8
Right click on Title Bar of the background image and select
Copy merged from the options
In ANIMATION SHOP
Right click the workspace and select
'Paste As New Animation' from the options.
Back to PSP
|
STEP 9
Right click on Title Bar of the star image and select
Copy merged from the options
In ANIMATION SHOP
Right click top of frame image and select
'Paste Before Current Frame' from the options.
Your frame should now look like this.
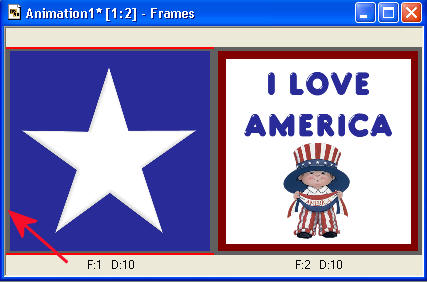
Click on the grey frame around the star frame to highlight it
as shown below.
|
On MENU
Click EFFECTS
Select
"Insert Image Transition"
from the options.
. This will open a new box.
Click the dropdown arrow and find the twist setting.
Then set it up like this
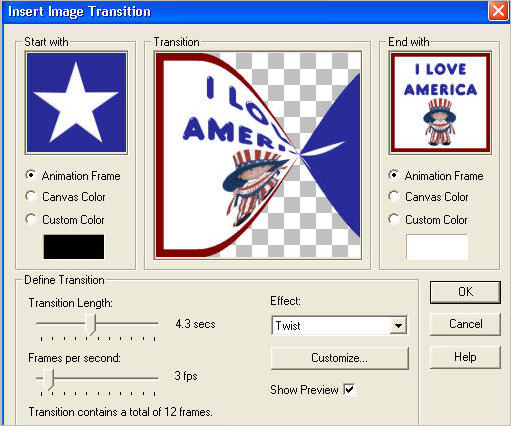
click OK.
|
STEP 11
Still in ANIMATION SHOP.
On MENU
Edit >> Select All
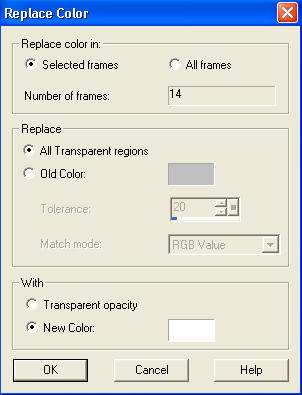
On MENU
Animation >> Replace Color
Use these settings.
This will give you a white background
in the transparent spots.
|
|
STEP 12
This will have preset frame properties
speed to make it work, but we dowant to change the last frame.
Scroll arrow on bottom to the right and
click the gray area around frame 14
to select it.
Right click on top of frames
Select 'Frame Properties' from the options
Display time =100
|
|
STEP 13
View >>Animation
or
click the icon
to view the animation.
Close the animation
|
|
STEP 14
We need to add our name to this, because we are using 2 images we would
have trouble getting them to be in the same spot on each image.
So we will do it a easier way.
Back to PSP.
When we finsh with this extra layer, delete it before saving as a PSP image.
On one of the images
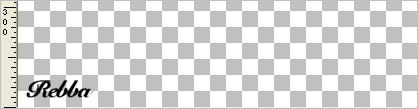
LAYERS >> NEW RASTER LAYER
and type your name on it.
Move it to the bottom left corner with your Mover Tool
Activate your name layer and close all other layers.
 Right click on the Title Bar and select Copy from the options.
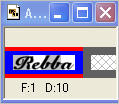
In ANIMATION SHOP
Right click on the Title Bar and select Copy from the options.
In ANIMATION SHOP
Right click the workspace and select
'Paste As New Animation' from the options.
So on the NAME animation
EDIT >> COPY
|
STEP 15
Still on the NAME animation
On MENU
Edit >> Propogate Paste
On the animation frames image
Edit >> Select all
Edit >> Paste into Selected Frame.
Your name will be attached to the arrow, move the name where you want it in the first frame and click.
This will apply the name into all the frames.
|
|
STEP 16
View >> Animation
and while it is still running,
File >> Save As
Name your animation.
With the Gif Optimiser keep pressing NEXT
until you get to the last one... click FINISH
Close the Animation
Close the frames.
Close Animation Shop
|
I hope you have enjoyed the tutorial.
Rebba
|
| |