|
|
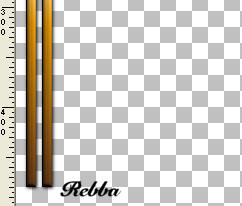
STEP 1
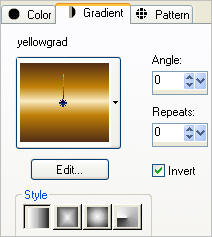
In your MATERIALS PALETTE
Load the BROWN ' #543015 ' color
in your foreground
Load the ' yellowgrad ' gradient
in your background
using these settings
|
 .  |
STEP 2
Open a new image 500 x 500
Transparent background
PSPX - X2: Colour Depth = 8bits/channel
PSPX3: Colour Depth RGB = 8bits/channel
Flood fill with BROWN
LAYERS >> NEW RASTER LAYER
Flood fill with the gradient
|
STEP 3
LAYERS >> Load/Save Mask >> Load Mask from disk
Locate the
hjr_mask_texture25 mask
Use these settings
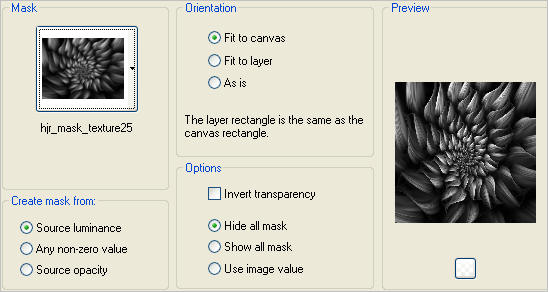
Click LOAD
|
STEP 4
LAYERS >>> MERGE >>> MERGE GROUP
EFFECTS >> EDGE EFFECTS >> ENHANCE
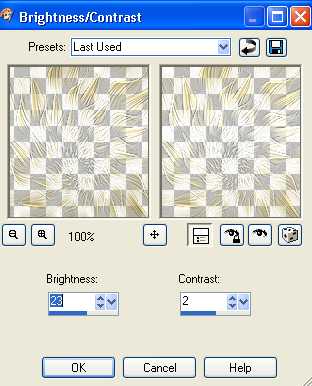
ADJUST >> Brightness and Contrast >> Brightness/Contrast
Use these settings
|
|
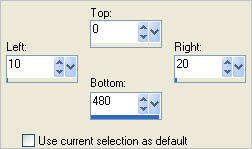
STEP 5
LAYERS >> NEW RASTER LAYER
Choose your SELECTION TOOL then click on the CUSTOM SELECTION symbol
and enter these coordinates.
Flood fill with the gradient
|
.  . .  |
STEP 6
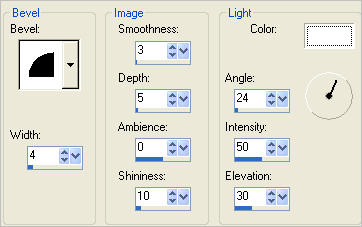
EFFECTS >> 3D EFFECTS >> INNER BEVEL
using these settings
|
|
STEP 7
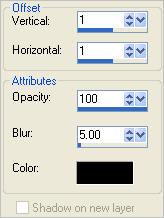
Effects >> 3D Effects >> Drop Shadow
using these settings.
DESELECT
|
|
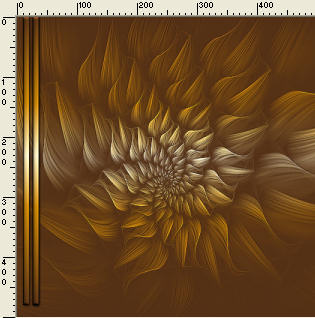
STEP 8
LAYERS >> DUPLICATE
Move to the left of the original
|
|
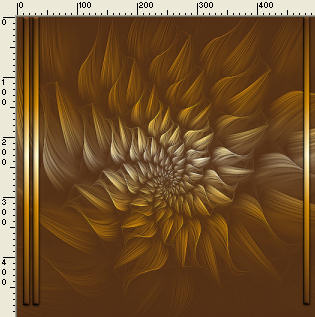
STEP 9
LAYERS >> DUPLICATE
Move to the extreme right |
|
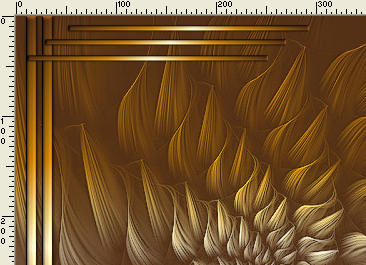
STEP 10
LAYERS >> DUPLICATE
IMAGE >> RESIZE = 50%
Ensure "Resize all layers" is UNCHECKED
IMAGE >> ROTATE >> FREE ROTATE = LEFT 90
Ensure "All layers" is UNCHECKED
PSPX - PSPX3:
IMAGE >> FREE ROTATE = LEFT 90
Ensure "All layers" is UNCHECKED
Duplicate this layer twice
and place as shown
|
|
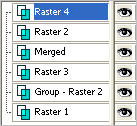
STEP 11
Close the bottom 2 layers
LAYERS >>> MERGE >> VISIBLE |
|
STEP 12
LAYERS >> NEW RASTER LAYER
Select your TEXT TOOL
with font and settings of your choice
add your name to the bottom left corner of the layer.
Rename this layer Name.
|
|
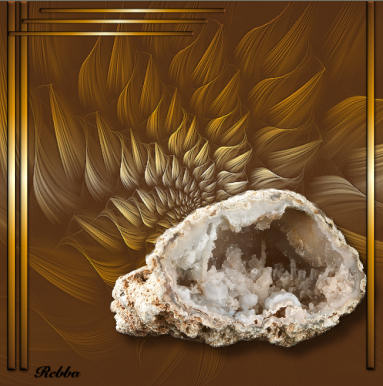
STEP 13
Open all layers
ACTIVATE
Group - Raster 2
Open up the rock image
in your PSP workspace
Right click on the Title Bar
and select COPY from the options.
Right click on the Title Bar
of your 'working' image and select
PASTE AS NEW LAYER from the options.
Position as shown with your Mover Tool
|
|
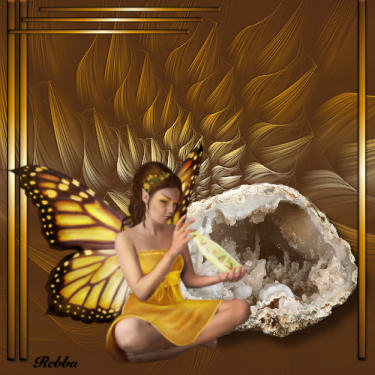
STEP 14
ACTIVATE RASTER 2
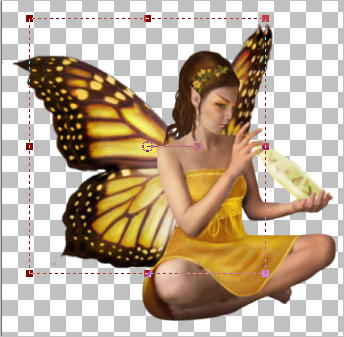
Open up the fairy image in your PSP workspace
Right click on the Title Bar and select COPY from the options.
Right click on the Title Bar of your 'working' image and select
PASTE AS NEW LAYER from the options.
IMAGE >> RESIZE = 95%
Ensure "Resize all layers" is UNCHECKED
Position as shown with your Mover Tool
|
|
STEP 15
Rename the layers in your layer palette |
 . to . 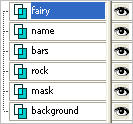 |
STEP 16
Rearrange the layers as shown
Activate the fairy layer
Close all other layers
|
|
Note: Many times the tube of an animation will be used without having to do many thing to it.
For that reason and because it is very easy to cut parts and change them and lose the main
image in the process.
I always name one layer of my tube Master and I leave it off if not using.
I also save it as part of my PSP file so it is always there.
|
STEP 17
Select your Freehand Selection Tool
(Lasso)
Selection Type = Point to Point
Mode = Replace
Feather = 0
Antialias = Checked
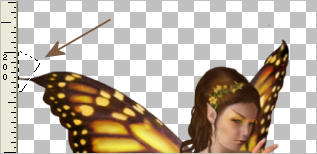
Select and remove the little curl on the tip of the wing.
Hit your Delete Key
DESELECT
|
|
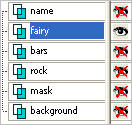
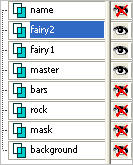
STEP 18
Duplicate the fairy layer twice
Rename the fairy layer = master
Rename the Copy of fairy layer = fairy1
Rename the Copy (2) of fairy layer = fairy2
|
|
Close all layers except fairy1.
Select your Freehand Selection Tool
(Lasso)
Selection Type = Point to Point
Mode = Add (Shift)
Feather = 0
Antialias = Checked
|
|
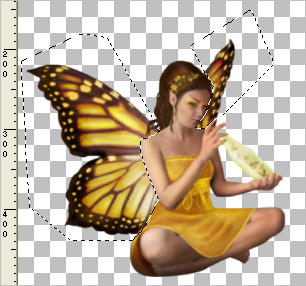
Zoom in if needed to section off one of the wings, then while depressing your SHIFT key, section off the second wing getting close to face and around arm as shown. |
|
STEP 21
Selections >> Promote selection to layer
DO NOT DESELECT
Rearrange layers as shown
.
|
|
STEP 22
ACTIVATE the fairy1 layer
Hit the DELETE key.
Close fairy1
ACTIVATE fairy2
Hit the DELETE key.
SELECTIONS >> SELECT NONE
|
Note: When you cut around images you may need to do clean up around the images.
|
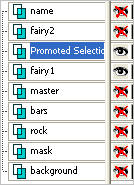
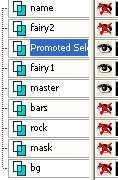
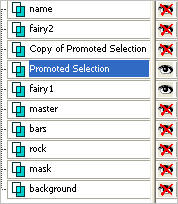
Set up layers as shown with the
Promoted Selection ACTIVE
|
|
|
STEP 24
Select the Deform Tool
PSPX-X3:Select your PICK tool
Use the SCALE (default) setting
Drag the centre left node about 10 pixels
to the right
Drag the centre right node about 10 pixels
to the left
Click the RESET RECTANGLE arrow
With the master layer on you can tell how much it is being moved.
|
|
STEP 25
Duplicate the Promoted Selection layer
.
Close the master layer
Close the Copy of Promoted Selection
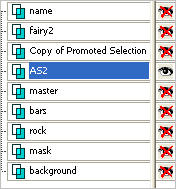
ACTIVATE the Promoted Selection layer
LAYERS >>> MERGE >> VISIBLE.
Rename the Merged layer AS2.
|
 .  |
STEP 26
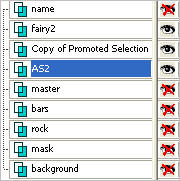
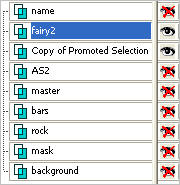
Open fairy2
Open and Activate the
Copy of Promoted Selection
Close all other layers.
|
|
STEP 27
Select the Deform Tool
PSPX-X3:Select your PICK tool
Same settings
Drag the centre left node about 10 pixels
to the right
Drag the centre right node about 10 pixels
to the left
Click the RESET RECTANGLE arrow
Close AS2
|
STEP 28
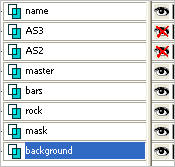
LAYERS >>> MERGE >> VISIBLE.
Rename the Merged layer AS3.
Activate the background
Open all layers except AS2 and AS3.
|
 .  |
STEP 29
Right click on Title Bar and select
Copy merged from the options
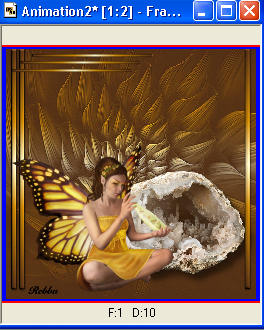
In ANIMATION SHOP
Right click the workspace and select
'Paste As New Animation' from the options.
Back to PSP..
|
|
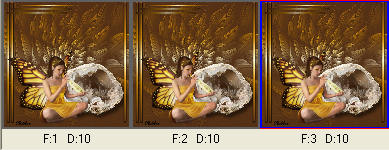
STEP 30
Close the master layer
Open AS2
Right click on Title Bar and select
Copy merged from the options
In ANIMATION SHOP
Right click top of frame image and select
'Paste After Current Frame' from the options.
Back to PSP.
|
|
STEP 31
Close AS2
Open AS3
Right click on Title Bar and select
Copy merged from the options
In ANIMATION SHOP
Right click top of frame image and select
'Paste After Current Frame' from the options.
|
|
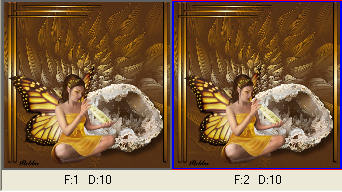
STEP 32
In ANIMATION SHOP
Edit >> Select All
View >> Animation
I left my speed on 10.
While animation is running
File >> Save As
Name your animation.
With the Gif Optimiser keep pressing NEXT
until you get to the last option... click FINISH
Close the Animation
Close the frames.
Close Animation Shop
|
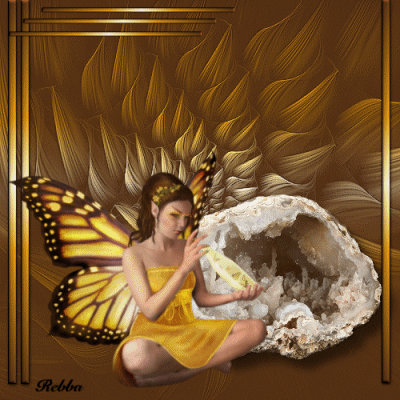
I hope you enjoyed the tutorial.
|