This tutorial was written by Rebba to be shared with the Artistry Master Group.
OCTOBER 2011
I have created the animation to have fun with but also to teach perhaps a
different way of doing it, I call My Way. I'm not a tutorial writer so this is more in
steps and doesn't expound on the design or PSP part of the tutorial. If you have any
To explain.... if you haven't done a slide puzzle before.
They are raised up plastic squares that come all mixed up.
It has a blank space where you move your first piece to
and you now have a blank where you moved the piece from.
Keep moving them until your picture is a whole picture.
|
STEP 1
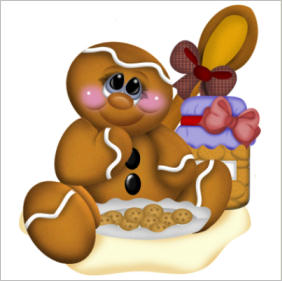
Open up the gingerspice001.pspimage image in your PSP workspace and minimize.
Open a new image 400 x 400
Transparent background
PSPX - X2: Colour Depth = 8bits/channel
PSPX3: Colour Depth RGB = 8bits/channel
|
STEP 2
In your MATERIALS PALETTE
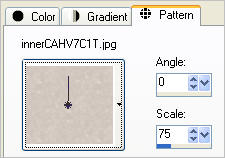
Load the ' innerCAHV7C1T.jpg ' pattern
in your foreground
using these settings --->>
Load WHITE #ffffff in your background
Flood fill with foreground pattern
Rename this layer
beige bgd
LAYERS >> NEW RASTER LAYER
Flood fill with WHITE
Rename this layer master
|
|
STEP 3
Maximize the gingerspice001.psp tube
Right click on the Title Bar and select
COPY from the options.
Right click on the Title Bar of your 'working' image
and select PASTE AS NEW LAYER
from the options.
IMAGE >> RESIZE = 95%
Ensure "Resize all layers" is UNCHECKED
|
|
STEP 4
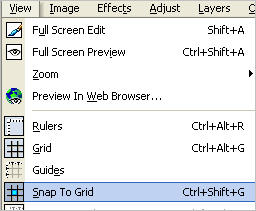
VIEW >>> RULERS
VIEW >>> GRID
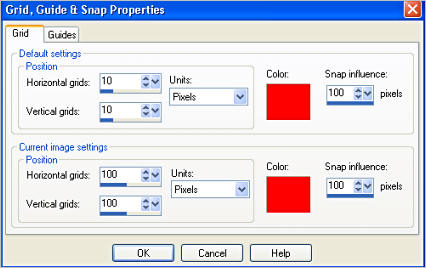
VIEW >>> CHANGE GRID, GUIDE & SNAP PROPERTIES
|
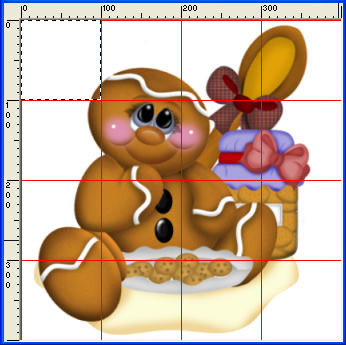
STEP 5
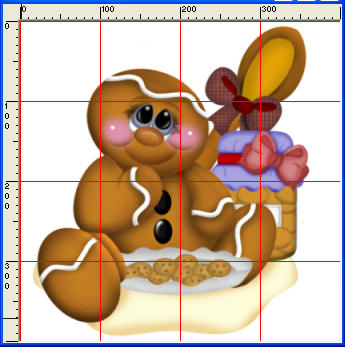
Move tube a little to left so there is some of the picture in each square
|
STEP 6
VIEW >> SNAP TO GRID
NOTE: once you set the grid and snap to grid don't
turn them off until it says to or your puzzle pieces
won't stay in place correctly.
LAYERS >> MERGE >> MERGE DOWN
|
|
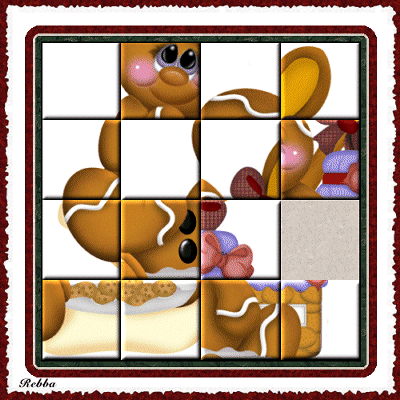
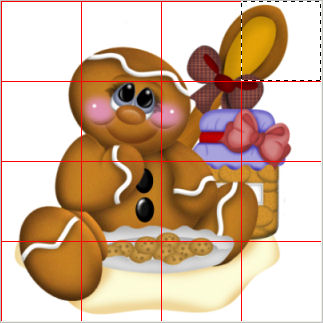
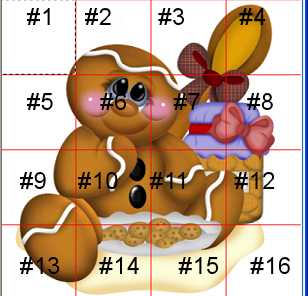
NOTE:the puzzle will be numbered from left to right top row 1-4
then left to right second row 5-8 then left to right third row 9-12
then left to right bottom row 13-16
|
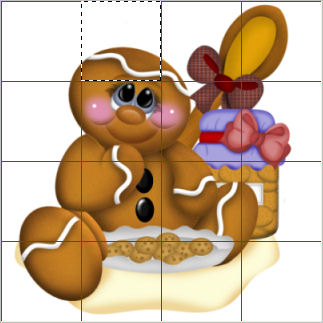
STEP 7
Choose your SELECTION TOOL
Selection Type = Rectangle
Mode = Replace
Feather = 0
Antialias = Checked
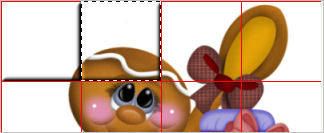
Starting at 0 pixels across and 0 pixels down
drag your cursor to 100 pixels across
and 100 pixels down
and release.
It will snap into place.
In your LAYER PALETTE
Right click on master layer
and select
Promote Selection to Layer
Activate the Promoted Selection layer
Rename this layer #1
|
|
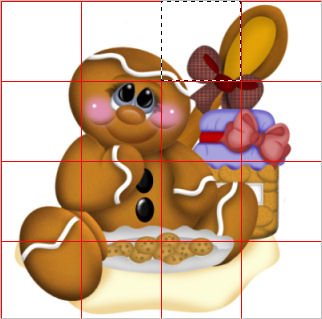
STEP 8
Activate master layer
Hover your mouse over the selection
(marching ants) when
you see
the + (Mover Tool cursor)
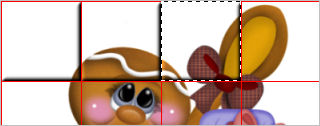
RIGHT click mouse and drag the selection over
to square #2 when it's in place release mouse.
In your LAYER PALETTE
Right click on master layer
and select
Promote Selection to Layer
Activate the Promoted Selection layer
Rename this layer #2 |
|
STEP 9
Activate master layer
Hover your mouse over the selection
(marching ant) when you see the +
RIGHT click mouse and drag the selection over
to square #3 when it's in place release mouse.
In your LAYER PALETTE
Right click on master layer
and select
Promote Selection to Layer
Activate the Promoted Selection layer
Rename this layer #3 |
|
STEP 10
Activate master layer
Hover your mouse over the selection
(marching ant) when you see the +
RIGHT click mouse and drag the selection over
to square #4 when it's in place release mouse.
In your LAYER PALETTE
Right click on master layer
and select
Promote Selection to Layer
Activate the Promoted Selection layer
Rename this layer #4 |
|
STEP 11
Activate master layer
Continue to do the same thing
until you have fifteen separate layers
#1 to #15
and the master.layer
#16 will be the beige bgd layer
Always activate the master layer
before promoting
or you will have a blank layer.
DON'T DESELECT
|
|
STEP 12
Activate master layer
Hover your mouse over the selection
(marching ant) when you see the +
RIGHT click mouse and drag the selection over
to square #16 when it's in place release mouse.
Hit your Delete key
DO NOT DESELECT
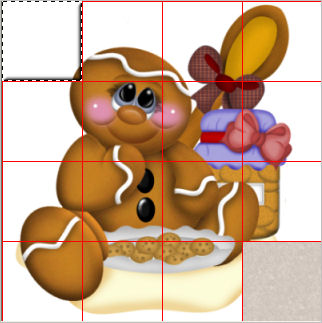
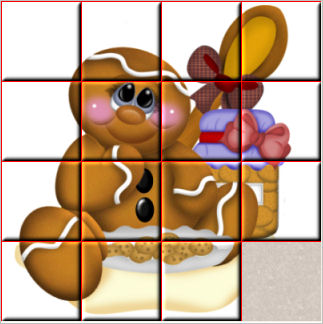
You should have this --->>>
The beige bgd space # 16
is now your new blank space |
|
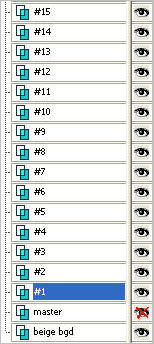
STEP 13
You have 15 selections layers and the master
(with a piece missing)
Set up LAYER PALETTE as shown
SELECTIONS >>> SELECT NONE
|
|
STEP 14
With layer #1 active
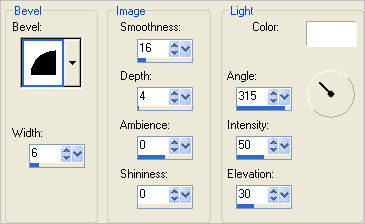
EFFECTS >> 3D EFFECTS >> INNER BEVEL
|
STEP 15
Activate layer #2
EDIT
>> Repeat Inner Bevel
|
|
STEP 16
Activate layer #3
EDIT
>> Repeat Inner Bevel |
|
STEP 17
Continue in this manner until all 15 squares have an inner bevel
DESELECT
When completed you should have this.
|
| |
|
| |