STEP 1
Open a new image 500x500 transparent.
Transparent background
PSPX - X2: Colour Depth = 8bits/channel
PSPX3: Colour Depth RGB = 8bits/channel
Add a background of choice.
In your Layer Palette
Rename this layer 'background'
This is your 'working' image
|
STEP 2
Note: when doing animations it is very important not to move the image,
so we will leave this tube centered.
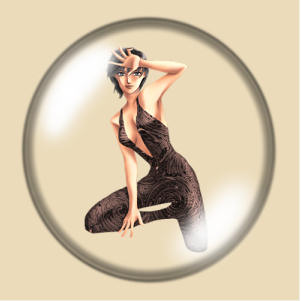
Open the Hase05_AS tube
Right click on the Title Bar
and select COPY from the options.
Right click on the Title Bar of your 'working' image and select
PASTE AS NEW LAYER
from the options.
Rename this layer AS1.
Right click on this layer and select
'Duplicate' from the options
Rename the duplicated layer AS2.
|
|
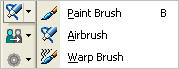
Note: we will be using the warp brush tool.
This tool can make a peaceful stream or a dam burst.
Know that it takes very little movement to have an animation. So less is more in this case.
Move about 1 or 2 pixels, if you pull it out into a point just push it back in.
There is no correct size tip to use, you will need to find that will work for each animation.
Always remember when applying the brush that you will get the strongest movement in the
center of the brush. The further away from center the weaker the movement.
|
STEP 3
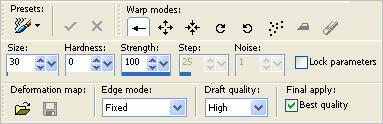
Select your WARP Brush
use these settings to start.
Select
the arrow pointing left.
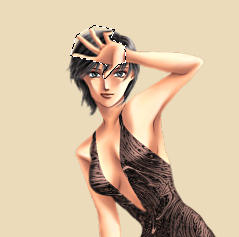
Note: Our goal here is to move her body a little to make it look like she is wanting to get out.
We will not use the warp on the face area because it will distort it.
|
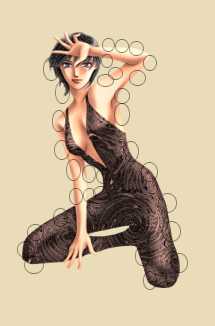
I have added circles around the frame to show where we will move.
When you take an area like an arm,
go down the one side,
push in direction you want it to move.
In this case most will be moving to the left.
When you have moved one side to the left you will see her arm has become bigger,
that's when we go to the other side of the arm
and move it in about the same amount
to make it is the right size arm again.
|
|
STEP 4
Close AS1
We will work on AS2 only,
so activate this layer.
We will start with the hair,
pull it out to the left in a couple of places.
On the right side of her head move to the left just a tad, if you see any movement it's enough.
In the Layer Palette open AS1
and click AS2 off
and on
to see the movement.
If it is too much
Edit >> Undo and do again.
I check my movement after each time,
by clicking the AS1 layer on and off,
so I don't have to scrap the complete thing.
|
Note: Please don't get discouraged at this point, take a break and come back. This is a
powerful tool and you will make many animations with it.
|
STEP 5
Close AS1
Activate AS2
don't do the neck area,
work down her left shoulder and arm to the leg.
Now do the inside of the arm.
We want move any overlapping parts
like the arm in front of leg.
Check the movement in the layer palette again,
by clicking the AS1 layer on and off.
I know you have her left side moving.
Close AS1
Activate AS2,
on her leg area we want to Pull It UP,
and the knee part to the left.
|
STEP 6
Push the bottom part of the leg UP,
you can move the fingers Up carefully
don't shorten them too much.
Move the inside of her ankle Up,
we won't move the inside of the leg
because it's to close.
Move to other leg and push it to the left
and the knee area UP.
Check the animation in the layer palette
by clicking the AS1 layer on and off.
|
STEP 7
With AS2 active,
work your way up the right side of the image
moving to the left.
If you see it indented pull it back out so the leg is smooth, also do the pushing close together,
don't leave a big gap between the brush movements..
When you move the waist area in go to the other
side and move to keep body the right size.
Check the movement in the layer palette
by clicking the AS1 layer on and off.
|
STEP 8
With AS2 still active,
continue until you are at the under arm.
Now move the brush to the top of her
shoulder, this is very close to face.
Make sure most of the brush circle is on the arm
and not the face.
Work carefully to the elbow, do both sides.
Check the movement in the layer palette
by clicking the AS1 layer on and off.
|
STEP 9
With AS2 still active,
move the top of the arm UP
and move the bottom of the arm UP
to make the size right.
We need to get the rest of her body moving now,
so choose your
Freehand Tool
Selection Type = Point to Point
Mode = Replace
Feather = 0
Antialias = Checked
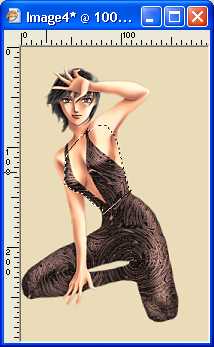
Carefully select the hand around the fingers to the wrist, this doesn't have to be perfect, zoom in if needed.
Effects >> Distortion Effects >> Punch
STRENGTH = 30
Click OK.
DESELECT
|
|
STEP 10
Using the freehand tool
same setting draw around her chest as shown.
|
|
STEP 11
Effects >> Distortion Effects >> Punch
STRENGTH = 15
Click OK.
We are finished with the animation,
check it in the layer palette.
On AS2 if you see it not smooth any place,
use the warp brush to do any corrections now.
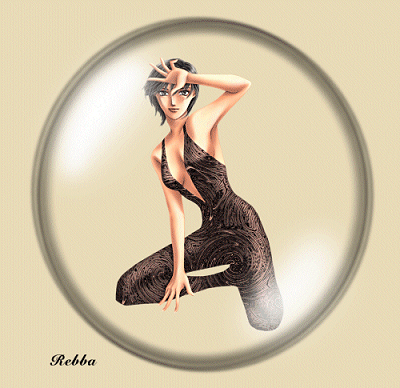
At this time you can add the globe
or finish how you want to.
Open the LG GLOBE.pspimage image
Right click on the Title Bar and select
COPY from the options.
Right click on the Title Bar of your 'working' image and select
PASTE AS NEW LAYER from the options.
add a newraster layer now,
and add your name.
|
|
STEP 12
LAYERS >> NEW RASTER LAYER
Select your TEXT TOOL
with font and settings of your choice
add your name to the bottom left corner of the layer.
Rename this layer Name.
|
|
STEP 13
Open all layers except AS2,
highlight your background layer.
Right click on Title Bar and select
Copy merged from the options
In ANIMATION SHOP
Right click the workspace and select
'Paste As New Animation' from the options.
Back to PSP.
Close AS1
Open AS2
Right click on Title Bar and select
Copy merged from the options
In ANIMATION SHOP
Right click top of frame image and select
'Paste After Current Frame' from the options.
Edit >> Select All
Right click on top of frames
Select 'Frame Properties' from the options
Display time = 50
|
STEP 14
Check the animation,
While the animation is running
Save your completed animation
File >> Save As
Find folder to save to.
Name your animation.
With the Gif Optimiser keep pressing NEXT
until you get to the last one... click FINISH
Close the Animation
Close the frames.
Close Animation Shop
|
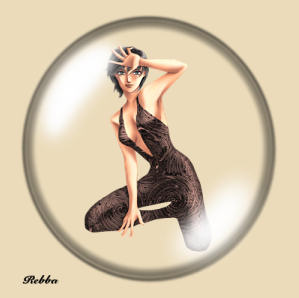
I hope you enjoyed this tutorial and have learned from it.
Rebba
|
| |