There will also be NOTES added to the tut and this is to explain something that I had
trouble with. I hope this will save you from having the same problem.
The tubes used are not mine and the copyright belongs to the artist. Noinfringement intended.
STEP 1
Open a new image 600 x 600
Transparent background
PSPX - X2: Colour Depth = 8bits/channel
PSPX3: Colour Depth RGB = 8bits/channel
Rename this layer bgd
Open up the downloaded images in your PSP workspace and minimize.
.
|
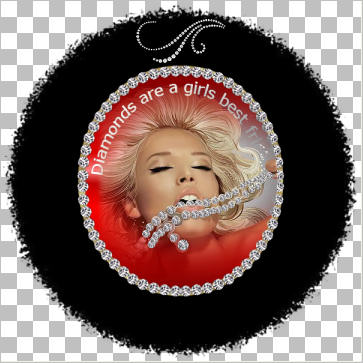
STEP 2
Open red circle tube in your PSP workspace
Right click on the Title Bar
and select COPY from the options.
Right click on the Title Bar
of your 'working' image and select PASTE AS NEW LAYER
from the options.
Rename this layer red circle
CLOSE the ORIGINAL red circle tube
.
|
STEP 3
Open gold ring tube in your PSP workspace
Right click on the Title Bar
and select COPY from the options.
Right click on the Title Bar
of your 'working' image
and select PASTE AS NEW LAYER
from the options.
Rename this layer gold ring
CLOSE the ORIGINAL gold ring tube
.
|
STEP 4
Open circle text tube in your PSP workspace
ACTIVATE THE TEXT LAYER
Right click on the Title Bar
and select COPY from the options.
Right click on the Title Bar
of your 'working' image and select
PASTE AS NEW LAYER
from the options.
Rename this layer text
CLOSE the ORIGINAL circle text
PLACE THE TEXT AS SHOWN
|
|
STEP 5
Open diamond circle tube in your PSP workspace
Right click on the Title Bar
and select COPY from the options.
Right click on the Title Bar
of your 'working' image and select
PASTE AS NEW LAYER
from the options.
ADJUST >> SHARPNESS >> SHARPEN MORE
Rename this layer diamond circle
CLOSE THE ORIGINAL TUBE
|
|
STEP 6
Open lady psp tube in your PSP workspace
Right click on the Title Bar
and select COPY from the options.
Right click on the Title Bar
of your 'working' image and select
PASTE AS NEW LAYER
from the options.
Rename this layer tube
ADJUST >> SHARPNESS >> SHARPEN
CLOSE THE ORIGINAL LADY TUBE
MOVE TUBE SLIGHTLY TO THE RIGHT
TO LOOK BETTER
|
|
STEP 7
ACTIVATE BACKGROUND LAYER
Flood Fill with BLACK
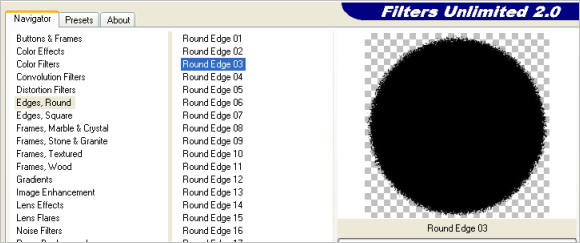
EFFECTS >> PLUGINS >> <I.C.NET Software> >>
Filters Unlimited 2.0 >> Edges, Round >> Round Edge 03

|
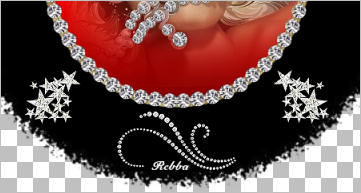
STEP 8
ACTIVATE the tube layer
Open diamantkrul.psp tube in your PSP workspace
Right click on the Title Bar
and select COPY from the options.
Right click on the Title Bar
of your 'working' image and select
PASTE AS NEW LAYER
from the options.
Rename this layer trim1
CLOSE the ORIGINAL diamantkrul image
With your Mover Tool
reposition to top center
|
|
STEP 9
LAYERS >> DUPLICATE
IMAGE >>> FLIP
LAYERS >> DUPLICATE
IMAGE >> ROTATE >> FREE ROTATE = RIGHT 90
Ensure "All layers" is UNCHECKED
MOVE TO CENTER RIGHT
LAYERS >> DUPLICATE
IMAGE >>> MIRROR
CLOSE ALL LAYERS EXCEPT trims
and duplicated trims layers
LAYERS >>> MERGE >> VISIBLE
Rename this layer trim1
|
|
STEP 10
OPEN ALL LAYERS
With the trim1 layer active
Open sterretjets-jean.psp tube
in your PSP workspace
Right click on the Title Bar
and select COPY from the options.
Right click on the Title Bar of your 'working' image
and select PASTE AS NEW LAYER
from the options.
Rename this layer trim2
With your Mover Tool
reposition as shown
|
|
STEP 11
LAYERS >> DUPLICATE
IMAGE >>> MIRROR
LAYERS >> DUPLICATE IMAGE >>> FLIP
LAYERS >> DUPLICATE IMAGE >>> MIRROR
PLACEMENT AS SHOWN
CLOSE ALL LAYERS EXCEPT trim2
and duplicated trims2 layers
LAYERS >>> MERGE >> VISIBLE
Rename this layer trim2
OPEN ALL LAYERS
|
|
STEP 12
THERE IS AN EXTRA TRIM SUPPLIED
IF YOU WANT TO USE IT
With trim2 layer active
LAYERS >> NEW RASTER LAYER
Select your TEXT TOOL
with font and settings of your choice
add your name to the bottom of the image.
Rename this layer Name.
PSPX3.. click the "A" tool
then before clicking on the work
hold down the shift key and then click,
it will bring up the entry box as other versions do
|
|
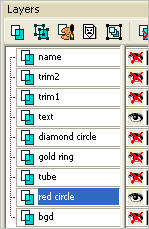
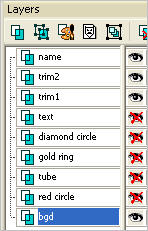
STEP 13
SET LAYER PALETTE UP AS SHOWN
|
|
STEP 14
Right click on Title Bar and select
Copy merged from the options
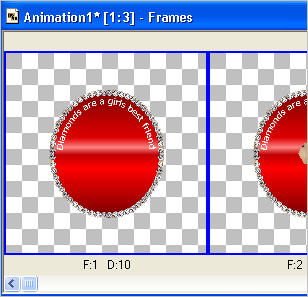
In ANIMATION SHOP
Right click the workspace and select
'Paste As New Animation' from the options.
Back to PSP.
CLOSE the text layer
OPEN the tube layer
Right click on Title Bar and select
Copy merged from the options
In ANIMATION SHOP
Right click top of frame image and select
'Paste After Current Frame' from the options.
|
STEP 15
In ANIMATION SHOP
Select the gray edge around frame 1 (F:1)
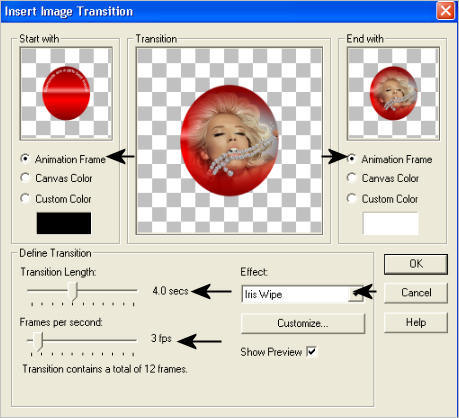
EFFECTS>>INSERT IMAGE TRANSITION
USE THESE SETTINGS
Then click the CUSTOMIZE button and use
settings below

CLICK OK
CLICK OK on the 'Insert Image Transition'
THIS TAKES YOU BACK TO WORKSPACE
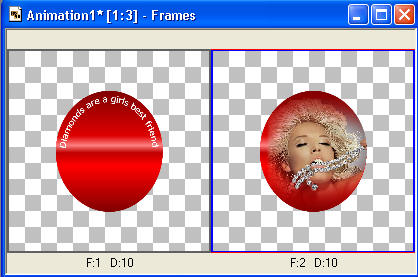
On the frames, select frame 11 (F:11)
depress your SHIFT key
scroll to frame 14 (F:14)
Right click on title bar and select
DELETE
Edit >> Select All
CLICK THE "PROPAGATE PASTE" ICON TO TURN ON
|
STEP 16
Back to PSP.
SET LAYER PALETTE UP AS SHOWN
|
|
STEP 17
Right click on Title Bar and select
Copy merged from the options
In ANIMATION SHOP
Right click the workspace and select
'Paste As New Animation' from the options.
Edit >> Copy
Right click top of frame image and select
'Paste INTO SELECTED FRAME
from the options.
OR
Click "EDIT" on the top Menu
and select
'Paste INTO SELECTED FRAME
from the options.
YOUR IMAGE WILL BE ATTACHED TO THE ARROW
CENTER AROUND CIRCLE
CLICK MOUSE TO PLACE IT
CLOSE the diamond circle frame
|
|
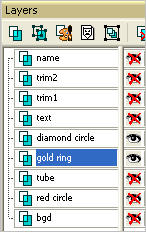
STEP 18
Back to PSP.
SET LAYER PALETTE AS SHOWN
|
|
STEP 19
Right click on Title Bar and select
Copy merged from the options
In ANIMATION SHOP
Right click the workspace and select
'Paste As New Animation' from the options.
WE NEED 10 FRAMES FOR THE
CIRCLE ANIMATION
Edit >> Copy
Edit >> Paste After Current Frame
Edit >> Copy
Edit >> Paste After Current Frame
Repeat this until you have 5 frames
Edit >> Select All
Edit >> Copy
Edit >> Paste After Current Frame
YOU SHOULD NOW HAVE 10 FRAMES
|
STEP 20
ACTIVATE THE RED CIRCLE ANIMATION
Edit >> Select All
Edit >> Copy
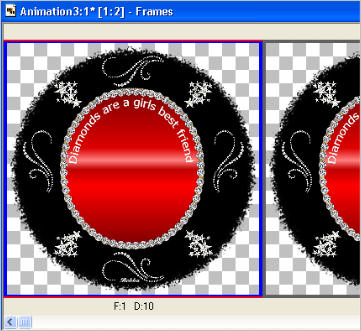
ACTIVATE THE BLACK BACKGROUND FRAMES
Edit >> Paste into selected frame
Your circle will be attached to the arrow
Center the image and click to set placement
|
|
STEP 21
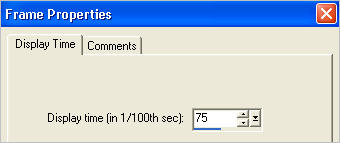
Scroll arrow on bottom of frame to left.
. Select the gray edge around Frame 1 (F:1)
Right click on Title Bar of frames
Select 'Frame Properties' from the options
Display time =75
|
|
STEP 22
Scroll arrow on bottom of frame to right.
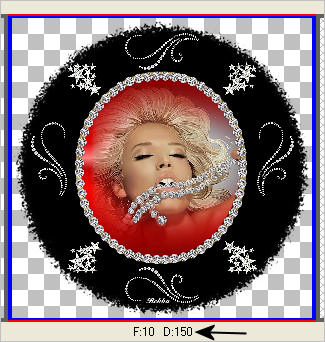
. Select the gray edge around frame 10 (F:10)
Right click on top of frames
Select 'Frame Properties' from the options
Display time = 150 |
|
STEP 23
View >> Animation
and while it is still running,
File >> Save As
Locate the folder in which you wish to save it.
Name your animation.
When first frame open click customize
Click Partial Transparency tab
choose black for your color.

Click OK
With the Gif Optimiser keep pressing NEXT
until you get to the last one... click FINISH
|
STEP 24
If you wish to REZIZE the animation
ACTIVATE the Title Bar of the animation frames
On the MENU
ANIMATION >> Resize Animation
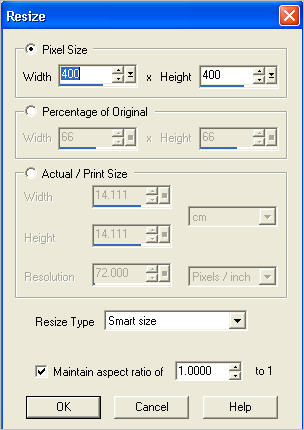
Click OK
Save your animation
|
STEP 25
Close the Animation
Close the frames.
Close Animation Shop
|
| |
I hope you enjoyed the tutorial
Rebba
|
| |