STEP 1
We first have to create the animation.
Open a new image 550 x 550
Transparent background
PSPX - X2: Colour Depth = 8bits/channel
PSPX3: Colour Depth RGB = 8bits/channel
Choose 2 colors that you want to use.
I used BROWN #93803d and YELLOW #faef8f
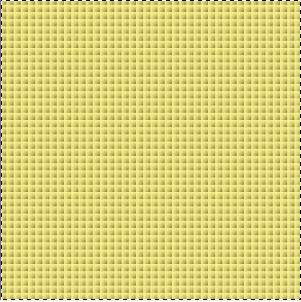
Flood Fill your image with BROWN #93803d
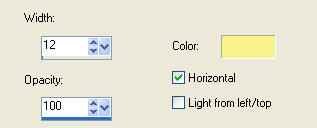
EFFECTS >> TEXTURE EFFECTS >> BLINDS
and use these settings.
COLOR = #f8f18e
ADJUST >> SHARPNESS >> SHARPEN
|
STEP 2
EFFECTS >> TEXTURE EFFECTS >> BLINDS
same settings BUT uncheck horizontal.
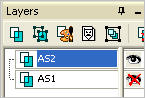
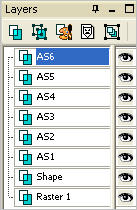
Rename the layer AS1
In your Layer Palette
Right click on this layer and select
'Duplicate' from the options
Rename the duplicated layer AS2
Close AS1
Activate AS2.
|
|
For the purpose of this tutorial I will refer to this image as the animation image.
We will be working back and forth between this image and the shape image.
|
STEP 3
Select the Deform Tool
PSPX-X3:Select your PICK tool
Use these setting

Click the RESET RECTANGLE arrow
We will be using the same setting on all the layers and only changing the Position X and Y,
Click the Mover Tool to release the Deform Tool.
|
STEP 4
Duplicate AS2 and rename AS3
Close AS2
Activate AS3
Select the Deform Tool
PSPX-X3:Select your PICK tool
and change the
Position X and Position Y to 4
Click the RESET RECTANGLE arrow
Click the Mover Tool to release the Deform Tool.
You will see that it moves down 2 pixels
and 2 pixels to the right each time.
|
STEP 5
Duplicate AS3 and rename it AS4
Close AS3
Activate AS4
Select the Deform Tool
PSPX-X3:Select your PICK tool
and change the
Position X and Position Y to 6.
Click the RESET RECTANGLE arrow
|
STEP 6
Duplicate AS4 and rename it AS5
Close AS4
Activate AS5
Select the Deform Tool
PSPX-X3:Select your PICK tool
and change the
Position X and Position Y to 8.
Click the RESET RECTANGLE arrow
|
STEP 7
Duplicate AS5 and rename it AS6
Close AS5
Activate AS6
Select the Deform Tool
PSPX-X3:Select your PICK tool
and change the
Position X and Position Y to 10
Click the RESET RECTANGLE arrow
. Click the Mover Tool to release the
Deform Tool. |
|
STEP 8
Open all layers
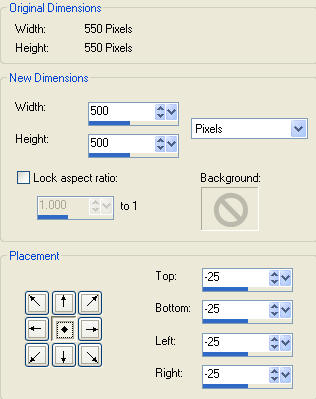
Image >> Canvas Size
Resize to 500 x 500
Placement =
center checked.
|
|
STEP 9
Hold down your CTRL key
and tap down your "A" key once
this will create a selection around the image
(marching ants)
Note: they will be hidden under the canvas at this stage.... until you...
Selections >>
Clip To Canvas
You will see the marching ants now.
Image >> Crop to Selection
|
|
STEP 10
Note: this is a good animation that you can use on many shapes etc.
so save it as a .psp image.
|
STEP 11
We don't want to lose the animation so we will duplicate the image.
WINDOW >> DUPLICATE
Close the original image
Open a new image 500 x 500
Transparent background
PSPX - X2: Colour Depth = 8bits/channel
PSPX3: Colour Depth RGB = 8bits/channel
(This is the 'shape' image)
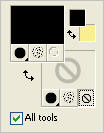
In the Materials Palette
have BLACK in the foreground color and background NULL
|
STEP 12
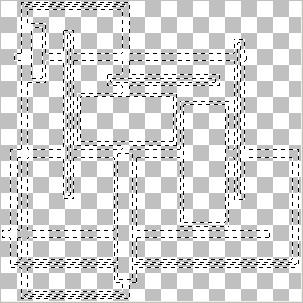
Select Preset Shapes Tool
Locate the shape 8
and use these settings
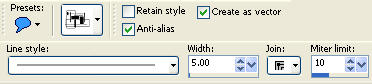 . .
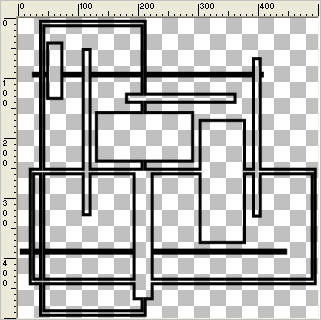
In the new blank 'shape' image
Starting at 5 pixels across and 5 pixels down draw it out to
495 pixels across and 495 pixels down
Click the Mover Tool to release the Preset ShapesTool.
. |
STEP 13
In the Layer Pallette
Right click the Vector layer
Select "Convert to raster layer"
Rename this layer "Shape"
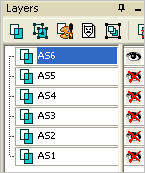
Add 6 new raster layers,
from bottom to top name AS1- AS6.
LAYERS >> NEW RASTER LAYER
Rename this layer AS1
LAYERS >> NEW RASTER LAYER
Rename this layer AS2
LAYERS >> NEW RASTER LAYER
Rename this layer AS3
LAYERS >> NEW RASTER LAYER
Rename this layer AS4
LAYERS >> NEW RASTER LAYER
Rename this layer AS5
LAYERS >> NEW RASTER LAYER
Rename this layer AS6
|
|
STEP 14
Activate the "Shape" layer
Selections >> Select all
Selections >> Float
Selections >> Defloat
Close all layers except AS1
Activate this layer
|
|
STEP 15
On the duplicated animation image
Close all layers except AS1
Activate this layer
Right click on the Title Bar and select
COPY from the options.
On the shape image
Right click on the Title Bar and select
PASTE INTO SELECTION
|
|
STEP 16
DO NOT DESELECT the selection
until
you finished with all layers.
On the animation image
Close AS1,
Open and Activate AS2
Right click on the Title Bar and select
COPY from the options.
On the shape image,
Close AS1,
Open and A ctivate AS2
Right click on the Title Bar and select
PASTE INTO SELECTION
|
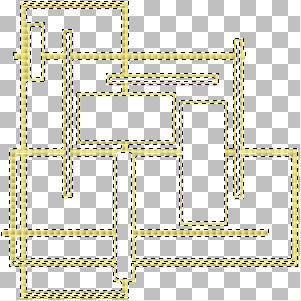
STEP 17
Do this for all 6 layers, make sure you copy the same layer as you paste.
When you have completed all six layers onto the shape layer
DESELECT
Delete the black "Shape" layer
Minimize the animation image
On the "Shape" image
Activate the bottom layer (Raster 1)
Rename background
Flood fill with
#592934
|
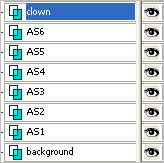
STEP 18
Activate AS6
Now open your chili_CarnevalJoy.psp tube
Right click on the Title Bar and select COPY from the options.
Right click on the Title Bar of your 'shape' image and select
PASTE AS NEW LAYER from the options.
Rename this layer clown
Effects >> 3D Effects >> Drop Shadow
Vertical and Horizontal = 5
Opacity = 50
Blur = 5.00
Color = Black.
|
|
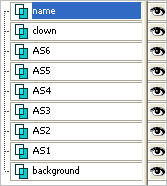
STEP 19
LAYERS >> NEW RASTER LAYER
Select your TEXT TOOL
with font and settings of your choice
add your name to the bottom right corner of the layer.
Rename this layer name
|
|
STEP 20
Activate the background layer
close layers AS2 to AS6
Right click on the Title Bar and select
COPY from the options.
In ANIMATION SHOP
Right click in the work space
and select "Paste As New Animation" from the options.
|
|
STEP 21
Back to PSP,
Close AS1
Open and Activate AS2
Right click on the Title Bar and select COPY from the options.
In ANIMATION SHOP
Right click the title bar of the frame and select
"Paste After Current Frame " from the options |
|
STEP 22
Back to PSP
Continue with these steps
until you have all 6 layers pasted into Animation Shop.
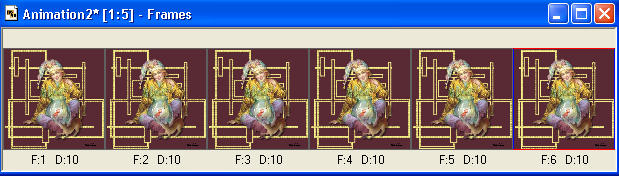
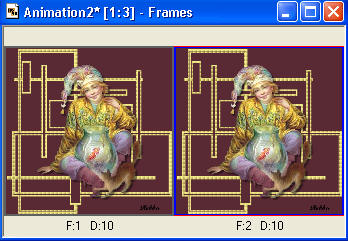
In Animation Shop
EDIT >> Select All
Right click the title bar and select "Frame Properties" from the options
Display time = 1
Note: don't set the speed any different.
I can't explain why this type of image slows down when it is sent through an email but it does.
|
STEP 23
View >> Animation
or check the  to view. to view.
and while it is still running,
File >> Save As
Locate the folder in which you wish to save it.
Name your animation.
With the Gif Optimiser keep pressing NEXT
until you get to the last one... click FINISH
Close the Animation
Close the frames.
Close Animation Shop
|
| |
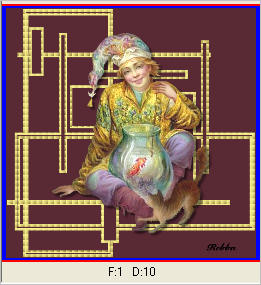
I hope you have enjoyed this animation and will try it on different shapes.
Rebba
|