This tutorial was written by Rebba to be shared with the Artistry Master Group.
Feb, 2011
I have created the animation to have fun with but also to teach perhaps a
different way of doing it, I call My Way. I'm not a tutorial writer so this is more in
steps and doesn't expound on the design or PSP part of the tutorial. If you have any
STEP 1
Open the flower and fruit tube ( Tube2235_Stil_life_misted_20_01__.psd) in your PSP workspace
WINDOW >>> DUPLICATE
Close the original Image
Delete Raster 2
LAYERS >> NEW RASTER LAYER
LAYERS >>> ARRANGE >>> SEND TO BOTTOM
Rename this layer background
|
STEP 2
In your MATERIALS PALETTE
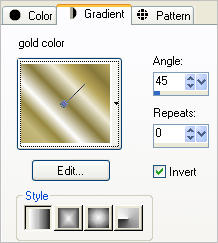
Load the ' gold color ' gradient in your foreground
using these settings
Load the ' #44342a ' in your background
using the settings below.
|
|
| |
|
STEP 3
Flood Fill the background layer with the #44342a color.
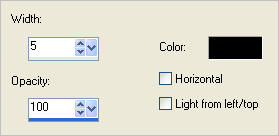
EFFECTS >> TEXTURE EFFECTS >> BLINDS
and use these settings.
|
|
STEP 4
SELECTIONS >> SELECT ALL
SELECTIONS >> MODIFY >>
CONTRACT = 30
SELECTIONS >> INVERT
LAYERS >> NEW RASTER LAYER
LAYERS >>> ARRANGE >>> BRING TO TOP
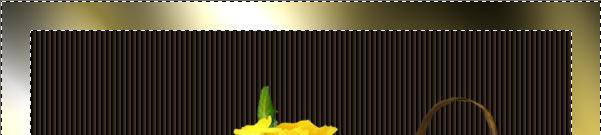
Flood Fill with the gradient.
leave selected.
EFFECTS >> PLUGINS >> Graphic Plus >>
Cross Shadow
use these settings.
|
|
|
STEP 5
DESELECT
LAYERS >> NEW RASTER LAYER
Select your TEXT TOOL
with font and settings of your choice
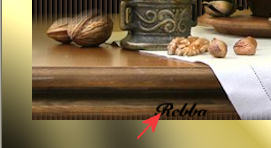
add your name to the bottom left
of the layer inside the frame area..
Rename this layer Name.
|
|
STEP 6
Open up the corner image
in your PSP workspace
Right click on the Title Bar and select
COPY from the options.
Right click on the Title Bar of your working image and select
PASTE AS NEW LAYER from the options.
IMAGE >> RESIZE = 75%
Ensure "Resize all layers" is UNCHECKED
ADJUST >> SHARPNESS >> SHARPEN
With your Mover Tool,
place in the top left corner.
|
|
STEP 7
EFFECTS >> PLUGINS >> SIMPLE >>
TOP LEFT MIRROR
OK. Minimize this image for now. |
|
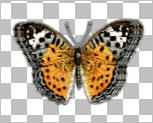
STEP 8
Open up the straight butterfly image
in your PSP workspace
WINDOW >>> DUPLICATE
Close the original Image
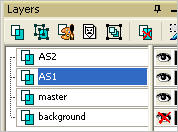
LAYERS >> DUPLICATE (twice)
Rename the layers and set up as shown.
|
|
STEP 9
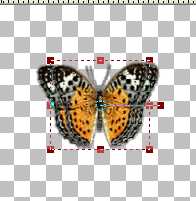
With AS1 layer active
Select the Deform Tool
PSPX-X3:Select your PICK tool
Use default settings
Push in on each side a little by moving the center left and center right nodes inwards.
Click the RESET RECTANGLE arrow
You can see how much is
being moved by looking at the master layer.
It doesn't take much of a move.
|
|
STEP 10
Click the Mover Tool
to deselect the Deform tool (Pick Tool).
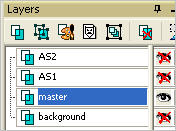
Close the master layer
Open & Activate the AS 2 layer,
Leave AS1 open.
Select the Deform Tool
PSPX-X3:Select your PICK tool
Use defaut setting
Push each side in,
look at the AS1 layer
to see how much.
Click the RESET RECTANGLE arrow
Click the Mover Tool
to deselect the Deform tool (Pick Tool).
|
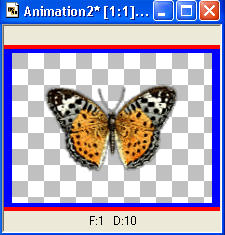
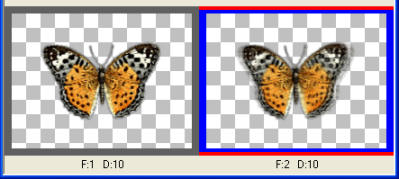
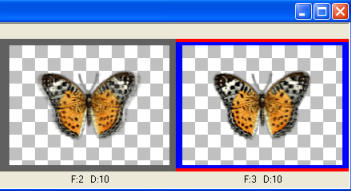
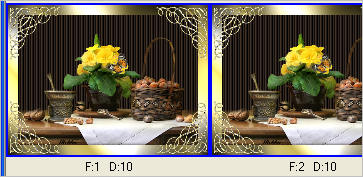
 .  The image on the left is with only the 'master' layer open.
The image on the right is with all layers open
|
STEP 11
Close the AS1layer
Close the AS2 layer
Open & Activate the master layer.
Right click on Title Bar and select
Copy merged from the options
|
|
Note: We just have one image that we are copying so why use copy merge?
Copy merge retains the size of the image,
and we need that space to rotate it in animations.
When you just copy the image it is cropped to remove extra space.
|
STEP 12
In ANIMATION SHOP
Right click the workspace and select
'Paste As New Animation' from the options.
Back to PSP.
|
|
STEP 13
Close the master layer
Open and Activate AS2 layer
Right click on Title Bar and select
Copy merged from the options
In ANIMATION SHOP
Right click top of frame image and select
'Paste After Current Frame' from the options.
Back to PSP
|
|
STEP 14
Close the AS2 layer
Open and Activate AS1layer
Right click on Title Bar and select
Copy merged from the options
In ANIMATION SHOP
Right click top of frame image and select
'Paste After Current Frame' from the options.
|
|
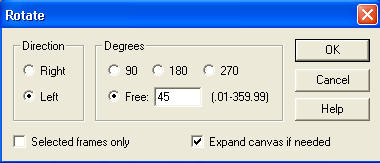
STEP 15
EDIT >> Select All
Animation >> Rotate
use these settings
|
|
|
Note: at this time I would save the butterfly to use on other tutorials.
|
STEP 16
View >> Animation
or click the  to view. to view.
and while it is still running,
File >> Save As
Locate the folder in which you wish to save it.
Name your animation.
on next frame click
Customize
|
 |
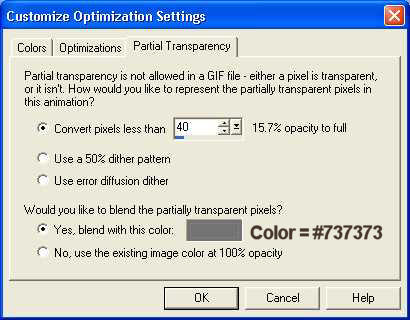
STEP 17
Click on the Partial Transparency Tag
and use these setting.
Click OK
|
|
STEP 18
Keep pressing NEXT
until you get to the last one... click FINISH
Leave the butterfly open in
ANIMATION SHOP
and go back to PSP.
Restore the minimized
flower and fruit image,
with all layers open
Right click on Title Bar and select
Copy merged from the options.
In ANIMATION SHOP
Right click the workspace and select
'Paste As New Animation' from the options.
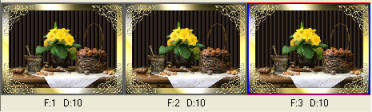
We need 3 frames
so we can insert the butterfly frames.
Edit >> Copy
Edit >> Paste After Current Frame
again,
Edit >> Paste After Current Frame
|
|
STEP 19
Edit >> Select All
and on tool bar click
the Propagate Paste icon.
It will be indented when selected. |
STEP 20
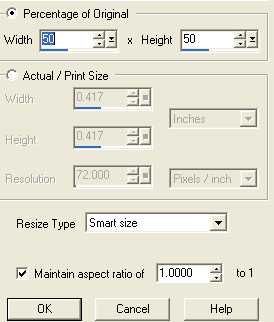
The butterfly needs to be resized
for the image
Activate the butterfly frames
Animation >> Resize Animation
Percentage = 50%.
|
|
STEP 21
If all 3 frames on the butterfly aren't selected,
Edit >> Select All
once they are selected...
Edit >> Copy
Activate the flower and fruit frames
Edit >> Paste into selected frame
The butterfly will be attached to the arrow, move it anywhere you want it and click to place the butterfly.
|
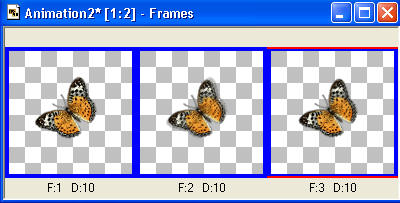
 The butterfly will be in all 3 frames
|
| |
|
STEP 22
View >> Animation
and while it is still running,
File >> Save As
Locate the folder in which you wish to save it.
Name your animation.
With the Gif Optimiser keep pressing NEXT
until you get to the last one... click FINISH
Close the Animation
Close the frames.
Close Animation Shop
|
| |
I hope you enjoyed the tutorial.
Rebba
|