This tutorial was written by Rebba to be shared with the Artistry Master Group.
Feb, 2011
I have created the animation to have fun with but also to teach perhaps a
different way of doing it, I call My Way. I'm not a tutorial writer so this is more in
steps and doesn't expound on the design or PSP part of the tutorial. If you have any
STEP 1
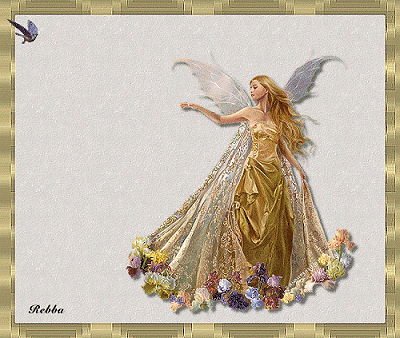
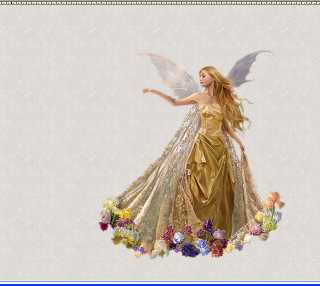
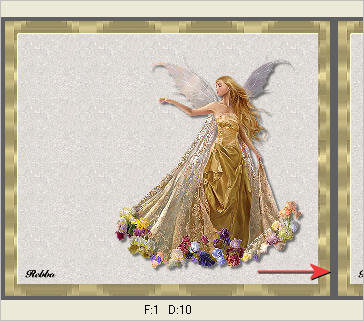
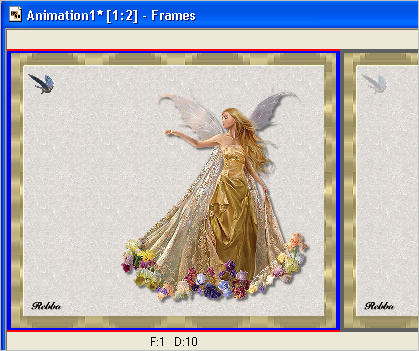
Open the Fairy image (Image1.pspimage) in your PSP workspace
WINDOW >>> DUPLICATE
Close the original Image.
.
|
STEP 2
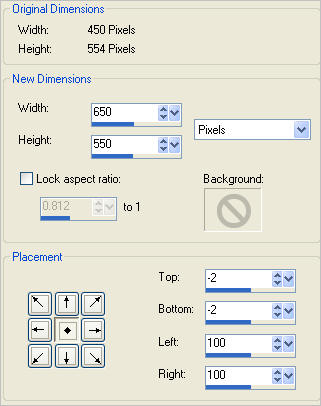
Image >>> Canvas Size
Width = 650
Height = 550
Center Placement selected |
|
STEP 3
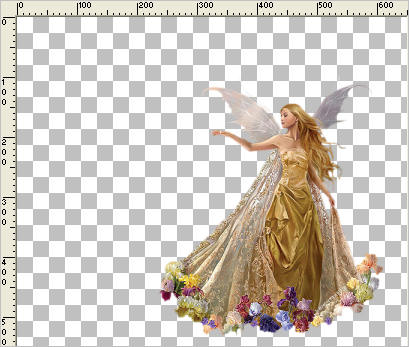
IMAGE >>> MIRROR
With your Mover Tool
move
the fairy to the right side
as shown.
Rename this layer fairy
|
|
STEP 4
LAYERS >> NEW RASTER LAYER
Arrange send to bottom.
Rename this layer background
|
|
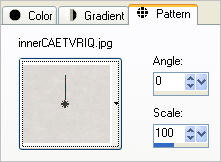
STEP 5
In your MATERIALS PALETTE
Load the ' innerCAETVRIQ.jpg ' pattern in your foreground
using these settings |
|
STEP 6
Flood Fill the background layer
with the pattern
|
|
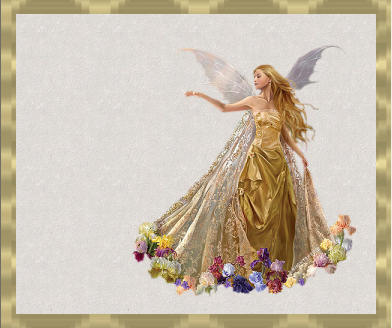
STEP 7
Selections >> Select all
Selections >> Modify >> Contract 25
Selections >> Invert
Layers >>New Raster Layer
|
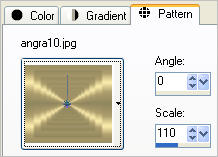
STEP 8
In your MATERIALS PALETTE
Load the ' angra10 ' pattern
in your background
using these settings
|
|
STEP 9
Flood Fill the selected border
with the gold pattern .
Deselect
LAYERS >> DUPLICATE
Image >> Flip.
Change opacity to 60
on the duplicated layer
.
|
|
STEP 10
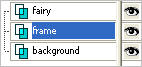
Close background layer
Close fairy layer
Activate Raster 2
LAYERS >>> MERGE >> VISIBLE.
Rename this layer frame
Effects>>Edge Effect>>Enhance
Open background and fairy layers
|
|
STEP 11
Activate the fairy layer
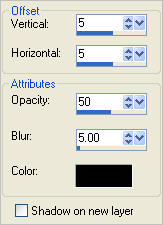
Effects >> 3D Effects >> Drop Shadow
Use these settings |
|
STEP 12
LAYERS >> NEW RASTER LAYER
Select your TEXT TOOL
with font and settings of your choice
add your name to the bottom left corner of the layer.
Rename this layer Name. |
|
Note: I made 2 tubes for my name, one black and one white,
I can resize it in toolbar, and this saves a lot of time.
|
STEP 13
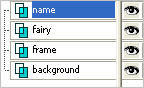
You should have these layers
in the layer palette.
|
|
STEP 14
With all layers open
Right click on Title Bar and select
Copy merged from the options
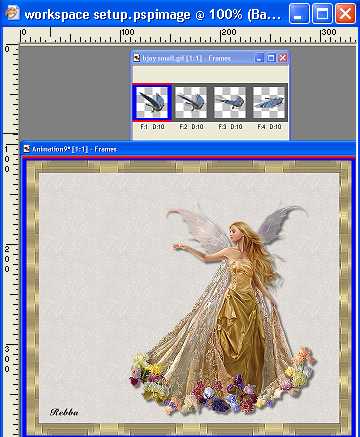
In ANIMATION SHOP
Right click the workspace and select
'Paste As New Animation' from the options.
|
STEP 15
In ANIMATION SHOP
File >> Open
Locate the
'BirdInFlight_Materials' folder
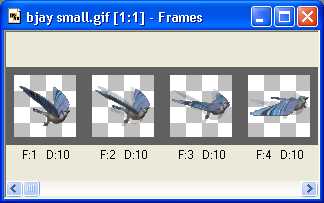
Select the bjay small gif
and click on OPEN.
|
|
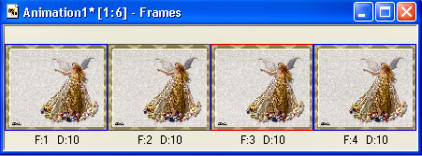
STEP 16
Check the Task Bar
and you will see you have
15 frames for the bird.
|
|
Click on the right side of the bird frame
(The blue border)
and pull to the right
to show a few frames |
|
Note: if you view the animation on the bird you will see the bird flying but he stays in one place.
We want him to fly across to image and set on the lady's hand.
We need 15 layers of the fairy background,
one for each of the bird layers.
|
STEP 17
Activate the fairy frame
Edit >> Copy
Edit >> Paste After Current Frame
Edit >>Select All
Edit >> Copy
Edit >> Paste After Current Frame
|
|
STEP 18
Edit >>Select All
Edit >> Copy
Edit >> Paste After Current Frame
You now have 8 frames
Edit >>Select All
Edit >> Copy
Edit >> Paste After Current Frame
You now have 16 frames
|
STEP 19
Edit >> Select None
Click on the gray area around
one of the frames to select it
(doesn't matter which one)
Edit >> Delete
You now have the same amount of frames as bird.
|
|
STEP 20
We are going to use the
'onion skin effect' in animation
to place our bird where it should go.
Set your images up in
ANIMATION SHOP workspace
to look like this.
|
|
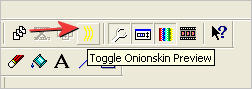
STEP 21
On ANIMATION SHOP top toolbar
there is a light yellow icon
(Toggle Onionskin Preview)
With the bird frames active
Click to turn it on
(it will be indented when on)
|
|
STEP 22
Note: The process we will use on this is:-
Click on the gray border
around first bird frame.
Right click on the Title Bar of bird frame
and select COPY from the options
Next
Click gray around first fairy frame
Right click on Title Bar of frame
and select "Paste into selected frame"
from the options
Move the bird image to left side of frame and click to apply.
This is the placement for the first bird.
|
|
If you look at the top of frame 2 you will see a shadow of the bird on the top of the frame.
This is the 'onion skin effect'.
Each time we place the next bird it will let you see where
the last one was placed so you know where to place the next one.
|
STEP 23
Activate the bird frames.
Select the gray around frame 2 (F2) Right click on the Title Bar of bird frame
and select COPY from the options
Next
Select the gray around the second
fairy frame (F2)
Right click on Title Bar of frame
and select "Paste into selected frame"
from the options.
Move the bird image to left side of frame just below the shadow
and click to apply.
|
|
Now what you are looking at is this.
On frame 2 (F2) the light bird image to left is the 'onion skin'
which is the placement of where the bird was put in the first frame.
The darker bird just to the right is where you just applied the second bird.
You will always see 2 images in the frame you have just done.
(The light image does not show in the completed animation)
To the right in frame 3 you see the onion skin shadow of the second image you just pasted.
This is the process we will use until we complete all 15 layers.
Each time you place the next bird look at the space between the bird and her hand.
You need to move these a little each time, if you feel you are running out of space,
put the next image closer together or further apart as needed.
(I have included a complete copy of my placement so you can see where I placed mine.)
Complete all 15 layers.
.
|
STEP 24
View >> Animation
(To check on how your animation looks)
Click on the Title Bar of the fairy frames
EDIT >> Select None
EDIT >> Select All
Right click on Title Bar of frames
Select 'Frame Properties' from the options
Display time =15
EDIT >> Select None
Scroll the arrow on bottom of frames to frame 15 (F15)
Select the gray border around the frame.
Right click on Title Bar of frames
Select 'Frame Properties' from the options
Display time =150
|
STEP 25
View >> Animation
or click 
to view animation.
and while it is still running,
File >> Save As
Name your animation.
With the Gif Optimiser keep pressing NEXT
until you get to the last one... click FINISH
This file is large so resize if you wish
Activate the fairy animation frames
Animation >> Resize Animation
insert your preferred size and save.
Close the Animation
Close the frames.
Close Animation Shop
|
I hope you have enjoyed this tutorial.
Rebba
|