STEP 1
Open up the downloaded images in your PSP workspace and minimize.
Open up the Image4The Lookout_LR image in your PSP workspace
WINDOW >>> DUPLICATE
Delete Raster 2
Close the original Image
.
|
STEP 2
Image >> Canvas Size
Resize 500x500 center checked
EFFECTS >> IMAGE EFFECTS >> SEAMLESS TILING
DEFAULT SETTING
LAYERS >> NEW RASTER LAYER
LAYERS >>> ARRANGE >>> SEND TO BOTTOM
Flood Fill with #fcffcb
LAYERS >> MERGE >> VISIBLE
|
|
STEP 3
Effects >> Distortion Effects >> Pixleate |
|
STEP 4
Choose your SELECTION TOOL
Selection Type = CIRCLE
Mode = Replace
Feather = 0
Antialias = Checked
Start in the center
at 250 pixels across and 250 pixels down
Draw out to 470 pixels down
and 470 pixels across.
|
|
STEP 5
Effects >> Distortion Effects >> Warp |
|
STEP 6
LAYERS >> DUPLICATE IMAGE >>> MIRROR
SELECTION>>DEFLOAT
CHANGE OPACITY TO 50
SELECTIONS >> INVERT
Hit your DELETE key
Activate the MERGED layer
Hit your DELETE key
DESELECT
LAYERS >>> MERGE >> VISIBLE
Rename this layer circle |
|
STEP 7
ADJUST >> SHARPNESS >> SHARPEN MORE
EFFECTS >> PLUGINS >>
EYE CANDY IMPACT>> GLASS
use these settings.
|
|
STEP 8
OPEN the LIGHTING TAB
use these settings. |
|
STEP 9
On the BEVEL PROFILE Tab
CLICK Factory Profile
|
|
STEP 10
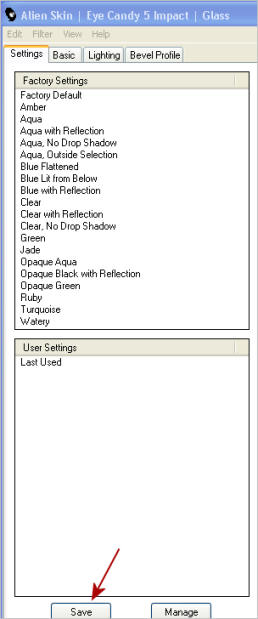
On SETTING Tab
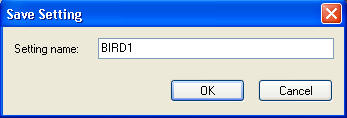
Save as a PRESET
Give it a name
Click OK
 . . 
|
STEP 11
Open cjw-parrots tube in your PSP workspace
Right click on the Title Bar
and select COPY from the options.
Right click on the Title Bar of your 'working' image and select PASTE AS NEW LAYER
from the options.
IMAGE >> RESIZE = 95%
Ensure "Resize all layers" is UNCHECKED
Select your Freehand Selection Tool
(Lasso)
Selection Type = Point to Point
Mode = Replace
Feather = 0
Antialias = UNChecked
Select the overlapping part of the branch
Hit your DELETE key
DESELECT
Rename this layer birds
|
|
STEP 12
Effects >> 3D Effects >> Drop Shadow
Vertical and Horizontal = 5
Opacity = 50
Blur = 5.00
Color = Black.
LAYERS >> NEW RASTER LAYER
LAYERS >> ARRANGE >> SEND TO BOTTOM
Rename this layer master bg
In the Materials Palette
In your MATERIALS PALETTE
Load the ' brass and gold ' gradient
in your foreground
using these settings.
|
|
STEP 13
Flood Fill with brass and gold gradient |
|
STEP 14
LAYERS >> DUPLICATE>>TWICE
SET LAYER PALETTE AS SHOWN
|
|
STEP 15
Effects >> Distortion Effects >> SPIKY HALO |
|
STEP 16
CLOSE AS1
OPEN and ACTIVATE AS2
Effects >> Distortion Effects >> SPIKY HALO
CHANGE ONLY FREQUENCY TO 12
LAYERS >> NEW RASTER LAYER
LAYERS >> ARRANGE >> BRING TO TOP
Select your TEXT TOOL
with font and settings of your choice
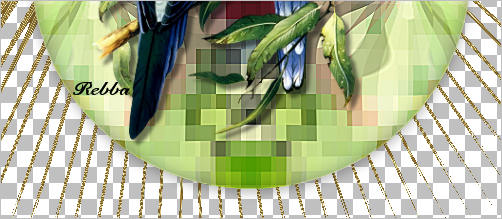
add your name to the bottom left corner of the layer.
Rename this layer Name.
PSPX3.. click the "A" tool
then before clicking on the work
hold down the shift key and then click,
it will bring up the entry box as other versions do

|
STEP 17
SET LAYER PALETTE AS SHOWN
|
|
STEP 18
Right click on Title Bar and select
Copy merged from the options
In ANIMATION SHOP
Right click the workspace and select
'Paste As New Animation' from the options.
Back to PSP.
CLOSE AS1
OPEN AS2
Right click on Title Bar and select
Copy merged from the options
In ANIMATION SHOP
Right click top of frame image and select
'Paste After Current Frame' from the options.
|
|
|
|
STEP 19
In ANIMATION SHOP
Edit >> Select All
View >> Animation
and while it is still running,
File >> Save As
Locate the folder in which you wish to save it.
Name your animation.
With the Gif Optimiser keep pressing NEXT
until you get to the last one... click FINISH
Close the Animation
Close the frames.
Close Animation Shop
|
|
I HOPE YOU ENJOYED THE TUTORIAL
REBBA
|
|