STEP 1
Open up the downloaded images in your PSP workspace and minimize.
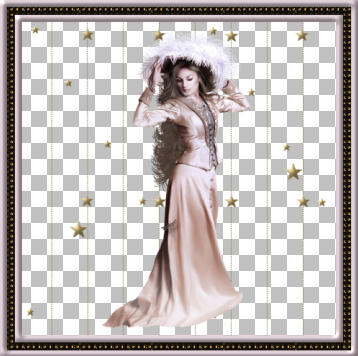
Open a new image 500 x 800
Transparent background
PSPX - X2: Colour Depth = 8bits/channel
PSPX3: Colour Depth RGB = 8bits/channel
Flood fill with black #000000
Name this layer bgd
This is your 'working' image
|
VIEW >>> RULERS
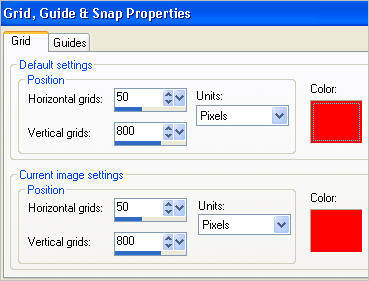
View >> Change Grid, Guide & Snap Properties
Enter these settings
VIEW >>> GRID
VIEW >> SNAP TO GRID
|
|
In your MATERIALS PALETTE
Load the cmv_gold pattern
in your foreground
using these settings |
|
LAYERS >> NEW RASTER LAYER
Select the Pen Tool
Line Style =
DOT LINE

|
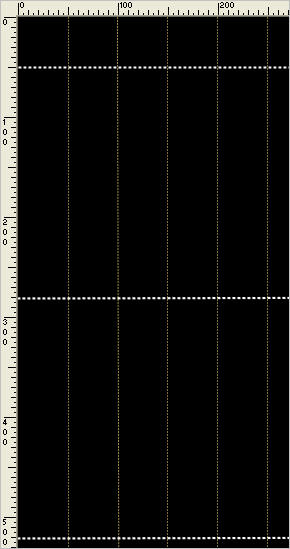
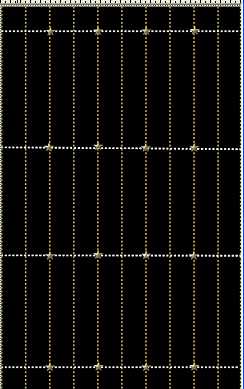
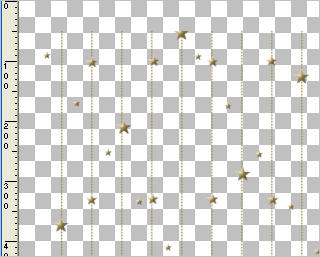
On every 50 pixel line except both edges
apply a line from top to bottom.
Click APPLY after each line.
You can check your positioning by checking
the settings at the bottom right of your
PSP window.

Top position

Bottom position
You will only be able to go as far as 799
for the bottom positioning.
VIEW >>> GRID
You won't be able to see these clearly until you ZOOM to 100%
|
|
LAYERS >> NEW RASTER LAYER
In your MATERIALS PALETTE
Change your foreground to SOLID WHITE
Activate pen tool same setting
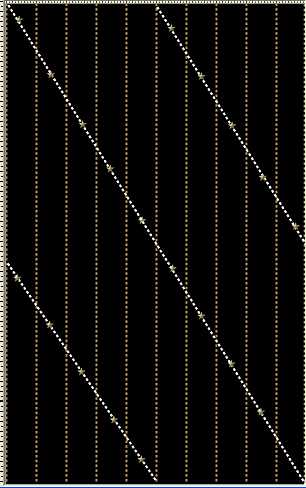
draw out 3 angled lines they don't have to be exact
Click the APPLY button after each line
I did one from 400 on left ruler
to 250 on top ruler.
One from 800 on left ruler to 500 on top ruler.
The last one from the bottom at 250 on top ruler to 400 on left ruler.
|
|
Activate the gold star image
Right click on the Title Bar
and select COPY from the options.
Right click on the Title Bar of your 'working' image
and select PASTE AS NEW LAYER from the options.
Right click on the Title Bar
and select COPY from the options.
Right click on the Title Bar of your 'working' image
and select PASTE AS NEW SELECTION
from the options.
Repeat this 11 times
Place the stars as shown
When finished
SELECTIONS >> SELECT NONE
|
|
CLOSE Raster 2
CLOSE Raster 3
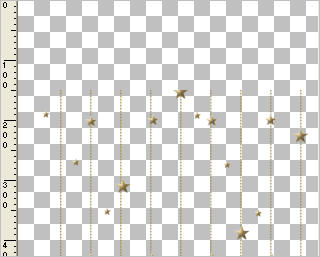
LAYERS >> NEW RASTER LAYER
Activate Pen Tool same setting
draw out 4 lines
Click the APPLY button after each line
I did mine 50 pixels
from top and bottom,
then at 280, 520 and 760 from the top
on left ruler
|
|
Activate the gold star image
Right click on the Title Bar
and select COPY from the options.
Right click on the Title Bar of your 'working' image
and select PASTE AS NEW LAYER from the options.
IMAGE >> RESIZE = 75%
Ensure "Resize all layers" is UNCHECKED
ADJUST >> SHARPNESS >> SHARPEN
Right click on the Title Bar
and select COPY from the options.
Right click on the Title Bar of your 'working' image
and select PASTE AS NEW SELECTION
from the options.
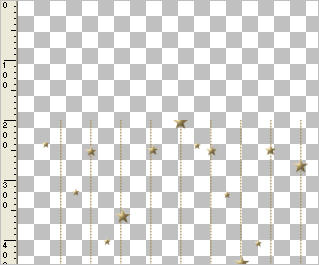
AS MANY TIMES AS NEEDED
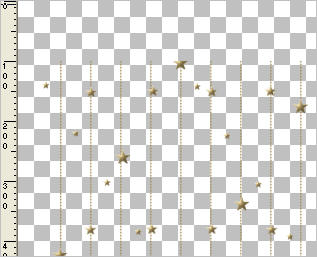
Place a star on every other line at sections
When all are placed
SELECTIONS >> SELECT NONE
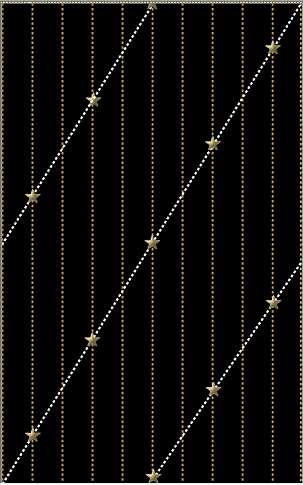
The lines on this example are exaggerated
to show placement. Your dot lines will be less
significant.
|
|
CLOSE Raster 3
CLOSE Raster 4
CLOSE Raster 5
OPEN & ACTIVATE Raster 2
IMAGE >>> MIRROR
Activate the gold star image
Right click on the Title Bar
and select COPY from the options.
Right click on the Title Bar of your 'working' image
and select PASTE AS NEW LAYER from the options.
IMAGE >> RESIZE =50%
Ensure "Resize all layers" is UNCHECKED
ADJUST >> SHARPNESS >> SHARPEN
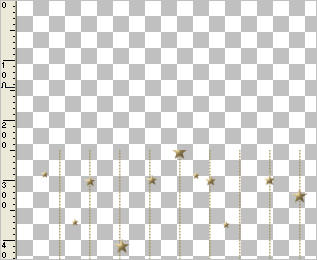
Place the stars between the vertical lines
on the white dot lines
Right click on the Title Bar
and select COPY from the options.
Right click on the Title Bar of your 'working' image
and select PASTE AS NEW SELECTION
from the options.
AS MANY TIMES AS NEEDED
SELECTIONS >> SELECT NONE
|
|
CLOSE-UP |
|
When all are placed
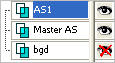
Close all layers except stars layers
DELETE Raster 2
DELETE Raster 4
CLOSE bgd layer
LAYERS >>> MERGE >> VISIBLE.
(the vertical gold line and the stars layers)
Rename this layer Master AS
LAYERS >> DUPLICATE
Rename this layer AS1
|
|
CLOSE Master AS
Select the Deformation Tool
PSPX-X3: Select your PICK tool
Use these settings

We will only change the 'Position Y' each time.
Click the RESET RECTANGLE arrow
Click the MOVER TOOL to deselect
|
LAYERS >> DUPLICATE
Rename this layer AS 2
Close AS 1
Select the Deformation Tool
PSPX-X3: Select your PICK tool
Use the same settings
BUT
CHANGE 'Position Y' to 100
Click the RESET RECTANGLE arrow
Click the MOVER TOOL to deselect
|
|
LAYERS >> DUPLICATE
Rename this layer AS 3
Close AS 2
Select the Deformation Tool
PSPX-X3: Select your PICK tool
Use the same settings
BUT
CHANGE 'Position Y' to 150
Click the RESET RECTANGLE arrow
Click the MOVER TOOL to deselect
|
|
LAYERS >> DUPLICATE
Rename this layer AS 4
Close AS 3
Select the Deformation Tool
PSPX-X3: Select your PICK tool
Use the same settings
BUT
CHANGE 'Position Y' to 200
Click the RESET RECTANGLE arrow
Click the MOVER TOOL to deselect
|
|
LAYERS >> DUPLICATE
Rename this layer AS 5
Close AS 4
Select the Deformation Tool
PSPX-X3: Select your PICK tool
Use the same settings
BUT
CHANGE 'Position Y' to 250
Click the RESET RECTANGLE arrow
Click the MOVER TOOL to deselect
|
|
LAYERS >> DUPLICATE
Rename this layer AS6
Close AS5
Select the Deformation Tool
PSPX-X3: Select your PICK tool
Use the same settings
BUT
CHANGE 'Position Y' to 300
Click the RESET RECTANGLE arrow
Click the MOVER TOOL to deselect
|
|
As you can see the images
have moved down each time.
Select Crop Tool

Click the APPLY button (the TICK)
You will have a 500x500 pixel image
|
NOTE: when doing these background floaties I want
to save them to use on other designs.
I will save them as a pspimage so it doesn't
have a outline around it.
I have a AS supply folder in it "
Master floaties" folder.
WINDOWS DUPLICATE
Save as line and star background.
|
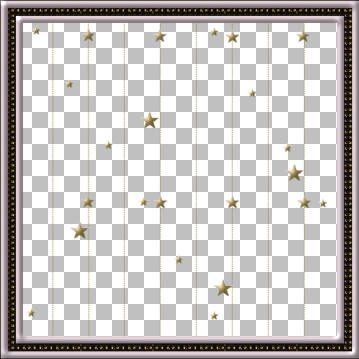
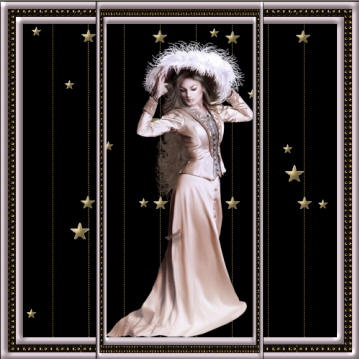
Open background frame tube in your PSP workspace
Right click on the Title Bar
and select COPY from the options.
Right click on the Title Bar of your 'working' image
and select PASTE AS NEW LAYER
from the options.
Name this layer frame
|
|
Open the lady tube image
Right click on the Title Bar
and select COPY from the options.
Right click on the Title Bar of your 'working' image
and select PASTE AS NEW LAYER
from the options.
Name this layer lady
|
|
Open the center frame image
Right click on the Title Bar
and select COPY from the options.
Right click on the Title Bar of your 'working' image
and select PASTE AS NEW LAYER
from the options.
Name this layer center frame
OPEN bgd layer
With your MOVER Tool
move the lady down to meet the center frame
as shown
|
|
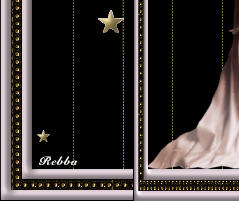
LAYERS >> NEW RASTER LAYER
Select your TEXT TOOL
with font and settings of your choice
add your name to the bottom left corner of the layer.
Name this layer name.
PSPX3.. click the "A" tool
then before clicking on the work
hold down the shift key and then click,
it will bring up the entry box as other versions do
|
|
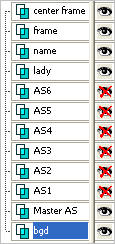
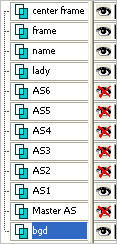
Set up LAYER PALETTE as shown
Right click on Title Bar and select
Copy merged from the options
In ANIMATION SHOP
Right click the workspace and select
'Paste As New Animation' from the options.
|
|
Back to PSP.
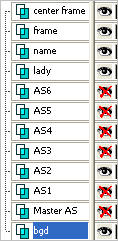
Set up LAYER PALETTE as shown
Right click on Title Bar and select
Copy merged from the options
In ANIMATION SHOP
Right click TITLE BAR of frames image and select
'Paste After Current Frame' from the options.
|
|
Back to PSP.
CLOSE AS1
OPEN AS2
Right click on Title Bar and select
Copy merged from the options
In ANIMATION SHOP
Right click TITLE BAR of frames image and select
'Paste After Current Frame' from the options..
|
|
Back to PSP.
Continue doing this until all the as layers are copy
merged and pasted into animation shop
You should have 7 frames
Select frame 1 (F:1) and DELETE
|
Edit >> Select All
Right click on Title Bar of frames
Select 'Frame Properties' from the options
Display time = 10 or speed you like
|
View >> Animation
and while it is still running,
File >> Save As
Locate the folder in which you wish to save it.
Name your animation.
With the Gif Optimizer keep pressing NEXT
until you get to the last one... click FINISH
Close the Animation
Close the frames.
Close Animation Shop
|
I hope you have enjoyed the tutorial
Rebba |