JAZZ SINGER
PSP8 to PSPX3
With animation option on 2nd page of tut.

This tutorial was written by Jemima ~ JULY 2011
Copyright © 2011 ~ Jemima ~ All rights reserved
********************************
This was created using PSP9 but can be adapted for other versions of PSP.
You will need the
following to complete this tutorial
Materials
JazzSinger.pspimage
Magie737.pspimage
Save to a folder on your computer
linenPOP.bmp
Save to your PSP Textures folder
PSP8: C:\Program Files\Jasc Software\Paint Shop Pro 8\Textures
PSP9: C:\Program Files\Jasc Software\Paint Shop Pro 9\Textures
PSPX: C:\Program Files\Corel\Corel Paint Shop Pro X\Textures
PSPXI / X2: C:\Program Files\Corel\Corel Paint Shop Pro Photo X2\Corel_15
PSPX3: C:\Program Files\Corel\X3\PSPClassic\Corel_15
Plugins
** NONE**
********************************
Open a new image 500 x 500
Transparent background
PSPX - X2: Colour Depth = 8bits/channel
PSPX3: Colour Depth RGB = 8bits/channel
Flood fill with RED #da384f
EFFECTS >>> TEXTURE EFFECTS >>> TEXTURE
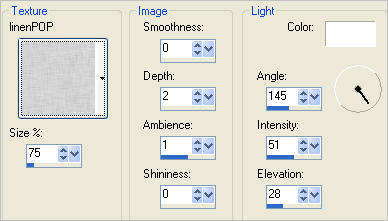
IMAGE >>> RESIZE = 85%
Ensure "Resize all layers" is UNCHECKED
Resample using WEIGHTED AVERAGE
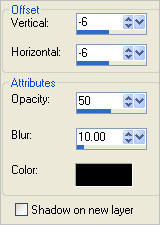
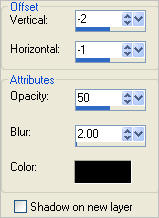
EFFECTS >>> IMAGE EFFECTS >>> OFFSET
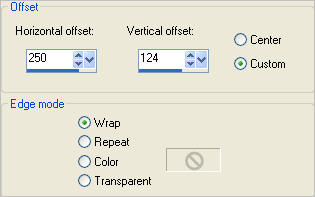
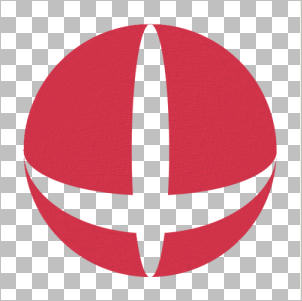
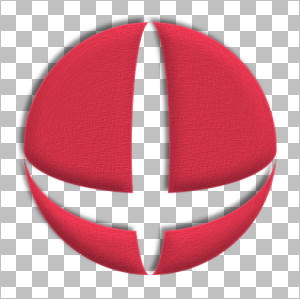
EFFECTS>>> GEOMETRIC EFFECTS >>> CIRCLE
Edge Mode = Transparent
IMAGE >>> RESIZE = 85%
Ensure "Resize all layers" is UNCHECKED
Resample using WEIGHTED AVERAGE
ADJUST >>> SHARPNESS >>> SHARPEN MORE
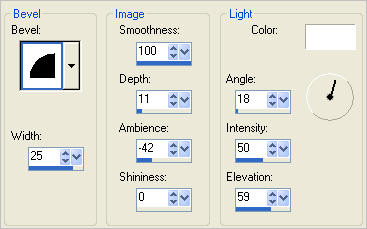
EFFECTS >>> 3D EFFECTS >>> INNER BEVEL
EFFECTS >>> 3D EFFECTS >>> DROP SHADOW
LAYERS >>> NEW RASTER LAYER
LAYERS >>> ARRANGE >>> MOVE DOWN
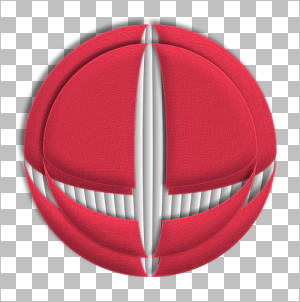
Flood fill with WHITE
IMAGE >>> RESIZE = 85%
Ensure "Resize all layers" is UNCHECKED
Resample using WEIGHTED AVERAGE
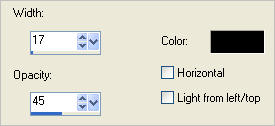
EFFECTS >>> TEXTURE EFFECTS >>> BLINDS
EFFECTS>>> GEOMETRIC EFFECTS >>> CIRCLE
Edge Mode = Transparent
Choose your SELECTION TOOL
Selection Type = Circle
Mode = Replace
Feather = 0
Antialias = Checked
Starting at 250 pixels across and 250 pixels down
drag your cursor until you reach the edge of the red shape and release

SELECTIONS >>> INVERT
EDIT >>> CLEAR
DESELECT
ACTIVATE RASTER 1
LAYERS >>> DUPLICATE
IMAGE >>> RESIZE = 85%
Ensure "Resize all layers" is UNCHECKED
Resample using WEIGHTED AVERAGE
ADJUST >>> SHARPNESS >>> SHARPEN
Open up the JazzSinger image in your PSP workspace
Right click on the Title Bar and select COPY from the options
Right click on the Title Bar of your tag image
and select PASTE AS NEW LAYER from the options.
IMAGE >>> RESIZE = 60%
Ensure "Resize all layers" is UNCHECKED
Resample using WEIGHTED AVERAGE
Choose your SELECTION TOOL
Selection Type = Circle
Mode = Replace
Feather = 0
Antialias = Checked
Starting at 250 pixels across and 240 pixels down
drag your cursor until the bottom edge is just above the edge of the singer and release

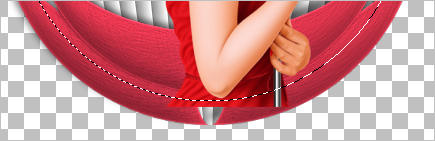
SELECTIONS >>> INVERT
EDIT >>> CLEAR
DESELECT
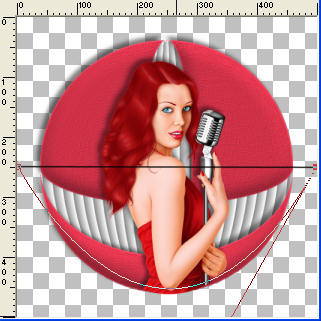
Reposition with your MOVER tool as shown below
EFFECTS >>> 3D EFFECTS >>> DROP SHADOW
Use the same settings
ACTIVATE Copy of Raster 1
Open up the Magie737 image in your PSP workspace
Right click on the Title Bar and select COPY from the options
Right click on the Title Bar of your tag image
and select PASTE AS NEW LAYER from the options.
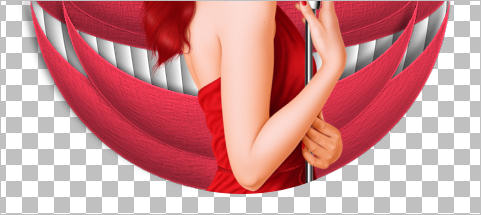
IMAGE >>> RESIZE = 80%
Ensure "Resize all layers" is UNCHECKED
Resample using WEIGHTED AVERAGE
Reposition up with your MOVER tool as shown below

NOTE: I forgot to do this next bit previously... oops.
ACTIVATE RASTER 3
ADJUST >>> BRIGHTNESS and CONTRAST >>> CLARIFY
Strength of effect = 5
PSPX3: BRIGHTNESS and CONTRAST >>> LOCAL TONE
Mapping strength = 5
Save as .psp image
Now we'll add some text.
We have 2 options as to how to do this.
Choose whichever is easiest for you.
OPTION 1
In your MATERIALS PALETTE
Load BLACK in your foreground and NULL your background
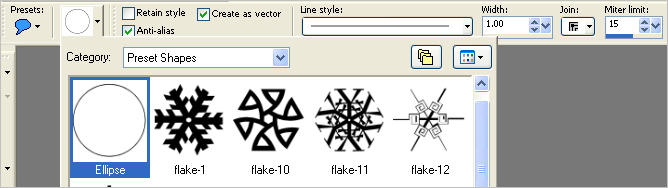
Select your PRESET SHAPES tool >>> ELLIPSE
Place your cursor at 50 pixels across and 450 pixels down
and drag UP to 450 pixels across and 50 pixels down and release.
In your MATERIALS PALETTE
Load RED #da384f in your foreground and
BLACK in your background
Select your TEXT tool
Move the Text Cursor to the bottom, OUTSIDE the circle,
once the icon appears...
LEFT click your mouse and the text box will appear.
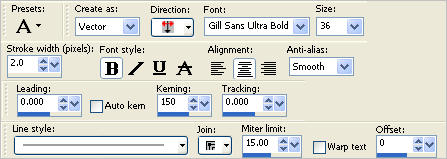
Use these settings or use a font of your choice
with your own settings .
Enter the text of your choice
SELECTIONS >>> SELECT NONE
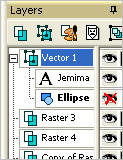
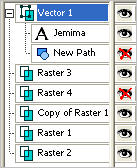
In your LAYER PALETTE open the Vector 1 layer
Close the ELLIPSE layer.
Right click on the Vector 1 layer and select
' Convert to Raster Layer ' from the options
Reposition with your MOVER tool if necessary

|
OPTION 2
In your MATERIALS PALETTE
Load BLACK in your foreground and NULL your background
Close Raster 4
Activate the top layer
.. Raster 3
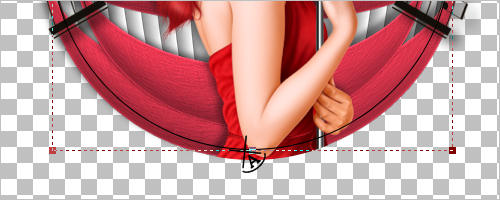
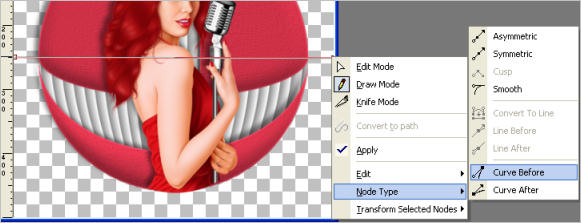
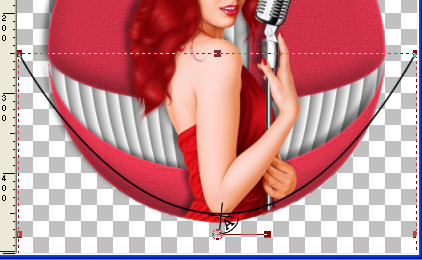
Select your PEN tool
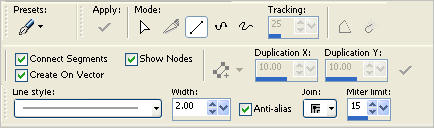
Around halfway down your graphic click on the left side drag it to the right,
at the second click on the right side of your graphic,
right click and select NODE TYPE >>> CURVE BEFORE
NOTE: You will find this easier to do if you Zoom Out
so your image is shown at 60% of it's original size.
Place your cursor over the "curve before" node and 2 curved arrows will show,
drag this down pulling it off your image if necessary to where you want your text placed,
the line will follow and stay once you let go.
In your MATERIALS PALETTE
Load RED #da384f in your foreground and
BLACK in your background
Select your TEXT tool
Move the Text Cursor to the bottom, OUTSIDE the circle,
once the icon appears...
LEFT click your mouse and the text box will appear.
PSPX3: hold down shift key while clicking and box will appear
(first time you may need to find it to the side)
once the cursor changes to an A sideways. add your text
click APPLY if using text box,
If you need to move the text a little you can place the cursor at the front
and move the text into position by pressing the space bar.
|
Use these settings or use a font of your choice
with your own settings .
Enter the text of your choice
SELECTIONS >>> SELECT NONE
In your LAYER PALETTE open the Vector 1 layer
Close the New Path layer.
Right click on the Vector 1 layer and select
' Convert to Raster Layer ' from the options
Reposition with your MOVER tool if necessary
OPEN Raster 4
.
|
EFFECTS >>> 3D EFFECTS >>> DROP SHADOW
Save your .psp image
ANIMATED VERSION
Page designed by

for
http://www.artistrypsp.com/
Copyright ©
2000-2011 Artistry In PSP / PSP Artistry
All rights reserved.
Unless specifically made available for
download,
no graphics or text may be removed from
this site for any reason
without written permission from Artistry
In PSP / PSP Artistry
|