RAINBOWS
PSP8 to PSPX3
PAGE 2
This tutorial was written by Jemima ~ JUNE 2011
Copyright © 2011 ~ Jemima ~ All rights reserved
********************************
This was created using PSP9 but can be adapted for other versions of PSP.
Open a new image 600 x 480
Transparent background
PSPX - X2: Colour Depth = 8bits/channel
PSPX3: Colour Depth RGB = 8bits/channel
Flood fill with BLUE
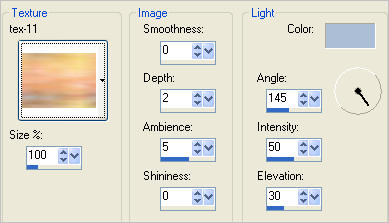
EFFECTS >>> TEXTURE EFFECTS >>> TEXTURE
COLOUR =
#acbed6
SELECTIONS >>> SELECT ALL
LAYERS >>> NEW RASTER LAYER
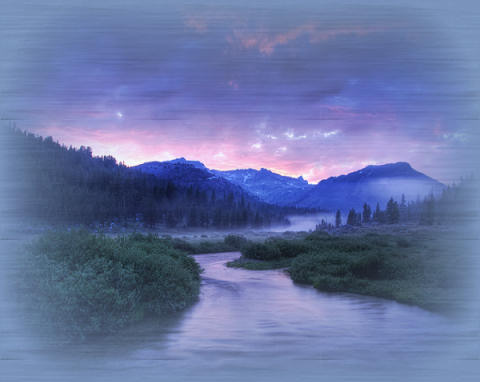
Open up the rivierepourpre_colorel image in your PSP workspace
Right click on the Title Bar and select COPY from the options
Right click on the Title Bar of your tag image
and select PASTE INTO SELECTION from the options.
DESELECT
In your LAYER PALETTE change the
BLEND MODE to HARD LIGHT
ACTIVATE RASTER 1
Open up the rainbow1 image in your PSP workspace
Right click on the Title Bar and select COPY from the options
Right click on the Title Bar of your tag image
and select PASTE AS NEW LAYER from the options.
IMAGE >>> MIRROR
Select your DEFORMATION tool
Mode = SCALE
use default settings
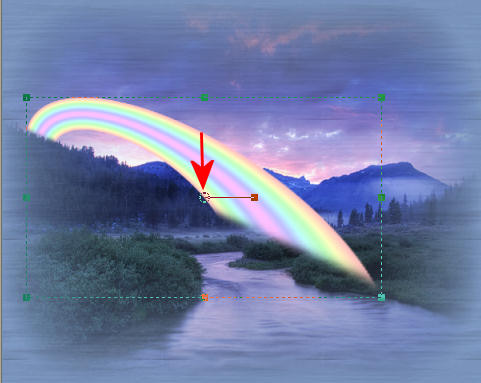
PSPX-X3:Select your PICK tool
Drag the centre bottom node upwards and using the circle in the centre
move the entire rainbow to the position shown below.
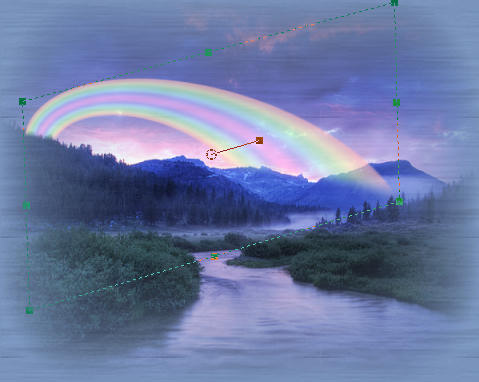
With your SHIFT KEY depressed move the top right node upwards
and the bottom right node upwards as shown below.
In your LAYER PALETTE change the OPACITY to 64%
LAYERS >>> ARRANGE >>> MOVE DOWN
ACTIVATE THE TOP LAYER
Open up the 1-fly-schwan04 image in your PSP workspace
Activate layer Ebene2 (without the flowers)
Right click on the Title Bar and select COPY from the options
Right click on the Title Bar of your tag image
and select PASTE AS NEW LAYER from the options.
IMAGE >>> RESIZE = 40%
Ensure "Resize all layers" is UNCHECKED
Resample using WEIGHTED AVERAGE

LAYERS >>> NEW RASTER LAYER
Flood fill with gradient
SELECTIONS >>> SELECT ALL
SELECTIONS >>> MODIFY >>> CONTRACT = 4
EDIT >>> CLEAR
SELECTIONS >>> MODIFY >>> CONTRACT = 4
Flood fill with gradient
SELECTIONS >>> MODIFY >>> CONTRACT = 4
EDIT >>> CLEAR
DESELECT
EFFECTS >>> 3D EFFECTS >>> DROP SHADOW
Vertical & Horizontal offsets = 1
Colour = Black
Opacity = 70
Blur = 0
Repeat Drop Shadow effect changing
Vertical & Horizontal Offsets to - ( minus ) 1
Click OK
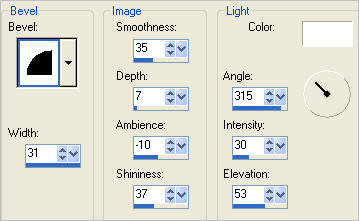
EFFECTS >>> 3D EFFECTS >>> INNER BEVEL
EFFECTS >>> 3D EFFECTS >>> DROP SHADOW
Vertical & Horizontal offsets = 6
Colour = Black
Opacity = 70
Blur = 12.00

LAYERS >>> DUPLICATE
IMAGE >>> RESIZE = 60 %
Ensure "Resize all layers" is UNCHECKED
Resample using WEIGHTED AVERAGE
PSP8 - PSP9:IMAGE >>> ROTATE >>> FREE ROTATE = RIGHT 90
Ensure "All layers" is UNCHECKED
PSPX - PSPX3: IMAGE >>> FREE ROTATE = RIGHT 90
Ensure "All layers" is UNCHECKED
ACTIVATE RASTER 4
LAYERS >>> ARRANGE >>> BRING TO TOP
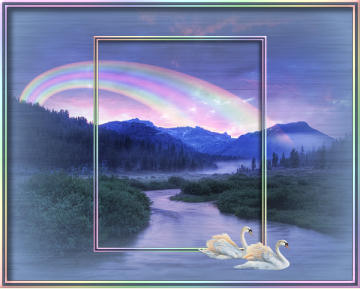
ACTIVATE Copy of Raster 5
With your MAGIC WAND
Mode = Replace
Match Mode = RGB Value
Tolerance = 0
Feather = 0
Antialias = UNchecked
Sample Merged = UNCHECKED
PSP9 - X3: Check CONTIGUOUS
PSPX - X3: There is no " Sample Merged"
PSPX - X3: Use all layers = UNChecked
Select the transparent area outside the centre frame
SELECTIONS >>> MODIFY >>> EXPAND = 3
ACTIVATE RASTER 2
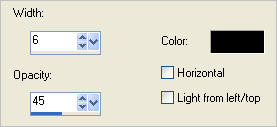
EFFECTS >>> TEXTURE EFFECTS >>> BLINDS
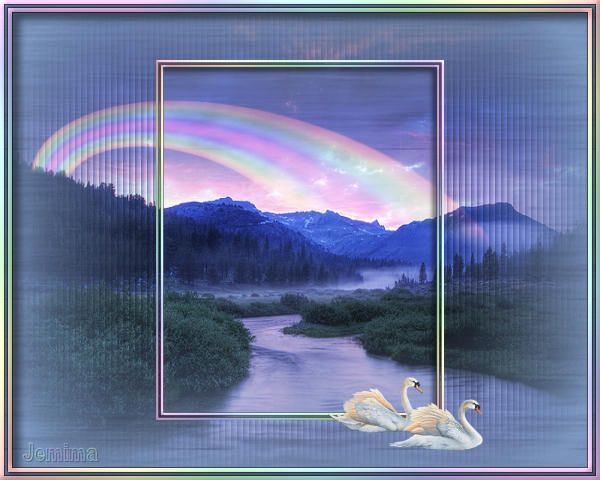
LAYERS >>> MERGE >>> MERGE ALL (Flatten)
Save as .jpg image
Page designed by

for
http://www.artistrypsp.com/
Copyright ©
2000-2011 Artistry In PSP / PSP Artistry
All rights reserved.
Unless specifically made available for
download,
no graphics or text may be removed from
this site for any reason
without written permission from Artistry
In PSP / PSP Artistry
|