I'd be here forever if I covered adjusting every preset,
so I will cover only a few to show you how to realise different effects
. |
EFFECTS >>> ILLUMINATION EFFECTS >>> LIGHTS |
EXERCISE 1
|
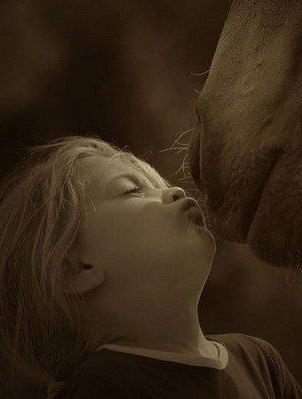
For this exercise we will use Image 5
Open it up in your PSP workspace
WINDOW >> DUPLICATE
CLOSE the original image |
Original Image (Image 5)
 |
Adjusted image
 |
I used the LOWER RIGHT preset here
and changed the DARKNESS and INTENSITY settings
 |
|
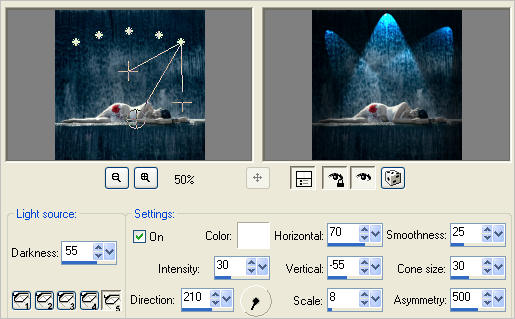
EXERCISE 2 |
For this exercise we will use Image 6
Open it up in your PSP workspace
WINDOW >> DUPLICATE
CLOSE the original image
This is to show you that you can move the lights around to create the desired effect
|
STEP 1
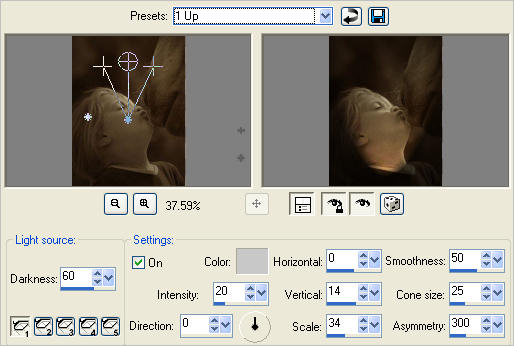
Using 1 UP preset
|
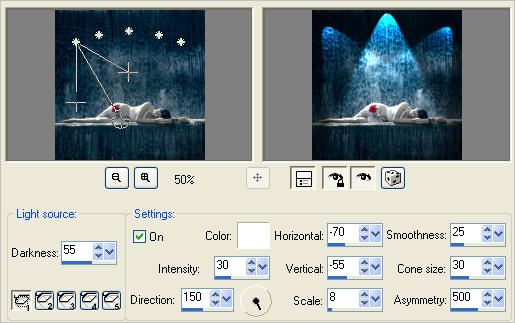
STEP 2
Change the colour to #fee7cc
OPTION 1:... you can grab the circle with the cross in the centre,
pull it down to the left,
place your cursor over the asterisk,move it up to the top right corner
and extend the arms as shown below.
OPTION 2:... With LIGHT 1active....Insert the settings shown below.

You can move the asterisks and crosses
(shown on the right, outside the image)
around and
extend the circle with the cross in the centre
as well as opening and closing the arms
until you are satisfied with the result.
You'll become more familiar with the result if you
practice, practice, practice. *S*
|
STEP 3
Make sure the "Settings" is turned ON
Move the asterisk on the left of the image to the lower left,
pull the arms out as shown.
Set the INTENSITY to 8.
OR
Activate LIGHT 2
Enter the settings shown below.
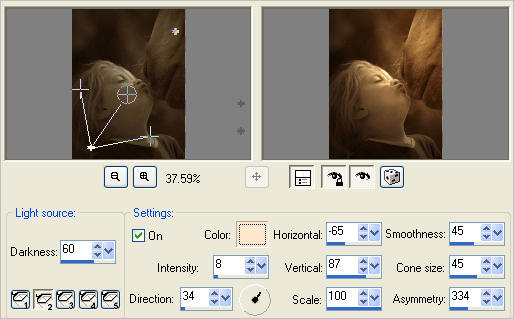
CLICK "OK"
.
|
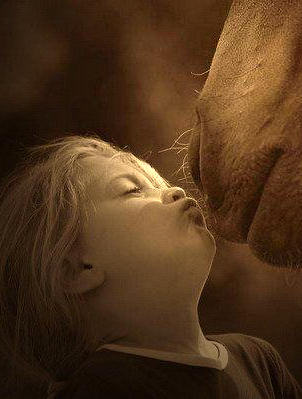
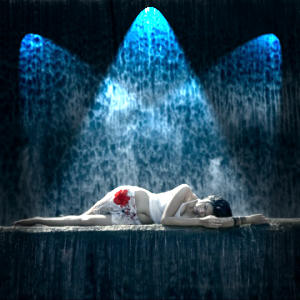
RESULT
|
Original Image (Image 6)
|
Adjusted Image
|
|
EXERCISE 3 |
For this exercise we will use Image 7
Open it up in your PSP workspace
WINDOW >> DUPLICATE
CLOSE the original image
This is to show you that you can add impact to an image |
STEP 1
Using SPOTLIGHTS preset

|
STEP 2
With LIGHT 3 Active.
Change the DARKNESS, INTENSITY and CONE SIZE settings

|
STEP 2
Activate LIGHT 5
Change the DARKNESS and CONE SIZE settings
|
STEP 3
Activate LIGHT 1
Change the DARKNESS and CONE SIZE settings
CLICK "OK"
|
RESULT |
Original Image (Image 7)

|
Adjusted Image
|
|
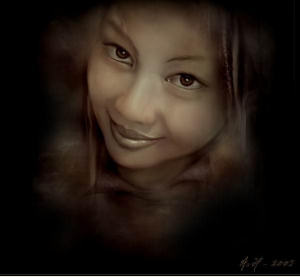
EXERCISE 4 |
For this exercise we will use Image 8
This one is for fun...
STEP 1
Open it up in your PSP workspace
WINDOW >> DUPLICATE
CLOSE the original image
Open up the HajimeSorayama-FlyingSaucer_ptv image in your PSP workspace
Right click on the Title Bar and select COPY from the options
Right click on the Title Bar of your tag image
and select PASTE AS NEW LAYER from the options.
IMAGE >>> RESIZE = 60%
Ensure "Resize all layers" is UNCHECKED
Resample using WEIGHTED AVERAGE
Reposition with your MOVER tool

|
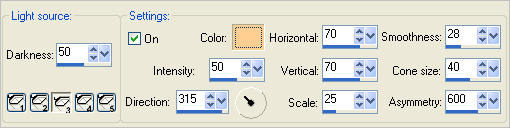
STEP 2
Activate the background layer
EFFECTS >>> ILLUMINATION EFFECTS >>> LIGHTS >>> Lamp
COLOUR = #00ff00
Enter these settings
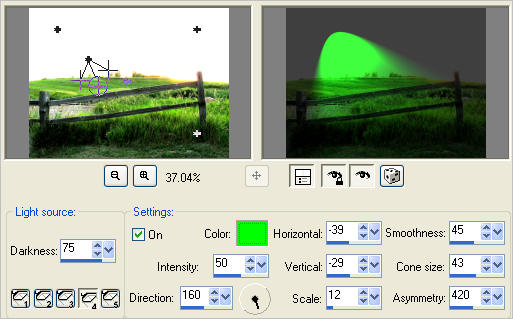
CLICK OK
|
STEP 2
Activate Raster 1
Reposition the Spaceship if necessary

|
EFFECTS >>> ILLUMINATION EFFECTS >>> LIGHTS
Use same settings
BUT
Change the colour to WHITE
Then move the
asterisk displaying the 2 arms and circle
to the top point of the spaceship.

CLICK OK
|
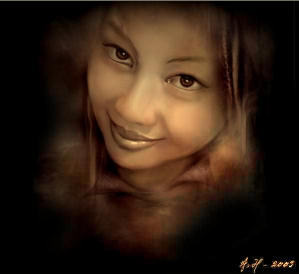
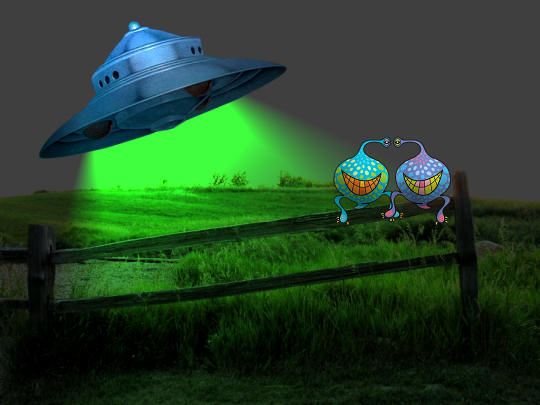
RESULT |
|
I added the space creatures just for fun *S*
 |
| |
I hope by doing these exercises I have given you
a reasonable idea of how the Lights Effects work
and how you can change preset settings
to suit your own creativity.
Don't forget ...
You can always SAVE your own settings as a PRESET for future use.
|
| |