NEW ADJUSTMENT LAYER
PSP8 to PSPX3
This tutorial was written by Jemima ~ APRIL 2011
Copyright © 2011 ~ Jemima ~ All rights reserved
********************************
This was created using PSP9 but can be adapted for other versions of PSP.
You will need the
following to complete this tutorial
Materials
Jem_TreeFrog.pspimage
Jem_Ostriches.pspimage
minuet.jpg
Still_Life_Blue.jpg
Still_Life_Brown.jpg
Save to a folder on your computer
********************************
In this tut we'll cover 3 options in the New Adjustment Layer
1)... INVERT
2)... CHANNEL MIXER
3)... COLOR BALANCE
********************************
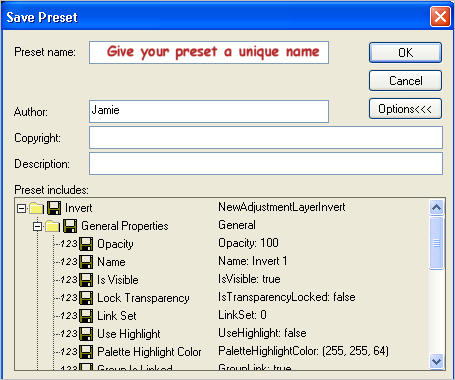
NOTE: You can save any of the settings by clicking on the SAVE icon
 Give your PRESET a unique name
Insert your name as AUTHOR
Click O.K.
|
I discovered the INVERT option was fun to play with, especially to change the colours
in images to make them unique.
First we'll play with the INVERT option
********************************
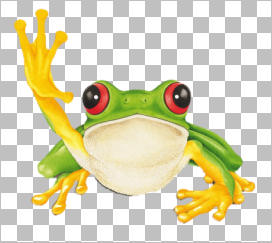
Open up the Jem_TreeFrog image in your PSP workspace
WINDOW >>> DUPLICATE (3 times)
Close the original Image
LAYERS >>> Promote background layer
ACTIVATE the first duplicated image
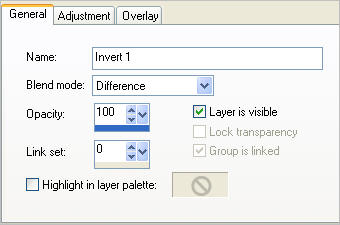
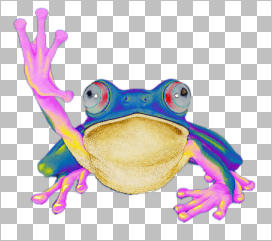
LAYERS >>> NEW ADJUSTMENT LAYER >>> INVERT
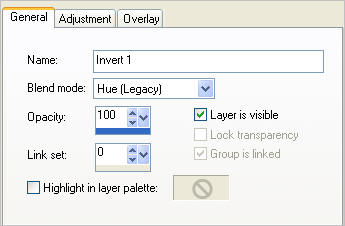
If you wish to save these settings do it now
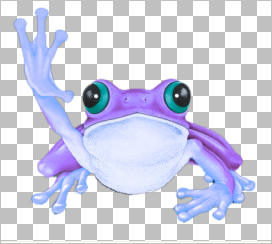
BEFORE .................................................................AFTER
 . . 
To save your new images
LAYERS >>> MERGE >>> MERGE DOWN
Save as .psp image
ACTIVATE the SECOND duplicated image
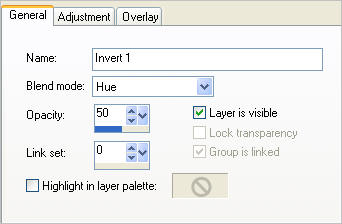
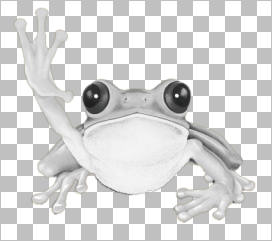
LAYERS >>> NEW ADJUSTMENT LAYER >>> INVERT
If you wish to save these settings do it now
BEFORE .................................................................AFTER
. 
ACTIVATE the THIRD duplicated image
LAYERS >>> NEW ADJUSTMENT LAYER >>> INVERT
LAYERS >>> NEW ADJUSTMENT LAYER >>> INVERT
If you wish to save these settings do it now
BEFORE .................................................................AFTER
. 
Now we'll play with the CHANNEL MIXER option
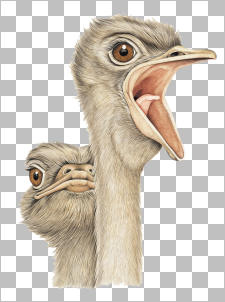
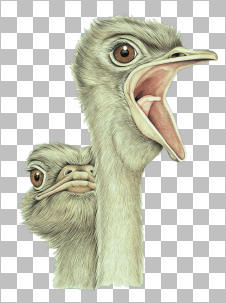
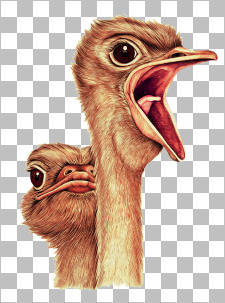
Open up the Jem_Ostriches image in your PSP workspace
WINDOW >>> DUPLICATE (Twice)
Close the original Image
LAYERS >>> Promote background layer
ACTIVATE the first duplicated image
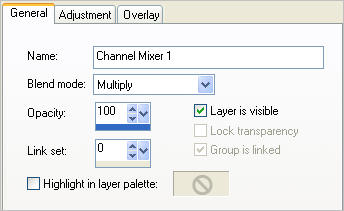
LAYERS >>> NEW ADJUSTMENT LAYER >>> CHANNEL MIXER
Use these settings on the GENERAL Tab
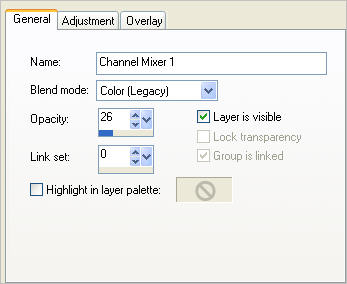
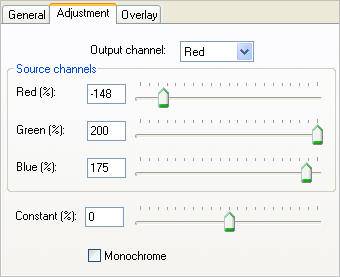
Click the ADJUSTMENT Tab
Use these settings for the RED 'Output channel'.
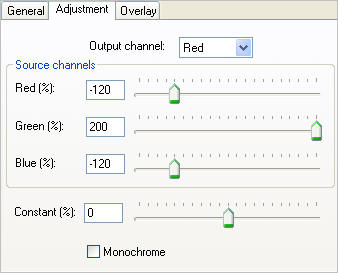
Click the arrow on the 'Output
channel'. and select GREEN
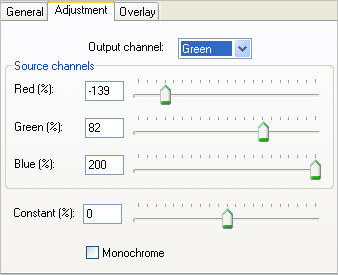
Use these settings
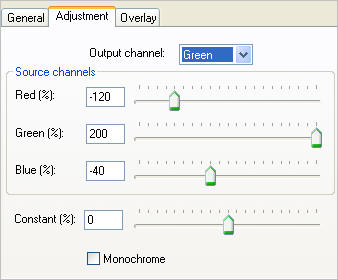
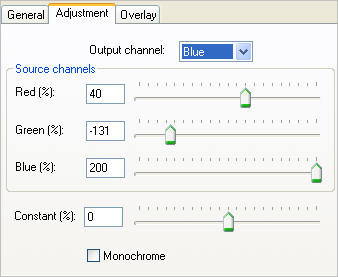
Click the arrow on the 'Output
channel'. and select BLUE
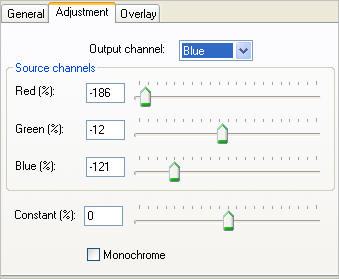
Use these settings
If you wish to save these settings do it now
BEFORE .......................................................AFTER
 . . 
LAYERS >>> MERGE >>> MERGE DOWN
Save as .psp image
ACTIVATE the SECOND duplicated image
LAYERS >>> NEW ADJUSTMENT LAYER >>> CHANNEL MIXER
Use these settings on the GENERAL Tab
Click the ADJUSTMENT Tab
Use these settings for the RED 'Output channel'.
Click the arrow on the 'Output
channel'. and select GREEN
Use these settings
Click the arrow on the 'Output
channel'. and select BLUE
Use these settings
If you wish to save these settings do it now
BEFORE .................................................AFTER
. 
LAYERS >>> MERGE >>> MERGE DOWN
Save as .psp image
******************************************
Now we'll play with the COLOR BALANCE option
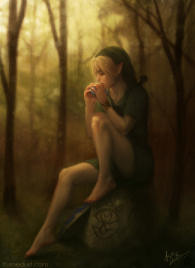
Open up the minuet image in your PSP workspace
WINDOW >>> DUPLICATE
Close the original Image
ACTIVATE the duplicated image
This is excellent and simple for lightening dark images
LAYERS >>> NEW ADJUSTMENT LAYER >>> COLOR BALANCE
Use these settings on the GENERAL Tab

If you wish to save these settings do it now
BEFORE .........................................AFTER
 . . 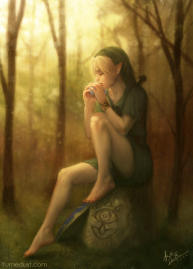
LAYERS >>> MERGE >>> MERGE DOWN
Save as .jpg image
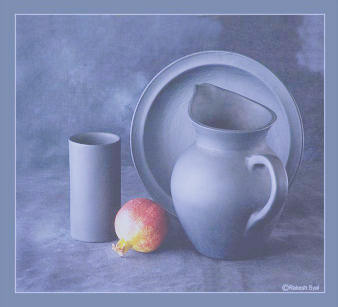
Open up the Still_Life_Blue image in your PSP workspace
WINDOW >>> DUPLICATE
Close the original Image
ACTIVATE the duplicated image
LAYERS >>> NEW ADJUSTMENT LAYER >>> COLOR BALANCE
Use these settings on the GENERAL Tab
Then click the OVERLAY tab
COLOUR = LIGHT BLUE #a7b0d5
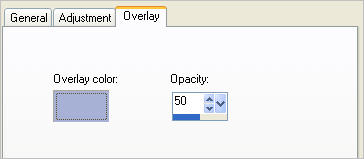
If you wish to save these settings do it now
EDIT >>> Repeat New Color Balance Adjustment Layer
BEFORE ................................................................................AFTER
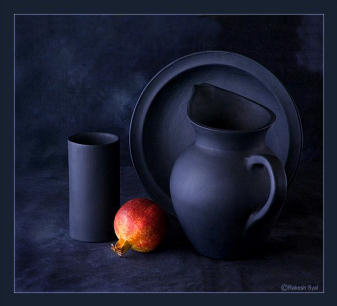 . . 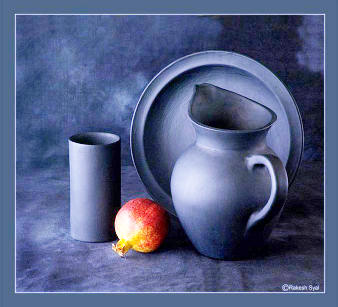
Now... we'll check the Overlay result
LAYERS >>> VIEW OVERLAY
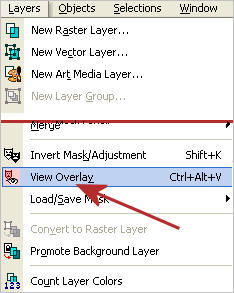
This shows the colour and strength of the overlay used.
This is only for your information, the image cannot be saved including the overlay view.
It will still be saved as the "AFTER" result above.
We'll try a different image and a different overlay colour.
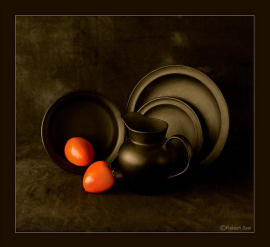
Open up the Still_Life_Brown image in your PSP workspace
WINDOW >>> DUPLICATE
Close the original Image
ACTIVATE the duplicated image
LAYERS >>> NEW ADJUSTMENT LAYER >>> COLOR BALANCE
Use these settings on the GENERAL Tab
Then click the OVERLAY tab
COLOUR = YELLOW #ffffc0

If you wish to save these settings do it now
EDIT >>> Repeat New Color Balance Adjustment Layer
EDIT >>> Repeat New Color Balance Adjustment Layer
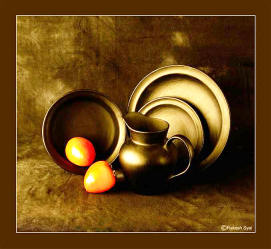
BEFORE ............................................................AFTER
 . . 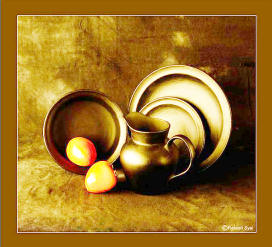
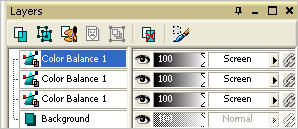
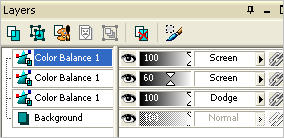
WINDOW >>> DUPLICATE
You can now fiddle with the BLEND Modes and OPACITY settings
in your LAYER PALETTE
CURRENT SETTINGS
ADJUSTED SETTINGS
BEFORE ............................................................AFTER
. 
Page designed by

for
http://www.artistrypsp.com/
Copyright ©
2000-2011 Artistry In PSP / PSP Artistry
All rights reserved.
Unless specifically made available for
download,
no graphics or text may be removed from
this site for any reason
without written permission from Artistry
In PSP / PSP Artistry
|