WISHING WELL
PSP8 to PSPX3
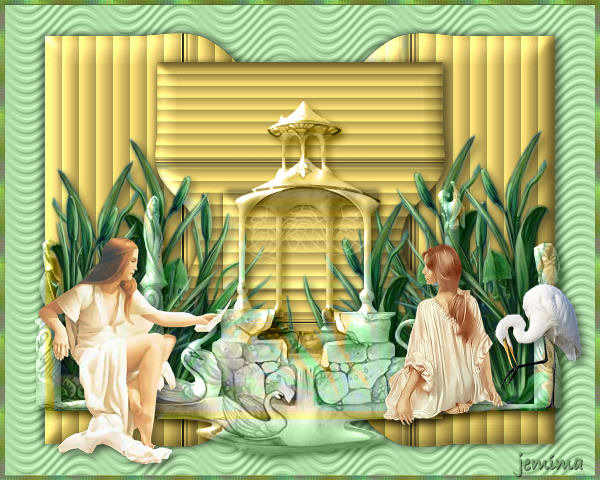
This tutorial was written by Jemima ~ October 2010
Copyright © 2010 ~ Jemima ~ All rights reserved
********************************
This was created using PSP9 but can be adapted for other versions of PSP.
You will need the
following to complete this tutorial
Materials
n[1][1].k.annette__rockgreenery3.psp
RRF_WELL_OF_URD_TUBE.PSP
GraphicsByLiz_LadyInNightgown_August2008.PspTube
LU_GraphicDream_Stork_01.pspimage
rw-edson_campos-springpromise.psp
Save to a folder on your computer
tuile102.jpg
Save to your PSP Patterns folder
PSP8: C:\Program Files\Jasc Software\Paint Shop Pro 8\Patterns
PSP9: C:\Program Files\Jasc Software\Paint Shop Pro 9\Patterns
PSPX: C:\Program Files\Corel\Corel Paint Shop Pro X\Patterns
PSPXI / X2: C:\Program Files\Corel\Corel Paint Shop Pro Photo X2\Corel_08
PSPX3: C:\Program Files\Corel\X3\PSPClassic\Corel_08
tuval9.jpg
Save to your PSP Textures folder
PSP8: C:\Program Files\Jasc Software\Paint Shop Pro 8\Textures
PSP9: C:\Program Files\Jasc Software\Paint Shop Pro 9\Textures
PSPX: C:\Program Files\Corel\Corel Paint Shop Pro X\Textures
PSPXI / X2: C:\Program Files\Corel\Corel Paint Shop Pro Photo X2\Corel_15
PSPX3: C:\Program Files\Corel\X3\PSPClassic\Corel_15
Plugins
** EYE CANDY3 **
http://www.pircnet.com/downloads.html
********************************
Open a new image 600 x 480
Transparent background
PSPX - X2: Colour Depth = 8bits/channel
PSPX3: Colour Depth RGB = 8bits/channel
Flood fill with GREEN #729f68
LAYERS >>> NEW RASTER LAYER
Flood fill with YELLOW #fff6a0
EFFECTS >>> TEXTURE EFFECTS >>> TEXTURE
COLOUR = #ad9f86
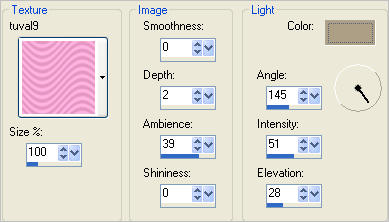
LAYERS >>> NEW RASTER LAYER
Flood fill with MID YELLOW #e4cb6f
EFFECTS >>> TEXTURE EFFECTS>>> BLINDS
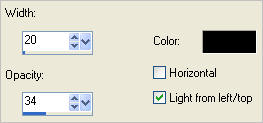
ADJUST >>> BRIGHTNESS and CONTRAST >>> BRIGHTNESS/CONTRAST

IMAGE >>> RESIZE = 85%
Ensure "Resize all layers" is UNCHECKED
Resample using WEIGHTED AVERAGE
Select your MESH WARP tool

Drag the centre 2 top nodes down and centre bottom 2 nodes up as shown below
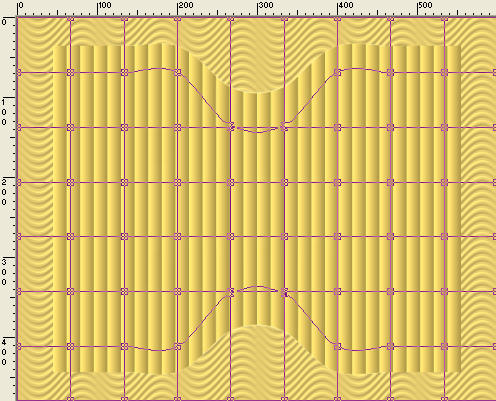
Click the RESET RECTANGLE arrow
Click one of your other tools to eliminate the mesh.
Choose your SELECTION TOOL then click on the CUSTOM SELECTION
symbol
and enter these coordinates.
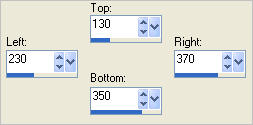
EFFECTS >>> 3D EFFECTS >>> INNER BEVEL
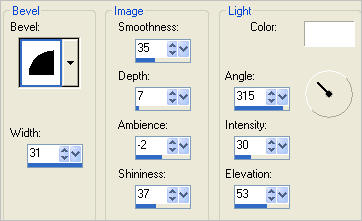
EFFECTS >>> PLUGINS >>> EYE CANDY 3 >>> DROP SHADOW
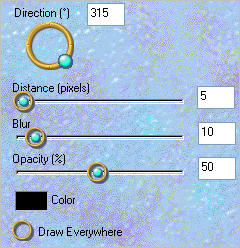
EDIT >>> Repeat Drop Shadow.. change DIRECTION to 135
DESELECT
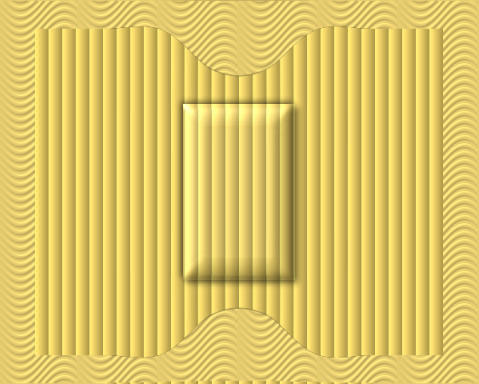
EFFECTS >>> 3D EFFECTS >>> INNER BEVEL
Same settings
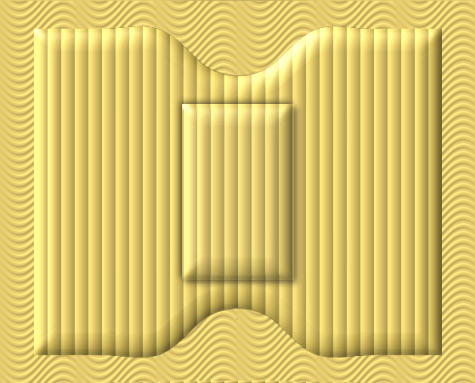
Choose your SELECTION TOOL
Selection Type = Rectangle
Mode = Replace
Feather = 0
Antialias = UNChecked
Select the area shown below
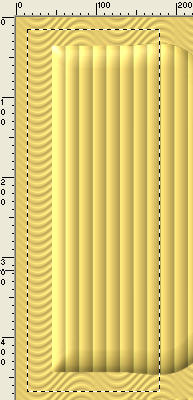
Click inside the marching ants to select the left side if the image.
SELECTIONS >>> DEFLOAT
EFFECTS >>> 3D EFFECTS >>> OUTER BEVEL
COLOUR = #c0c0c0
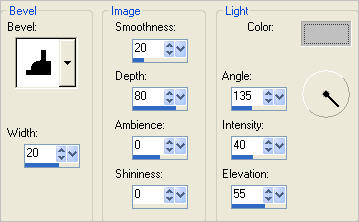
DESELECT
With your SELECTION TOOL ... same settings...
select the area shown on the right side of your image
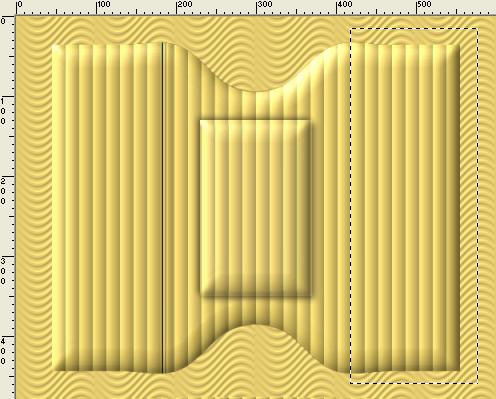
Click inside the marching ants to select the left side of the image.
SELECTIONS >>> DEFLOAT
EFFECTS >>> 3D EFFECTS >>> OUTER BEVEL
Same settings
DESELECT
You may find some stray segments on your image... if so...
With your SELECTION TOOL ... same settings...
and while depressing your SHIFT KEY...
Select the stray segments ..

EDIT >>> CLEAR
DESELECT
LAYERS >>> DUPLICATE
IMAGE >>> ROTATE >>> FREE ROTATE = LEFT 90
Ensure "All layers" is UNCHECKED
PSPX - PSPX3: IMAGE >>> FREE ROTATE = LEFT 90
Ensure "All layers" is UNCHECKED
IMAGE >>> RESIZE = 70%
Ensure "Resize all layers" is UNCHECKED
Resample using WEIGHTED AVERAGE
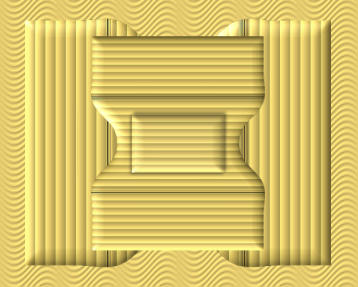
EFFECTS >>> PLUGINS >>> EYE CANDY 3 >>> DROP SHADOW
Same settings BUT change DIRECTION to 90
EDIT >>> Repeat Drop Shadow.. change DIRECTION to 270
ACTIVATE RASTER 3
EDIT >>> Repeat Drop Shadow.. change DIRECTION to 180
EDIT >>> Repeat Drop Shadow.. change DIRECTION to 0
In your LAYER PALETTE change the BLEND MODE to LUMINANCE (L) for RASTER 2
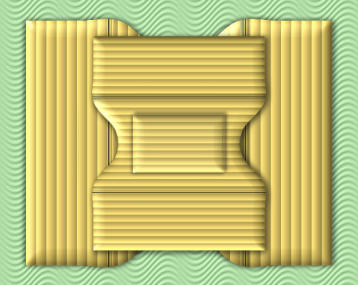
WITH THE TOP LAYER ACTIVE
Open up the n[1][1].k.annette__rockgreenery3 image in your PSP workspace
Right click on the Title Bar and select COPY from the options
Right click on the Title Bar of your tag image
and select PASTE AS NEW LAYER from the options.
Reposition with your MOVER tool
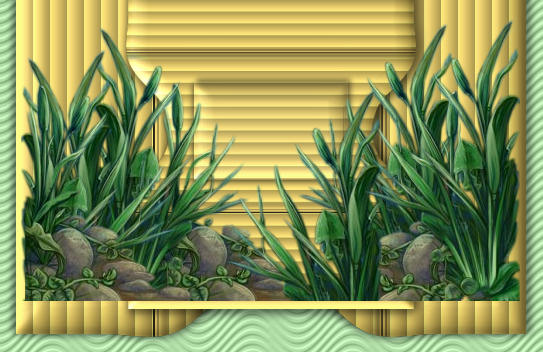
EFFECTS >>> PLUGINS >>> EYE CANDY 3 >>> DROP SHADOW
Same settings BUT change DIRECTION to 315
Open up the RRF_WELL_OF_URD_TUBE image in your PSP workspace
Right click on the Title Bar and select COPY from the options
Right click on the Title Bar of your tag image
and select PASTE AS NEW LAYER from the options.
EFFECTS >>> 3D EFFECTS >>> INNER BEVEL
Same settings
In your LAYER PALETTE change the BLEND MODE to LUMINANCE (L)
Reposition with your MOVER tool
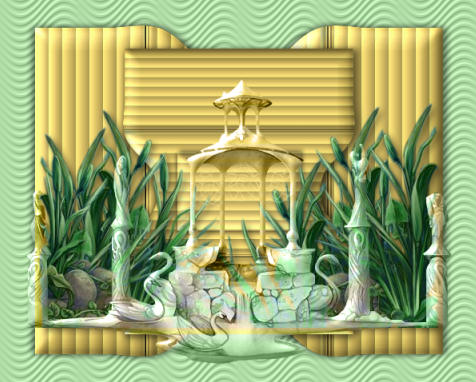
EFFECTS >>> PLUGINS >>> EYE CANDY 3 >>> DROP SHADOW
Same settings
Open up the GraphicsByLiz_LadyInNightgown_August2008 image in your PSP workspace
Right click on the Title Bar and select COPY from the options
Right click on the Title Bar of your tag image
and select PASTE AS NEW LAYER from the options.
IMAGE >>> RESIZE = 50%
Ensure "Resize all layers" is UNCHECKED
Resample using WEIGHTED AVERAGE
ADJUST >>> SHARPNESS >>> SHARPEN
EFFECTS >>> PLUGINS >>> EYE CANDY 3 >>> DROP SHADOW
Same settings
Reposition with your MOVER tool

Open up the LU_GraphicDream_Stork_01 image in your PSP workspace
Right click on the Title Bar and select COPY from the options
Right click on the Title Bar of your tag image
and select PASTE AS NEW LAYER from the options.
IMAGE >>> RESIZE = 40%
Ensure "Resize all layers" is UNCHECKED
Resample using WEIGHTED AVERAGE
ADJUST >>> SHARPNESS >>> SHARPEN
EFFECTS >>> PLUGINS >>> EYE CANDY 3 >>> DROP SHADOW
Same settings
Reposition with your MOVER tool
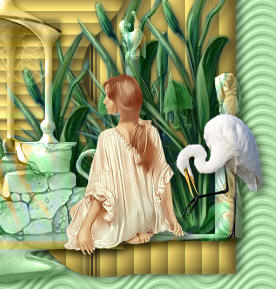
Open up the rw-edson_campos-springpromise image in your PSP workspace
Right click on the Title Bar and select COPY from the options
Right click on the Title Bar of your tag image
and select PASTE AS NEW LAYER from the options.
IMAGE >>> RESIZE = 60%
Ensure "Resize all layers" is UNCHECKED
Resample using WEIGHTED AVERAGE
EFFECTS >>> PLUGINS >>> EYE CANDY 3 >>> DROP SHADOW
Same settings
Reposition with your MOVER tool

LAYERS >>> NEW RASTER LAYER
Flood fill with GREEN #729f68
SELECTIONS >>> SELECT ALL
SELECTIONS >>> MODIFY >>> CONTRACT = 5
EDIT >>> CLEAR
DESELECT
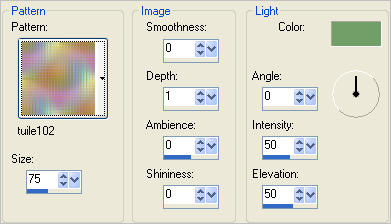
EFFECTS >>> TEXTURE EFFECTS >>> SCULPTURE
COLOUR = GREEN #729f68
LAYERS >>> MERGE >>> MERGE ALL (Flatten)
Save as .jpg image
Page designed by

for
http://www.artistrypsp.com/
Copyright ©
2000-2011 Artistry In PSP / PSP Artistry
All rights reserved.
Unless specifically made available for
download,
no graphics or text may be removed from
this site for any reason
without written permission from Artistry
In PSP / PSP Artistry
|