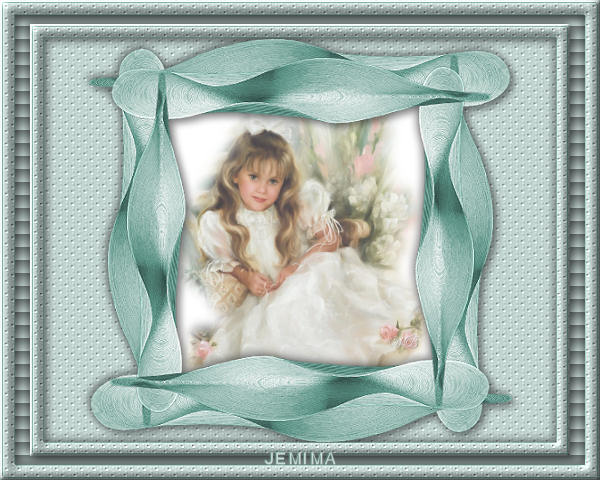
TEAL FRAME
PSP8 - PSPX3
This tutorial was
created by Jemima using PSP9 ~ December 2010
BUT should be creatable using all versions of PSP
Copyright © 2010/11 ~ Jemima
~ All rights reserved
********************************
You will need the
following to complete this tutorial
Materials
JF_15.pspimage
JR_WB_ABBY.psp
Save to a folder on your computer
esp_tan_patt_9.jpg
Save to your PSP Textures folder
PSP8: C:\Program Files\Jasc Software\Paint Shop Pro 8\Textures
PSP9: C:\Program Files\Jasc Software\Paint Shop Pro 9\Textures
PSPX: C:\Program Files\Corel\Corel Paint Shop Pro X\Textures
PSPXI / X2: C:\Program Files\Corel\Corel Paint Shop Pro Photo X2\Corel_15
PSPX3: C:\Program Files\Corel\X3\PSPClassic\Corel_15
Plugins
** EYE CANDY3 **
http://www.pircnet.com/downloads.html
********************************
Open a new image 600 x 480
Transparent background
PSPX - X2: Colour Depth = 8bits/channel
PSPX3: Colour Depth RGB = 8bits/channel
Open up the JF_15 image in your PSP workspace
Right click on the Title Bar and select COPY from the options
Right click on the Title Bar of your frame image
and select PASTE AS NEW LAYER from the options.
PSP8 - PSP9: IMAGE >>> ROTATE >>> FREE ROTATE = RIGHT 90
Ensure "All layers" is UNCHECKED
PSPX - PSPX3: IMAGE >>> FREE ROTATE = RIGHT 90
Ensure "All layers" is UNCHECKED
CAREFULLY Reposition with your MOVER tool

ADJUST >>> HUE & SATURATION >>> COLORIZE
Hue = 125
Saturation = 60
LAYERS >>> DUPLICATE
PSP8 - PSP9: IMAGE >>> ROTATE >>> FREE ROTATE = RIGHT 90
Ensure "All layers" is UNCHECKED
PSPX - PSPX3: IMAGE >>> FREE ROTATE = RIGHT 90
Ensure "All layers" is UNCHECKED
CAREFULLY Reposition with your MOVER tool

ACTIVATE RASTER 2
LAYERS >>> DUPLICATE
IMAGE >>> FLIP
IMAGE >>> MIRROR
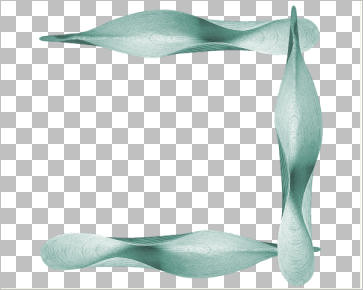
ACTIVATE THE TOP LAYER
IMAGE >>> RESIZE = 90%
Ensure "Resize all layers" is UNCHECKED
Resample using WEIGHTED AVERAGE
ADJUST >>> SHARPNESS >>> SHARPEN
LAYERS >>> DUPLICATE
IMAGE >>> FLIP
IMAGE >>> MIRROR
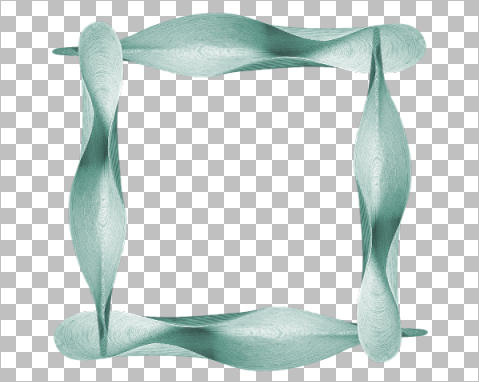
ACTIVATE RASTER 2
Choose your SELECTION TOOL
Selection Type = Rectangle
Mode = Replace
Feather = 0
Antialias = Checked
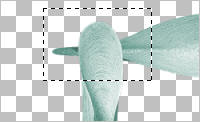
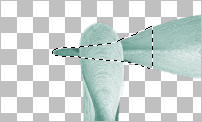
Select the area shown below then....
Click inside the marching ants to select the shape.
 . . 
ACTIVATE THE TOP LAYER
EDIT >>> CLEAR
DESELECT
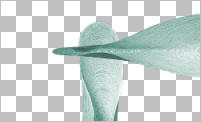
ACTIVATE THE MIDDLE LAYER
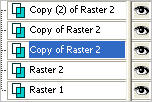
Choose your SELECTION TOOL
Same settings
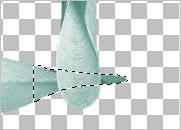
Select the area shown below then....
Click inside the marching ants to select the shape.
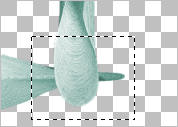 . . 
ACTIVATE THE 2ND TOP LAYER
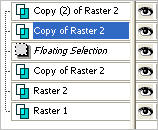
EDIT >>> CLEAR
DESELECT
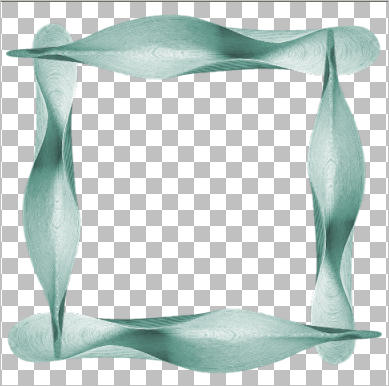
LAYERS >>> MERGE >>> MERGE VISIBLE
IMAGE >>> RESIZE = 90%
Ensure "Resize all layers" is UNCHECKED
Resample using WEIGHTED AVERAGE
ADJUST >>> SHARPNESS >>> SHARPEN
LAYERS >>> DUPLICATE
IMAGE >>> RESIZE = 90%
Ensure "Resize all layers" is UNCHECKED
Resample using WEIGHTED AVERAGE
IMAGE >>> FLIP
ADJUST >>> SHARPNESS >>> SHARPEN
LAYERS >>> MERGE >>> MERGE VISIBLE
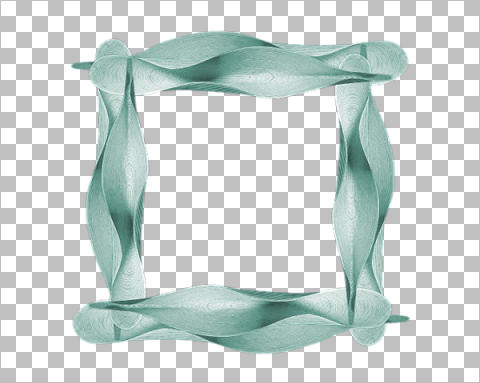
LAYERS >>> NEW RASTER LAYER
LAYERS >>> ARRANGE >>> MOVE DOWN
Flood fill with TEAL #c9dcd8
EFFECTS >>> TEXTURE EFFECTS >>> TEXTURE
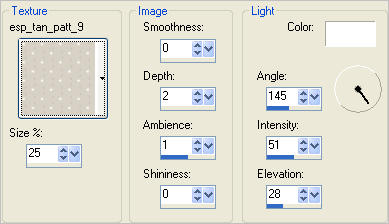
ADJUST >>> SHARPNESS >>> SHARPEN MORE
SELECTIONS >>> SELECT ALL
SELECTIONS >>> MODIFY >>> CONTRACT = 3
EFFECTS >>> 3D EFFECTS >>> OUTER BEVEL
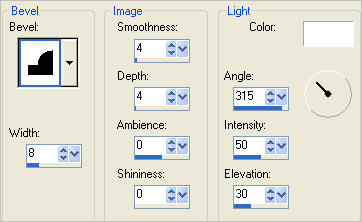
EFFECTS >>> 3D EFFECTS >>> DROP SHADOW
Vertical & Horizontal offsets = 1
Colour = GREEN #61968b
Opacity = 70
Blur = 0
Repeat Drop Shadow effect changing
Vertical & Horizontal Offsets to - ( minus ) 1
Click OK
SELECTIONS >>> MODIFY >>> CONTRACT = 12
EDIT >>> CLEAR
EFFECTS >>> 3D EFFECTS >>> DROP SHADOW
Vertical & Horizontal offsets = 1
Colour = GREEN #61968b
Opacity = 70
Blur = 0
Repeat Drop Shadow effect changing
Vertical & Horizontal Offsets to - ( minus ) 1
Click OK
DESELECT
EFFECTS >>> 3D EFFECTS >>> INNER BEVEL
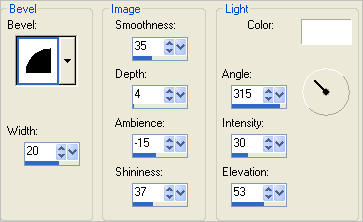
ADJUST >>> SHARPNESS >>> SHARPEN

LAYERS >>> DUPLICATE
IMAGE >>> RESIZE = 90%
Ensure "Resize all layers" is UNCHECKED
Resample using WEIGHTED AVERAGE
ADJUST >>> SHARPNESS >>> SHARPEN

LAYERS >>> MERGE >>> MERGE VISIBLE
With your MAGIC WAND
Mode = Replace
Match Mode = RGB Value
Tolerance = 0
Feather = 0
Antialias = UNchecked
Sample Merged = UNCHECKED
PSP9 - X3: Check CONTIGUOUS
PSPX - X3: There is no " Sample Merged"
PSPX - X3: Use all layers = UNChecked
Select the transparent area between the borders
SELECTIONS >>> MODIFY >>> EXPAND = 3

LAYERS >>> NEW RASTER LAYER
LAYERS >>> ARRANGE >>> MOVE DOWN
Flood fill with TEAL
EFFECTS >>> TEXTURE EFFECTS >>> BLINDS
COLOUR = #000000
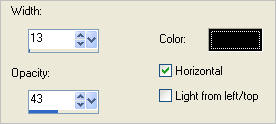
DESELECT

With your MAGIC WAND.... Same settings.
Select the CENTRE transparent area
SELECTIONS >>> MODIFY >>> CONTRACT = 8
LAYERS >>> NEW RASTER LAYER
LAYERS >>> ARRANGE >>> MOVE DOWN
Flood fill with TEAL
. EFFECTS >>> TEXTURE EFFECTS >>> TEXTURE
Same settings
ADJUST >>> SHARPNESS >>> SHARPEN MORE
DESELECT
ACTIVATE THE MERGED LAYER
With your MAGIC WAND.... Same settings.
Select the CENTRE of your image.
SELECTIONS >>> MODIFY >>> EXPAND = 3
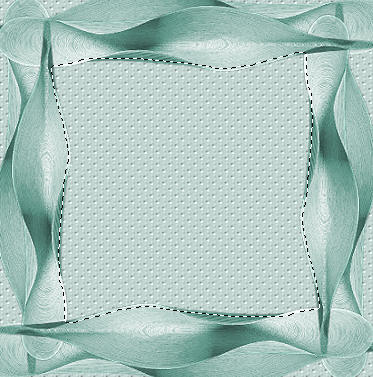
ACTIVATE RASTER 2
EDIT >>> CLEAR
DESELECT
ACTIVATE THE MERGED LAYER
EFFECTS >>> PLUGINS >>> EYE CANDY 3 >>> DROP SHADOW
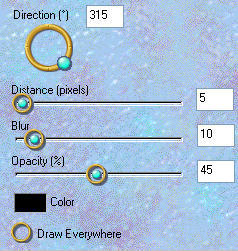
EDIT >>> Repeat Drop Shadow.. change DIRECTION to 135
LAYERS >>> MERGE >>> MERGE VISIBLE
Save as .psp image
LAYERS >>> NEW RASTER LAYER
LAYERS >>> ARRANGE >>> MOVE DOWN
Flood fill with WHITE
Open up the JR_WB_ABBY image in your PSP workspace
Right click on the Title Bar and select COPY from the options
Right click on the Title Bar of your frame image
and select PASTE AS NEW LAYER from the options.
IMAGE >>> RESIZE = 60%
Ensure "Resize all layers" is UNCHECKED
Resample using WEIGHTED AVERAGE
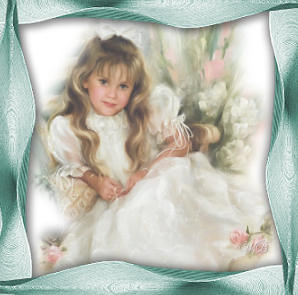
LAYERS >>> MERGE >>> MERGE ALL (Flatten)
Save as .jpg image
Testers Results
Page designed by

for

http://www.artistrypsp.com/
Copyright ©
2000-2011 Artistry In PSP / PSP Artistry
All rights reserved.
Unless specifically made available for
download,
no graphics or text may be removed from
this site for any reason
without written permission from Artistry
In PSP / PSP Artistry
|