PAPILLION
PSP8 - PSPX3
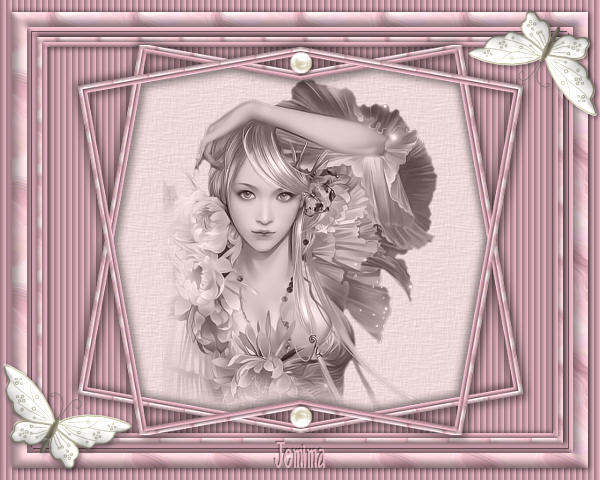
This tutorial was
created by Jemima using PSP9 ~ December 2010
BUT should be creatable using all versions of PSP
Copyright © 2010/11 ~ Jemima
~ All rights reserved
********************************
You will need the
following to complete this tutorial
Materials
ap_pearls_pastel.tub
V~Eyeletlacebutterflies.tub
AmethystFantasy.pspimage
Save to a folder on your computer
JF_PapillionPatt.jpg
Save to your PSP Patterns folder
PSP8: C:\Program Files\Jasc Software\Paint Shop Pro 8\Patterns
PSP9: C:\Program Files\Jasc Software\Paint Shop Pro 9\Patterns
PSPX: C:\Program Files\Corel\Corel Paint Shop Pro X\Patterns
PSPXI / X2: C:\Program Files\Corel\Corel Paint Shop Pro Photo X2\Corel_08
PSPX3: C:\Program Files\Corel\X3\PSPClassic\Corel_08
linenPOP.bmp
Save to your PSP Textures folder
PSP8: C:\Program Files\Jasc Software\Paint Shop Pro 8\Textures
PSP9: C:\Program Files\Jasc Software\Paint Shop Pro 9\Textures
PSPX: C:\Program Files\Corel\Corel Paint Shop Pro X\Textures
PSPXI / X2: C:\Program Files\Corel\Corel Paint Shop Pro Photo X2\Corel_15
PSPX3: C:\Program Files\Corel\X3\PSPClassic\Corel_15
Plugins
** EYE CANDY3 **
http://www.pircnet.com/downloads.html
********************************
In your MATERIALS PALETTE
Load the ' JF_PapillionPatt ' pattern in your foreground
using the settings below.
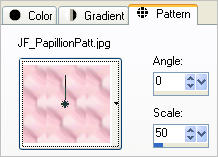
Load SOLID PINK ' #e9b6c4 ' in your background
Open a new image 600 x 480
Transparent background
PSPX - X2: Colour Depth = 8bits/channel
PSPX3: Colour Depth RGB = 8bits/channel
Flood fill with PINK
EFFECTS >>> TEXTURE EFFECTS >>> BLINDS
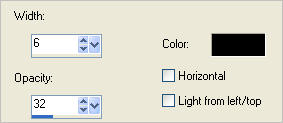
SELECTIONS >>> SELECT ALL
SELECTIONS >>> MODIFY >>> CONTRACT = 12
EDIT >>> CLEAR
LAYERS >>> NEW RASTER LAYER
Flood fill with pattern
SELECTIONS >>> MODIFY >>> CONTRACT = 15
EDIT >>> CLEAR
DESELECT
EFFECTS >>> 3D EFFECTS >>> INNER BEVEL
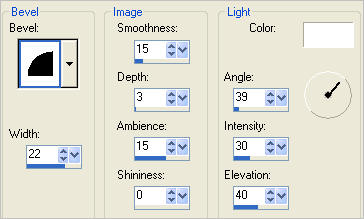

With your MAGIC WAND
Mode = Replace
Match Mode = RGB Value
Tolerance = 0
Feather = 0
Antialias = UNchecked
Sample Merged = UNCHECKED
PSP9 - X3: Check CONTIGUOUS
PSPX - X3: There is no " Sample Merged"
PSPX - X3: Use all layers = UNChecked
Select the CENTRE transparent area
LAYERS >>> NEW RASTER LAYER
Flood fill with PINK
SELECTIONS >>> MODIFY >>> CONTRACT = 5
EFFECTS >>> 3D EFFECTS >>> DROP SHADOW
Vertical & Horizontal offsets = 1
Colour = Black
Opacity = 50
Blur = 0
Repeat Drop Shadow effect changing
Vertical & Horizontal Offsets to - ( minus ) 1
Click OK
SELECTIONS >>> MODIFY >>> CONTRACT = 5
EDIT >>> CLEAR
DESELECT
EFFECTS >>> 3D EFFECTS >>> INNER BEVEL
Same settings

In your MATERIALS PALETTE
Change the SCALE of the pattern to 25
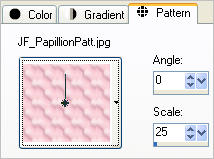
With your MAGIC WAND ... same settings..
Select the CENTRE transparent area
LAYERS >>> NEW RASTER LAYER
Flood fill with the pattern
SELECTIONS >>> MODIFY >>> CONTRACT = 5
EDIT >>> CLEAR
DESELECT
EFFECTS >>> 3D EFFECTS >>> INNER BEVEL
Same settings

With your MAGIC WAND ... same settings..
Select the CENTRE transparent area
LAYERS >>> NEW RASTER LAYER
Flood fill with PINK
SELECTIONS >>> MODIFY >>> CONTRACT = 5
EDIT >>> CLEAR
DESELECT
EFFECTS >>> 3D EFFECTS >>> INNER BEVEL
Same settings

LAYERS >>> MERGE >>> MERGE DOWN
LAYERS >>> DUPLICATE
EFFECTS >>> REFLECTION EFFECTS >>> ROTATING MIRROR

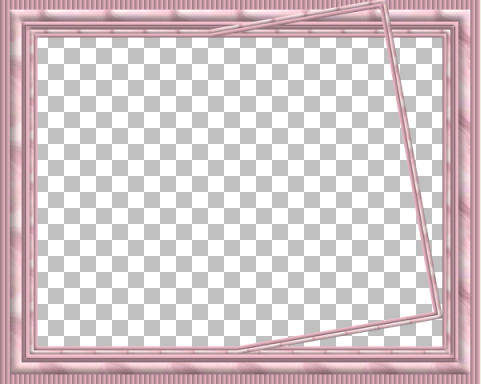
LAYERS >>> DUPLICATE
IMAGE >>> MIRROR
Choose your SELECTION TOOL then click on the CUSTOM SELECTION
symbol
and enter these coordinates.
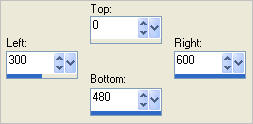
EDIT >>> CLEAR
SELECTIONS >>> INVERT
ACTIVATE Copy of Raster 4 layer
EDIT >>> CLEAR
DESELECT
ACTIVATE Copy (2) of Raster 4
LAYERS >>> MERGE >>> MERGE DOWN
IMAGE >>> RESIZE = 88%
Ensure "Resize all layers" is UNCHECKED
Resample using WEIGHTED AVERAGE
ADJUST >>> SHARPNESS >>> SHARPEN
Reposition down with your MOVER tool

LAYERS >>> DUPLICATE
IMAGE >>> FLIP
LAYERS >>> MERGE >>> MERGE DOWN
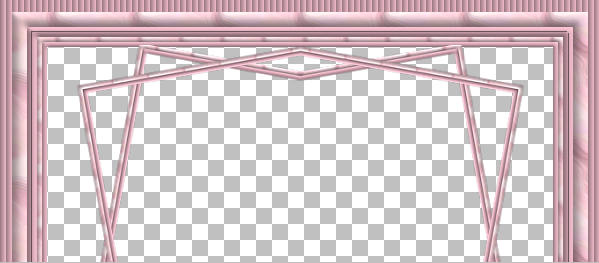
LAYERS >>> NEW RASTER LAYER
LAYERS >>> ARRANGE >>> SEND TO BOTTOM
Flood fill with PINK
EFFECTS >>> TEXTURE EFFECTS >>> BLINDS
Same settings
ACTIVATE Copy of Raster 4 layer
With your MAGIC WAND.... Same settings.
Select the CENTRE of the image
SELECTIONS >>> MODIFY >>> EXPAND = 4
.
ACTIVATE RASTER 5
EDIT >>> CLEAR
DESELECT
ACTIVATE Copy of Raster 4
EFFECTS >>> PLUGINS >>> EYE CANDY 3 >>> DROP SHADOW
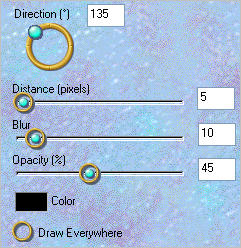
EDIT >>> Repeat Drop Shadow.. change DIRECTION to 315
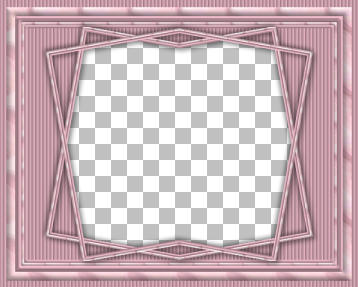
ACTIVATE RASTER 4
EFFECTS >>> PLUGINS >>> EYE CANDY 3 >>> DROP SHADOW

EDIT >>> Repeat Drop Shadow.. change DIRECTION to 135
ACTIVATE RASTER 2
EFFECTS >>> PLUGINS >>> EYE CANDY 3 >>> DROP SHADOW
Same settings
EDIT >>> Repeat Drop Shadow.. change DIRECTION to 315
LAYERS >>> MERGE >>> MERGE VISIBLE
Open up the V~Eyeletlacebutterflies image in your PSP workspace
Select the centre left butterfly using your FREEHAND SELECTION tool
Right click on the Title Bar and select COPY from the options
Right click on the Title Bar of your frame image
and select PASTE AS NEW LAYER from the options.
IMAGE >>> RESIZE = 50%
Ensure "Resize all layers" is UNCHECKED
Resample using WEIGHTED AVERAGE
EFFECTS >>> 3D EFFECTS >>> INNER BEVEL
Same settings
ADJUST >>> BRIGHTNESS and CONTRAST >>> BRIGHTNESS/CONTRAST

Reposition to the bottom left of your frame with your MOVER tool
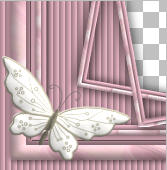
LAYERS >>> DUPLICATE
IMAGE >>> FLIP
IMAGE >>> MIRROR
LAYERS >>> MERGE >>> MERGE DOWN
EFFECTS >>> PLUGINS >>> EYE CANDY 3 >>> DROP SHADOW
Same settings
Open up the ap_pearls_pastel.tub image in your PSP workspace
Select the pearl third from the left using your FREEHAND SELECTION tool
Right click on the Title Bar and select COPY from the options
Right click on the Title Bar of your frame image
and select PASTE AS NEW LAYER from the options.
IMAGE >>> RESIZE = 75%
Ensure "Resize all layers" is UNCHECKED
Resample using WEIGHTED AVERAGE
Reposition to the centre top of your frame with your MOVER tool

LAYERS >>> DUPLICATE
IMAGE >>> FLIP
LAYERS >>> MERGE >>> MERGE VISIBLE
Save as .psp image
LAYERS >>> NEW RASTER LAYER
LAYERS >>> ARRANGE >>> MOVE DOWN
Flood fill with LIGHT PINK #f7e1e1
EFFECTS >>> TEXTURE EFFECTS >>> TEXTURE
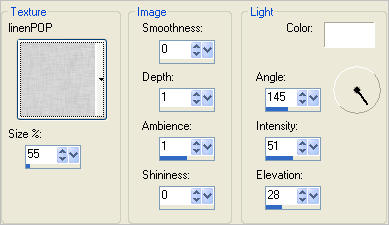
Open up the AmethystFantasy image in your PSP workspace
Select the pearl third from the left using your FREEHAND SELECTION tool
Right click on the Title Bar and select COPY from the options
Right click on the Title Bar of your frame image
and select PASTE AS NEW LAYER from the options.
IMAGE >>> RESIZE = 50%
Ensure "Resize all layers" is UNCHECKED
Resample using WEIGHTED AVERAGE
In your LAYER PALETTE change the BLEND MODE to LUMINANCE (L)
LAYERS >>> MERGE >>> MERGE ALL (Flatten)
Save as .jpg image
Testers Results
Page designed by

for

http://www.artistrypsp.com/
Copyright ©
2000-2011 Artistry In PSP / PSP Artistry
All rights reserved.
Unless specifically made available for
download,
no graphics or text may be removed from
this site for any reason
without written permission from Artistry
In PSP / PSP Artistry
|