TAG 23
PSP8 to PSPX2
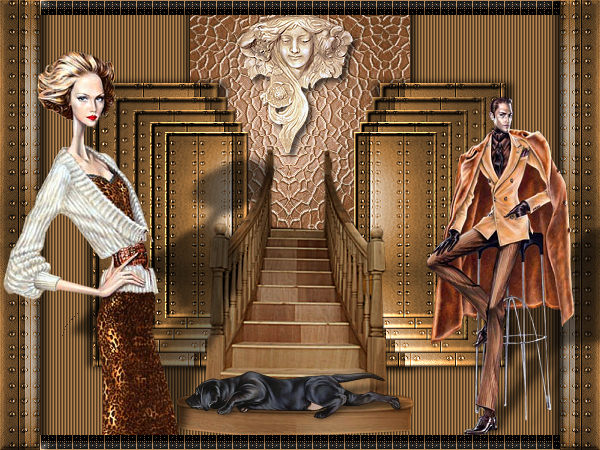
This tutorial was written by Jemima ~ January 2010
Copyright © 2010 ~ Jemima ~ All rights reserved
********************************
This was created using PSP9 but can be adapted for other versions of PSP.
You will need the
following to complete this tutorial
Materials
JF_element118.pspimage
JF_stairs2.psp
1aconledge6.tub
JF_ArturoElena14.psp
JF_ArturoElena17.psp
MJR_crawling-black-labby_BLongley.psp
Save to a folder on your computer
JF_Patt114.jpg
JF_Patt115.jpg
Save to your PSP Patterns folder
Plugins
** EYE CANDY3 **
http://www.pircnet.com/downloads.html
** Cybia Screenworks **
download
http://www.cybia.co.uk/plugins.htm
********************************
REMEMBER TO SAVE YOUR WORK OFTEN
********************************
In your MATERIALS PALETTE
Load the ' JF_Patt114 ' pattern in your foreground
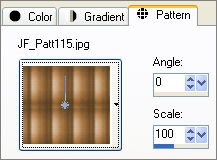
Load the ' JF_Patt115 ' pattern in your background
using the settings below
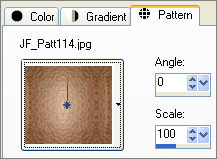 . . 
Load SOLID BROWN ' #72502c ' in your foreground
Load SOLID TAN ' #b5844f ' in your background
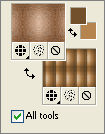
Open a new image 600 x 450
Transparent background
PSPX/XI/X2: Colour Depth = 8bits/channel
Flood fill with SOLID TAN
EFFECTS >>> TEXTURE EFFECTS >>> BLINDS
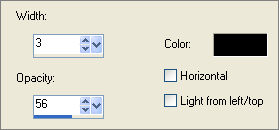
LAYERS >>> NEW RASTER LAYER
Choose your SELECTION TOOL then click on the CUSTOM SELECTION
symbol
and enter these coordinates.
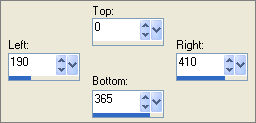
Flood fill with foreground pattern
DESELECT
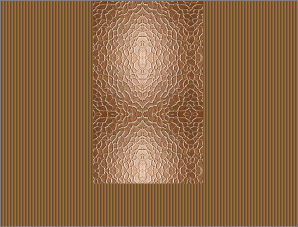
LAYERS >>> NEW RASTER LAYER
Choose your SELECTION TOOL then click on the CUSTOM SELECTION symbol
and enter these coordinates.
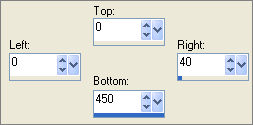
Flood fill with background pattern
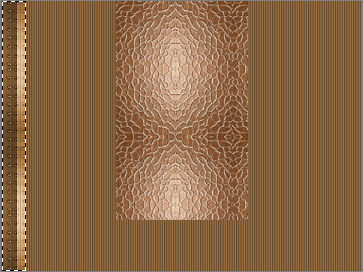
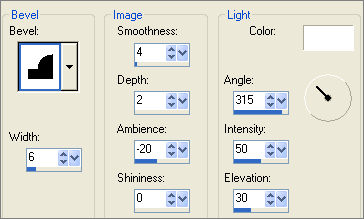
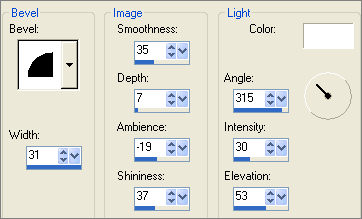
EFFECTS >>> 3D EFFECTS >>> INNER BEVEL
DESELECT
LAYERS >>> DUPLICATE
IMAGE >>> MIRROR
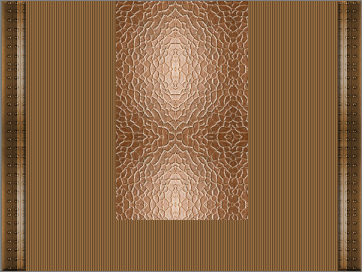
LAYERS >>> NEW RASTER LAYER
Choose your SELECTION TOOL then click on the CUSTOM SELECTION symbol
and enter these coordinates.
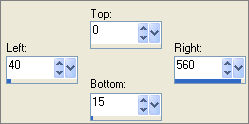
Flood fill with background pattern
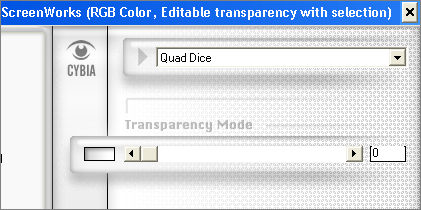
EFFECTS >>> PLUGINS >>> CYBIA >>> SCREENWORKS
EFFECTS >>> 3D EFFECTS >>> INNER BEVEL
DESELECT

LAYERS >>> DUPLICATE
IMAGE >>> FLIP
Open up the JF_element118 image in your PSP workspace
Right click on the Title Bar and select COPY from the options
Right click on the Title Bar of your tag image
and select PASTE AS NEW LAYER from the options.
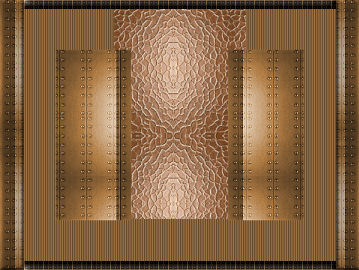
EFFECTS >>> 3D EFFECTS >>> INNER BEVEL
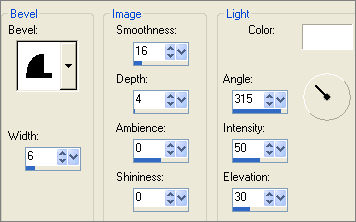
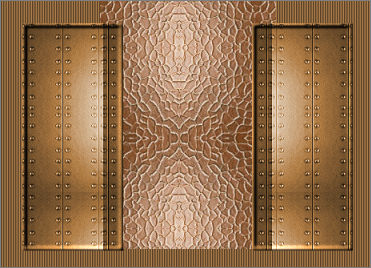
LAYERS >>> DUPLICATE (1)
IMAGE >>> RESIZE = 90%
Ensure "Resize all layers" is UNCHECKED
Resample using WEIGHTED AVERAGE
ADJUST >>> SHARPNESS >>> SHARPEN
LAYERS >>> DUPLICATE (2)
IMAGE >>> RESIZE = 90%
Ensure "Resize all layers" is UNCHECKED
Resample using WEIGHTED AVERAGE
ADJUST >>> SHARPNESS >>> SHARPEN
LAYERS >>> DUPLICATE (3)
IMAGE >>> RESIZE = 90%
Ensure "Resize all layers" is UNCHECKED
Resample using WEIGHTED AVERAGE
ADJUST >>> SHARPNESS >>> SHARPEN
LAYERS >>> DUPLICATE (4)
IMAGE >>> RESIZE = 90%
Ensure "Resize all layers" is UNCHECKED
Resample using WEIGHTED AVERAGE
ADJUST >>> SHARPNESS >>> SHARPEN
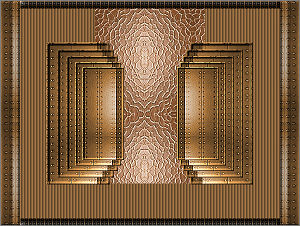
ACTIVATE RASTER 2
EFFECTS >>> PLUGINS >>> EYE CANDY 3 >>> DROP SHADOW
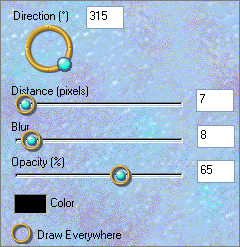
EDIT >>> Repeat Drop Shadow.. change DIRECTION to 135
ACTIVATE RASTER 5
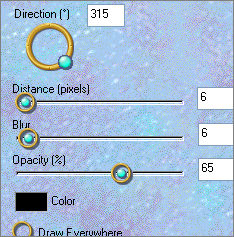
EFFECTS >>> PLUGINS >>> EYE CANDY 3 >>> DROP SHADOW
CHANGE DIRECTION TO 170
EDIT >>> Repeat Drop Shadow.. change DIRECTION to 0
ACTIVATE RASTER 3
EFFECTS >>> PLUGINS >>> EYE CANDY 3 >>> DROP SHADOW
Same settings (Direction = 0)
ACTIVATE Copy of RASTER 3
EFFECTS >>> PLUGINS >>> EYE CANDY 3 >>> DROP SHADOW
CHANGE DIRECTION TO 170
Open up the 1aconledge6 image in your PSP workspace
Right click on the Title Bar and select COPY from the options
Right click on the Title Bar of your tag image
and select PASTE AS NEW LAYER from the options.
IMAGE >>> RESIZE = 55%
Ensure "Resize all layers" is UNCHECKED
Resample using WEIGHTED AVERAGE
ADJUST >>> SHARPNESS >>> SHARPEN
EFFECTS >>> PLUGINS >>> EYE CANDY 3 >>> DROP SHADOW
Reposition with your MOVER tool

CLOSE RASTER 4 and COPY OF RASTER 4
LAYERS >>> MERGE >>> MERGE VISIBLE
OPEN RASTER 4 and COPY OF RASTER 4
Still on the MERGED layer
Open up the JF_stairs2 image in your PSP workspace
Right click on the Title Bar and select COPY from the options
Right click on the Title Bar of your tag image
and select PASTE AS NEW LAYER from the options.
IMAGE >>> RESIZE = 75%
Ensure "Resize all layers" is UNCHECKED
Resample using WEIGHTED AVERAGE
ADJUST >>> SHARPNESS >>> SHARPEN MORE
Reposition with your MOVER tool
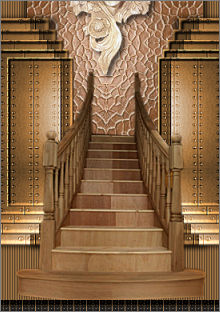
ACTIVATE Copy of Raster 4
Open up the JF_ArturoElena17 image in your PSP workspace
Right click on the Title Bar and select COPY from the options
Right click on the Title Bar of your tag image
and select PASTE AS NEW LAYER from the options.
IMAGE >>> RESIZE = 75%
Ensure "Resize all layers" is UNCHECKED
Resample using WEIGHTED AVERAGE
ADJUST >>> SHARPNESS >>> SHARPEN
Reposition with your MOVER tool
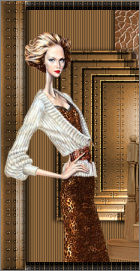
EFFECTS >>> PLUGINS >>> EYE CANDY 3 >>> PERSPECTIVE SHADOW

Open up the JF_ArturoElena14 image in your PSP workspace
Right click on the Title Bar and select COPY from the options
Right click on the Title Bar of your tag image
and select PASTE AS NEW LAYER from the options.
IMAGE >>> RESIZE = 60%
Ensure "Resize all layers" is UNCHECKED
Resample using WEIGHTED AVERAGE
ADJUST >>> SHARPNESS >>> SHARPEN
Reposition with your MOVER tool
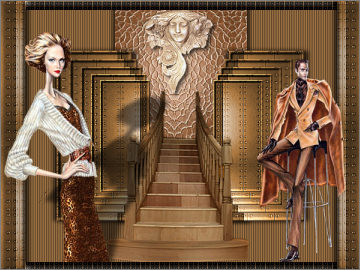
EFFECTS >>> PLUGINS >>> EYE CANDY 3 >>> PERSPECTIVE SHADOW
Same settings
OK... last one....
Open up the MJR_crawling-black-labby_BLongley image in your PSP workspace
Right click on the Title Bar and select COPY from the options
Right click on the Title Bar of your tag image
and select PASTE AS NEW LAYER from the options.
IMAGE >>> RESIZE = 43%
Ensure "Resize all layers" is UNCHECKED
Resample using WEIGHTED AVERAGE
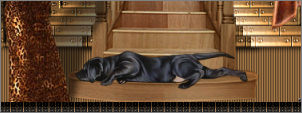
EFFECTS >>> PLUGINS >>> EYE CANDY 3 >>> PERSPECTIVE SHADOW
Same settings
LAYERS >>> MERGE >>> MERGE ALL (Flatten)
Save as .jpg image
TESTERS RESULTS
Page designed by

for
http://www.artistrypsp.com/
Copyright ©
2000-2010 Artistry In PSP / PSP Artistry
All rights reserved.
Unless specifically made available for
download,
no graphics or text may be removed from
this site for any reason
without written permission from Artistry
In PSP / PSP Artistry
|