TAG BACK 39
PSP8 TO PSP12
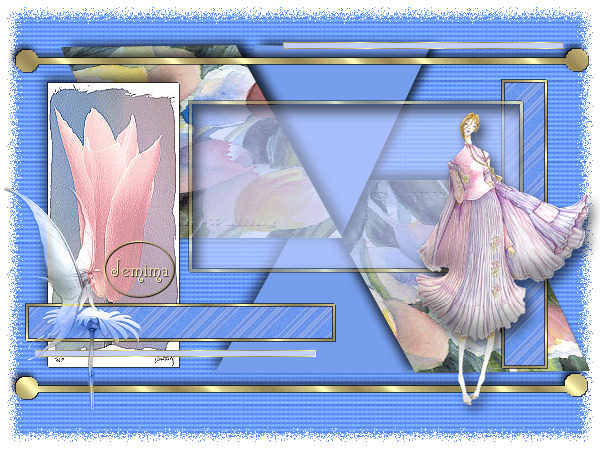
This tutorial was
written by Jemima ~ 2007
Copyright © 2007 ~ Jemima
~ All rights reserved
********************************
This was created using PSP9 but can be adapted for other versions of PSP.
You will need the
following to complete this tutorial
Materials
RIGHT CLICK >>> SAVE TARGET AS
ab9987.jpg
Fairy On Globe Flower~LJT.psp
JF_template2bb.psp
Othello_Fairy.psp
springtulips.jpg
Save to a folder on your computer
goldfill1.bmp
PatternY~06_GxChic!.bmp
Save to your PSP Patterns folder
PSP8: C:\Program Files\Jasc Software\Paint Shop Pro 8\Patterns
PSP9: C:\Program Files\Jasc Software\Paint Shop Pro 9\Patterns
PSPX: C:\Program Files\Corel\Corel Paint Shop Pro X\Patterns
PSPXI / X2: C:\Program Files\Corel\Corel Paint Shop Pro Photo X2\Corel_08
Plugins
** EYE CANDY3 **
http://www.pircnet.com/downloads.html
********************************
Open your images in PSP and minimize
Maximize the "
JF_template2bb.psp "
WINDOW >>> DUPLICATE
Close the original Image
Close all layers except Raster 1 which you will highlight to activate
SELECTIONS >>> SELECT ALL
SELECTIONS >>> FLOAT
SELECTIONS >>> DEFLOAT
flood fill with BLUE
" #759eed "
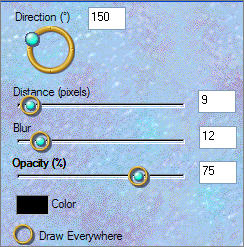
EFFECTS >>> PLUGINS >>> EYE CANDY 3 >>> DROP SHADOW
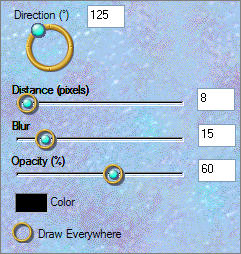
DESELECT
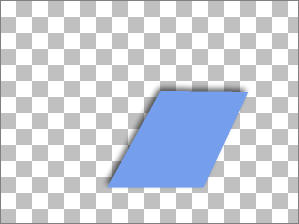
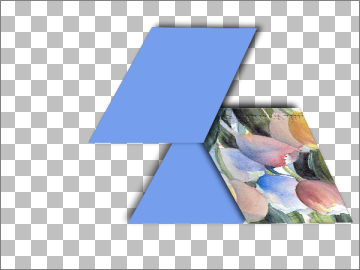
OPEN & ACTIVATE Copy of Raster 1
SELECTIONS >>> SELECT ALL
SELECTIONS >>> FLOAT
SELECTIONS >>> DEFLOAT
Open up the springtulips.jpg image in your PSP workspace
WINDOW >>> DUPLICATE
IMAGE FLIP (The duplicated image)
Right click on the Title Bar and select COPY from the options
Right click on the Title Bar of your new tag image
and select PASTE INTO SELECTION from the options.
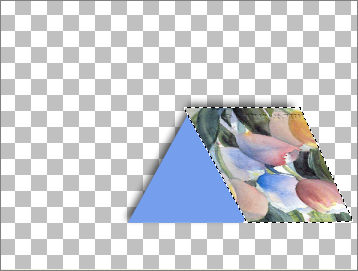
Close the duplicated image
EFFECTS >>> PLUGINS >>> EYE CANDY 3 >>> DROP SHADOW
DESELECT
OPEN & ACTIVATE Copy (2) of Raster 1
SELECTIONS >>> SELECT ALL
SELECTIONS >>> FLOAT
SELECTIONS >>> DEFLOAT
Flood fill with BLUE #759eed
EFFECTS >>> PLUGINS >>> EYE CANDY 3 >>> DROP SHADOW
Same settings but CHANGE DIRECTION TO 30
DESELECT
OPEN & ACTIVATE Copy (3) of Raster 1
SELECTIONS >>> SELECT ALL
SELECTIONS >>> FLOAT
SELECTIONS >>> DEFLOAT
Open up the springtulips.jpg image in your PSP workspace
Right click on the Title Bar and select COPY from the options
Right click on the Title Bar of your new tag image
and select PASTE INTO SELECTION from the options.
EFFECTS >>> PLUGINS >>> EYE CANDY 3 >>> DROP SHADOW
Same settings
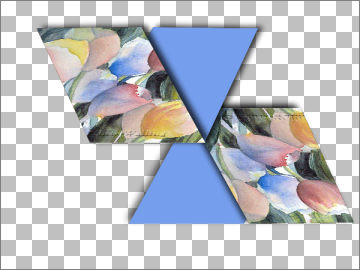
DESELECT
OPEN & ACTIVATE THE MERGED LAYER
SELECTIONS >>> SELECT ALL
SELECTIONS >>> FLOAT
SELECTIONS >>> DEFLOAT
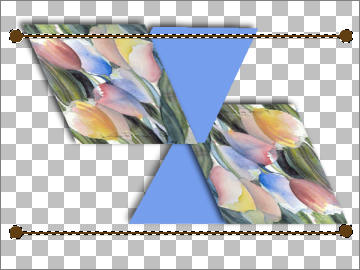
In your MATERIALS PALETTE
Load the ' goldfill1 ' pattern in your foreground
using the settings below.
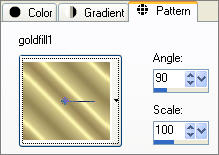
Flood fill the bands with the gold pattern
EFFECTS >>> 3D EFFECTS >>> DROP SHADOW
Vertical & Horizontal offsets = 1
Colour = Black
Opacity = 65
Blur = 0
Repeat Drop Shadow effect changing
Vertical & Horizontal Offsets to - ( minus ) 1
Click OK
EFFECTS >>> PLUGINS >>> EYE CANDY 3 >>> DROP SHADOW
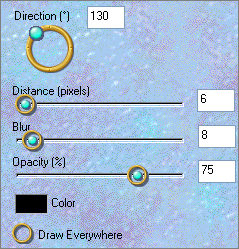
DESELECT
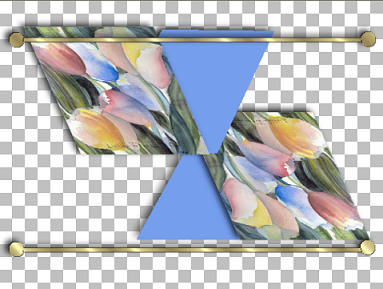
OPEN & ACTIVATE RASTER 2
SELECTIONS >>> SELECT ALL
SELECTIONS >>> FLOAT
SELECTIONS >>> DEFLOAT
Open up the ab9987.jpg image in your PSP workspace
Right click on the Title Bar and select COPY from the options
Right click on the Title Bar of your new tag image
and select PASTE INTO SELECTION from the options.
EFFECTS >>> 3D EFFECTS >>> DROP SHADOW
Vertical & Horizontal offsets = 1
Colour = Black
Opacity = 65
Blur = 0
Repeat Drop Shadow effect changing
Vertical & Horizontal Offsets to - ( minus ) 1
Click OK
EFFECTS >>> PLUGINS >>> EYE CANDY 3 >>> DROP SHADOW
Then DESELECT
 . . 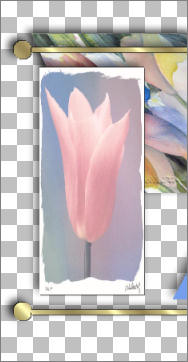
EFFECTS >>> EDGE EFFECTS >>> ENHANCE
OPEN & ACTIVATE RASTER 3
SELECTIONS >>> SELECT ALL
SELECTIONS >>> FLOAT
SELECTIONS >>> DEFLOAT
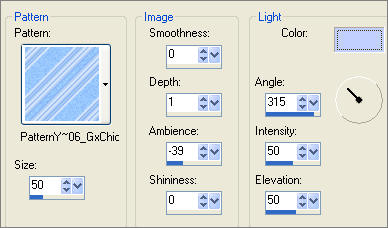
EFFECTS >>> TEXTURE EFFECTS >>> SCULPTURE
COLOUR = " #c1d0ff "
LAYERS >>> NEW RASTER LAYER
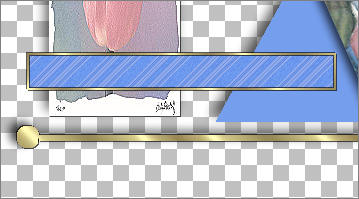
Flood fill with the gold pattern
SELECTIONS >>> MODIFY >>> CONTRACT = 2
EDIT >>> CLEAR
DESELECT
EFFECTS >>> 3D EFFECTS >>> DROP SHADOW
Vertical & Horizontal offsets = 1
Colour = Black
Opacity = 65
Blur = 0
Repeat Drop Shadow effect changing
Vertical & Horizontal Offsets to - ( minus ) 1
Click OK
DESELECT
OPEN & ACTIVATE THE MERGED 2 LAYER
SELECTIONS >>> SELECT ALL
SELECTIONS >>> FLOAT
SELECTIONS >>> DEFLOAT
Flood fill with the gold pattern
SELECTIONS >>> MODIFY >>> CONTRACT = 1
EDIT >>> CLEAR
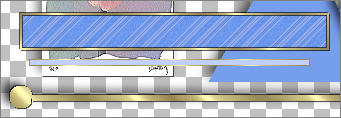
Flood fill with LIGHT BLUE " #c1d0ff "
DESELECT

OPEN & ACTIVATE RASTER 4
SELECTIONS >>> SELECT ALL
SELECTIONS >>> FLOAT
SELECTIONS >>> DEFLOAT
EFFECTS >>> TEXTURE EFFECTS >>> SCULPTURE
Same settings
LAYERS >>> NEW RASTER LAYER
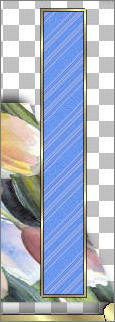
Flood fill with the gold pattern
SELECTIONS >>> MODIFY >>> CONTRACT = 2
EDIT >>> CLEAR
DESELECT
EFFECTS >>> 3D EFFECTS >>> DROP SHADOW
Vertical & Horizontal offsets = 1
Colour = Black
Opacity = 65
Blur = 0
Repeat Drop Shadow effect changing
Vertical & Horizontal Offsets to - ( minus ) 1
Click OK
OPEN & ACTIVATE RASTER 6
SELECTIONS >>> SELECT ALL
SELECTIONS >>> FLOAT
SELECTIONS >>> DEFLOAT
Flood fill with the gold pattern
EFFECTS >>> 3D EFFECTS >>> DROP SHADOW
Vertical & Horizontal offsets = 1
Colour = Black
Opacity = 65
Blur = 0
Repeat Drop Shadow effect changing
Vertical & Horizontal Offsets to - ( minus ) 1
Click OK
DESELECT
With your MAGIC WAND
Mode = Replace
Match Mode = RGB Value
Tolerance = 0
Feather = 0
Antialias = UNchecked
Sample Merged = UNCHECKED
PSP9/X: Check CONTIGUOUS
PSPX: There is no " Sample Merged"
PSPX: Use all layers = UNChecked
PSP9/X: ANTIALIAS = Inside
Select the area inside the gold border
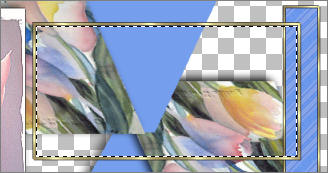
Flood fill with LIGHT BLUE " #c1d0ff "
In your LAYER PALETTE change the OPACITY to 65%
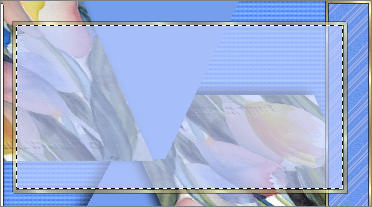
LAYERS >>> NEW RASTER LAYER
SELECTIONS >>> INVERT
EFFECTS >>> PLUGINS >>> EYE CANDY 3 >>> DROP SHADOW
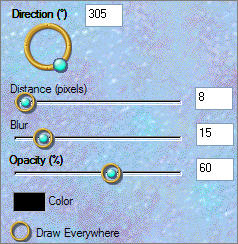
DESELECT
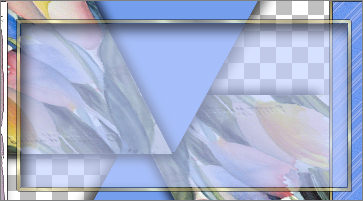
ACTIVATE RASTER 1
LAYERS >>> NEW RASTER LAYER
LAYERS >>> ARRANGE >>> MOVE DOWN
Flood fill with LIGHT BLUE " #c1d0ff "
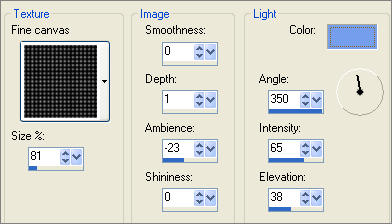
EFFECTS >>> TEXTURE EFFECTS >>> TEXTURE
COLOUR = " #759eed "
 . .
SELECTIONS >>> SELECT ALL
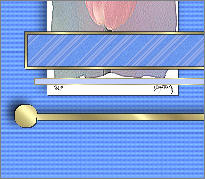
SELECTIONS >>> MODIFY >>> CONTRACT = 15
SELECTIONS >>> MODIFY >>> INSIDE/OUTSIDE FEATHER

SELECTIONS >>> INVERT
EDIT >>> CLEAR
DESELECT
In your LAYER PALETTE change the BLEND MODE to DISSOLVE
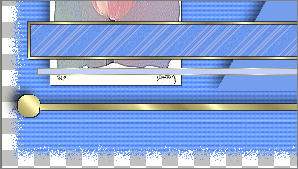
LAYERS >>> NEW RASTER LAYER
Flood fill with WHITE
(I chose WHITE because my web page background is white)
LAYERS >>> ARRANGE >>> MOVE DOWN
LAYERS >>> MERGE >>> MERGE VISIBLE
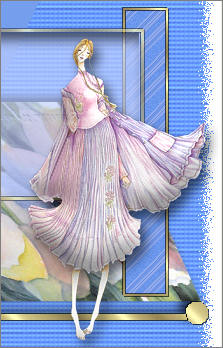
Open up the Othello_Fairy.psp image in your PSP workspace
Right click on the Title Bar and select COPY from the options
Right click on the Title Bar of your new tag image
and select PASTE AS NEW LAYER from the options.
IMAGE >>> RESIZE = 68%
Ensure "Resize all layers" is UNCHECKED
ADJUST >>> SHARPNESS >>> SHARPEN
EFFECTS >>> 3D EFFECTS >>> INNER BEVEL
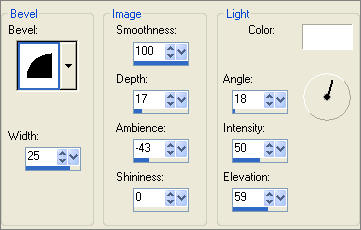
EFFECTS >>> PLUGINS >>> EYE CANDY 3 >>> DROP SHADOW
Same settings
Reposition with your MOVER tool
Open up the Fairy On Globe Flower~LJT.psp image in your PSP workspace
Right click on the Title Bar and select COPY from the options
Right click on the Title Bar of your new tag image
and select PASTE AS NEW LAYER from the options.
IMAGE >>> RESIZE = 55%
Ensure "Resize all layers" is UNCHECKED
ADJUST >>> SHARPNESS >>> SHARPEN
EFFECTS >>> 3D EFFECTS >>> INNER BEVEL
Same settings
Reposition with your MOVER tool
In your LAYER PALETTE change the BLEND MODE to LUMINANCE (L)
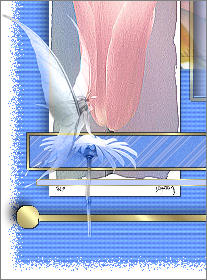
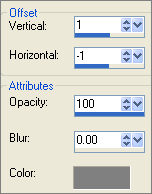
EFFECTS >>> 3D EFFECTS >>> DROP SHADOW
COLOUR = #808080
LAYERS >>> MERGE >>> MERGE ALL (Flatten)
Save as .jpg image
TESTERS RESULTS
Page designed by

for
http://www.artistrypsp.com/
Copyright ©
2000-2010 Artistry In PSP / PSP Artistry
All rights reserved.
Unless specifically made available for
download,
no graphics or text may be removed from
this site for any reason
without written permission from Artistry
In PSP / PSP Artistry
|