LONG LONG AGO
PSP8 to PSPX2
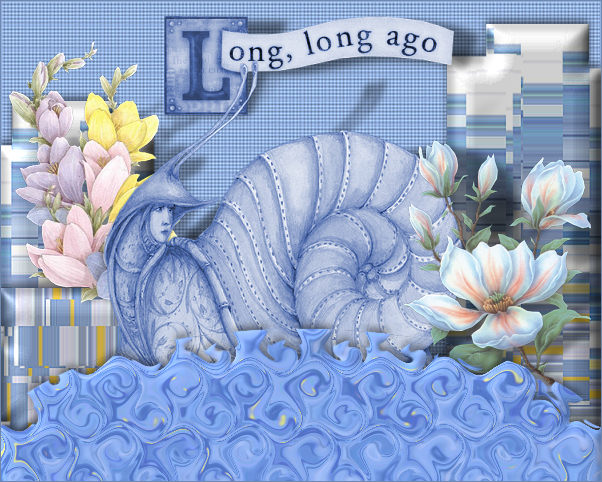
This tutorial was written by Jemima ~ April 2010
Copyright © 2010 ~ Jemima ~ All rights reserved
********************************
This was created using PSP9 but can be adapted for other versions of PSP.
You will need the
following to complete this tutorial
Materials
JF_LLA_STRIP.pspimage
pretty flowers_vsc.psp
blb-RobPohl_VictorianFantasy02-mac.psp
blb_lrsWTW07-05BrewsterPatience.psp
KarenFoster_StorybookPhrasesSheet1_SLH.psp
Save to a folder on your computer
JF_PattBL5.jpg
Save to your PSP Patterns folder
PSP8: C:\Program Files\Jasc Software\Paint Shop Pro 8\Patterns
PSP9: C:\Program Files\Jasc Software\Paint Shop Pro 9\Patterns
PSPX: C:\Program Files\Corel\Corel Paint Shop Pro X\Patterns
PSPXI / X2: C:\Program Files\Corel\Corel Paint Shop Pro Photo X2\Corel_08
Fine canvas.bmp
Save to your PSP Textures folder
PSP8: C:\Program Files\Jasc Software\Paint Shop Pro 8\Textures
PSP9: C:\Program Files\Jasc Software\Paint Shop Pro 9\Textures
PSPX: C:\Program Files\Corel\Corel Paint Shop Pro X\Textures
PSPXI / X2: C:\Program Files\Corel\Corel Paint Shop Pro Photo X2\Corel_15
Plugins
** EYE CANDY3 **
http://www.pircnet.com/downloads.html
** DSB FLUX **
HERE
********************************
In your MATERIALS PALETTE
Load BLUE " #92afdc" in your foreground
and
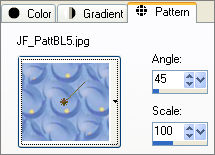
JF_PattBL5 pattern in the background using these settings
Open a new image 600 x 480
Transparent background
PSPX - X2: Colour Depth = 8bits/channel
Flood fill with WHITE
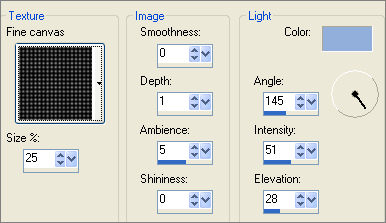
EFFECTS >>> TEXTURE EFFECTS >>> TEXTURE
COLOUR =
BLUE " #92afdc"
ADJUST >>> SHARPNESS >>> SHARPEN MORE
LAYERS >>> NEW RASTER LAYER
Choose your SELECTION TOOL
Selection Type = Ellipse
Mode = Replace
Feather = 1
Antialias = Checked
Starting at 300 pixels across and 430 pixels down
drag your cursor down to the right until the bottom of the ellipse can
no longer be seen
and release
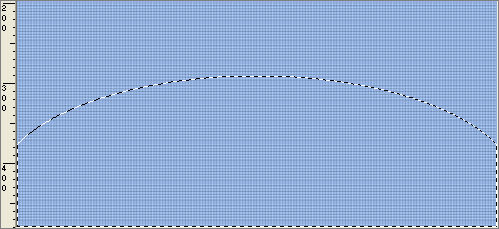
Flood fill with background pattern
DO NOT DESELECT
EFFECTS >>> PLUGINS >>> DSB FLUX >>> BUBBLES
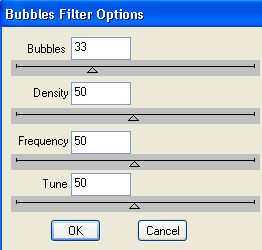
EDIT >>> Repeat Bubbles
DESELECT
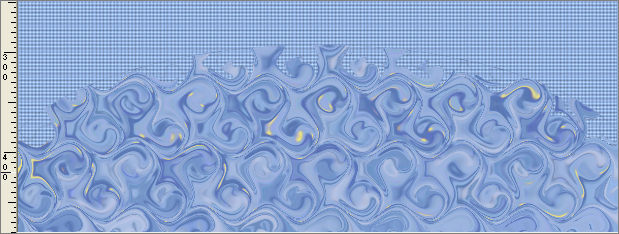
ACTIVATE RASTER 1
Open up the JF_LLA_STRIP image in your PSP workspace
Right click on the Title Bar and select COPY from the options
Right click on the Title Bar of your tag image
and select PASTE AS NEW LAYER from the options.
IMAGE >>> RESIZE = 90%
Ensure "Resize all layers" is UNCHECKED
Resample using WEIGHTED AVERAGE
ADJUST >>> SHARPNESS >>> SHARPEN
Reposition with your MOVER tool
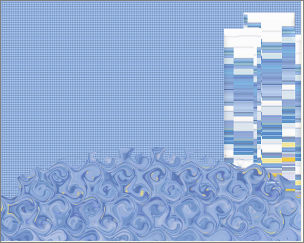

LAYERS >>> DUPLICATE
IMAGE >>> MIRROR
Reposition with your MOVER tool
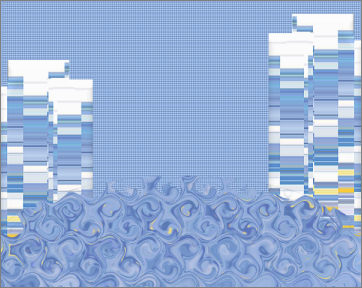

LAYERS >>> DUPLICATE
PSP8 - PSP9: IMAGE >>> ROTATE >>> FREE ROTATE = RIGHT 90
Ensure "All layers" is UNCHECKED
PSPX - PSPX2: IMAGE >>> FREE ROTATE = RIGHT 90
Ensure "All layers" is UNCHECKED
Reposition with your MOVER tool

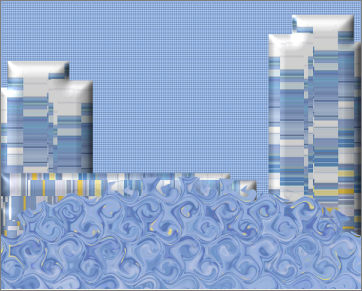
EFFECTS >>> 3D EFFECTS >>> INNER BEVEL
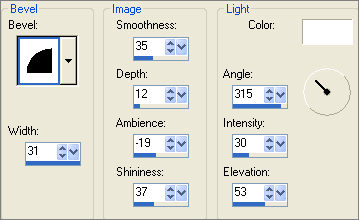
ACTIVATE Copy of Raster 3 layer
EDIT >>> Repeat Inner Bevel
ACTIVATE RASTER 3
EDIT >>> Repeat Inner Bevel
EFFECTS >>> PLUGINS >>> EYE CANDY 3 >>> DROP SHADOW
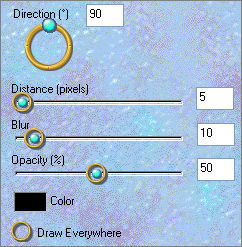
ACTIVATE Copy of Raster 3 layer
EDIT >>> Repeat Drop Shadow
ACTIVATE Copy (2) of Raster 3 layer
EDIT >>> Repeat Drop Shadow
ACTIVATE RASTER 2
EDIT >>> Repeat Drop Shadow
EFFECTS >>> 3D EFFECTS >>> INNER BEVEL
COLOUR = #c8d7ee
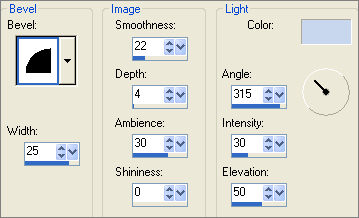

ACTIVATE Copy (2) of Raster 3
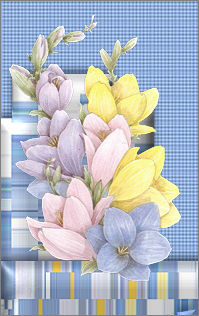
Open up the pretty flowers_vsc image in your PSP workspace
Right click on the Title Bar and select COPY from the options
Right click on the Title Bar of your tag image
and select PASTE AS NEW LAYER from the options.
IMAGE >>> RESIZE = 50%
Ensure "Resize all layers" is UNCHECKED
Resample using WEIGHTED AVERAGE
ADJUST >>> SHARPNESS >>> SHARPEN
Reposition with your MOVER tool to the left of your tag
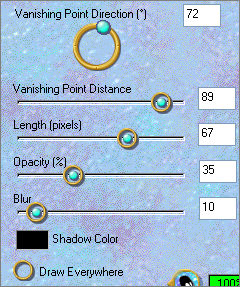
EFFECTS >>> PLUGINS >>> EYE CANDY 3 >>> PERSPECTIVE SHADOW
ACTIVATE RASTER 2
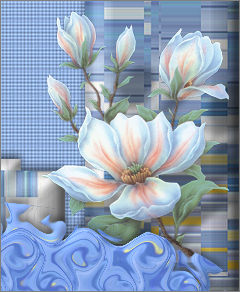
Open up the blb-RobPohl_VictorianFantasy02-mac image in your PSP workspace
Right click on the Title Bar and select COPY from the options
Right click on the Title Bar of your tag image
and select PASTE AS NEW LAYER from the options.
IMAGE >>> RESIZE = 50%
Ensure "Resize all layers" is UNCHECKED
Resample using WEIGHTED AVERAGE
ADJUST >>> SHARPNESS >>> SHARPEN
EFFECTS >>> PLUGINS >>> EYE CANDY 3 >>> PERSPECTIVE SHADOW
Same settings
Reposition with your MOVER tool to the RIGHT of your tag
ACTIVATE RASTER 4
Open up the blb_lrsWTW07-05BrewsterPatience image in your PSP workspace
Right click on the Title Bar and select COPY from the options
Right click on the Title Bar of your tag image
and select PASTE AS NEW LAYER from the options.
IMAGE >>> RESIZE = 80%
Ensure "Resize all layers" is UNCHECKED
Resample using WEIGHTED AVERAGE
ADJUST >>> SHARPNESS >>> SHARPEN
ADJUST >>> HUE & SATURATION >>> COLORIZE

EFFECTS >>> PLUGINS >>> EYE CANDY 3 >>> PERSPECTIVE SHADOW

EDIT >>> Repeat Perspective Shadow
ACTIVATE RASTER 4
Open up theKarenFoster_StorybookPhrasesSheet1_SLH image in your PSP workspace
Choose your SELECTION TOOL
Selection Type = Rectangle
Mode = Replace
Feather = 0
Antialias = UNChecked
Section off the image "Long, long ago"
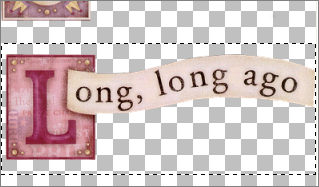
Right click on the Title Bar and select COPY from the options
Right click on the Title Bar of your tag image
and select PASTE AS NEW LAYER from the options.
Reposition with your MOVER tool to the top centre of your image
IMAGE >>> RESIZE = 75%
Ensure "Resize all layers" is UNCHECKED
Resample using WEIGHTED AVERAGE
ADJUST >>> SHARPNESS >>> SHARPEN
ADJUST >>> HUE & SATURATION >>> COLORIZE
Same settings
EFFECTS >>> PLUGINS >>> EYE CANDY 3 >>> PERSPECTIVE SHADOW
Same settings
EDIT >>> Repeat Perspective Shadow

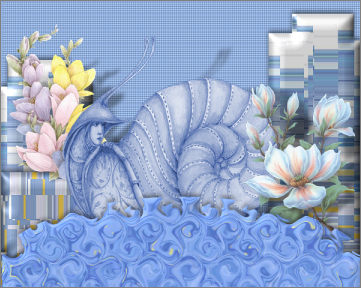
LAYERS >>> MERGE >>> MERGE ALL (Flatten)
IMAGE >>> ADD BORDERS = 1
COLOUR =
#7188ae
Save as .jpg image
TESTERS RESULTS
Page designed by

for
http://www.artistrypsp.com/
Copyright ©
2000-2010 Artistry In PSP / PSP Artistry
All rights reserved.
Unless specifically made available for
download,
no graphics or text may be removed from
this site for any reason
without written permission from Artistry
In PSP / PSP Artistry
|