TRYPTICH
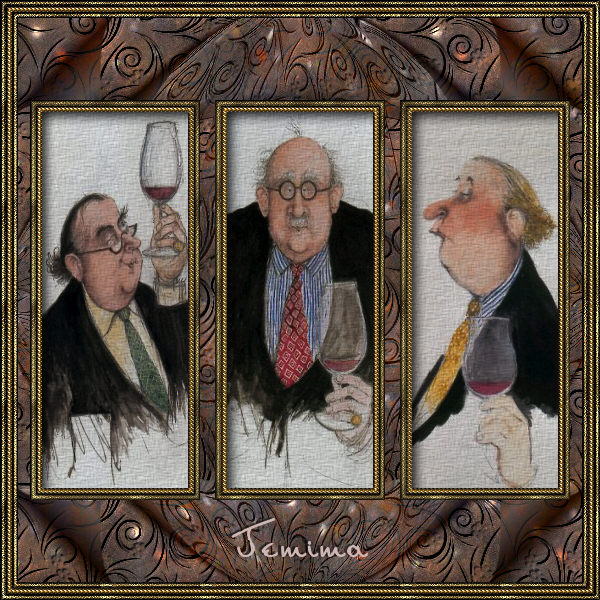
This tutorial was
created by Jemima using PSP9 ~ April 2010
BUT should be creatable using all versions of PSP
Copyright © 2010 ~ Jemima
~ All rights reserved
********************************
You will need the
following to complete this tutorial
Materials
gloriousoldfruit.jpg
richbutcrackingup.jpg
goodcolourforage.jpg
Save to a folder on your computer
goldenbeads.bmp
h-gold45.jpg
JF177.jpg
Fantasy sky.jpg
Save to your PSP Patterns folder
PSP8: C:\Program Files\Jasc Software\Paint Shop Pro 8\Patterns
PSP9: C:\Program Files\Jasc Software\Paint Shop Pro 9\Patterns
PSPX: C:\Program Files\Corel\Corel Paint Shop Pro X\Patterns
PSPXI / X2: C:\Program Files\Corel\Corel Paint Shop Pro Photo X2\Corel_08
Plugins
** EYE CANDY3 **
http://www.pircnet.com/downloads.html
********************************
Open a new image 600 x 600
Transparent background
PSPX - X2: Colour Depth = 8bits/channel
Choose your SELECTION TOOL then click on the CUSTOM SELECTION
symbol
and enter these coordinates.
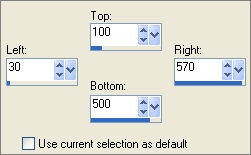
Flood fill with DARK GREY #404040
DESELECT
Choose your SELECTION TOOL then click on the CUSTOM SELECTION
symbol
and enter these coordinates.
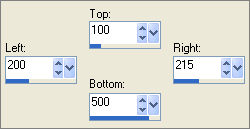
EDIT >>> CLEAR
DESELECT
Choose your SELECTION TOOL then click on the CUSTOM SELECTION
symbol
and enter these coordinates.
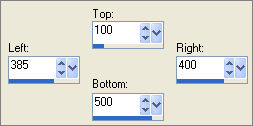
EDIT >>> CLEAR
DESELECT
With your MAGIC WAND
Mode = Replace
Match Mode = RGB Value
Tolerance = 0
Feather = 0
Antialias = UNchecked
Sample Merged = UNCHECKED
PSP9 - X2: Check CONTIGUOUS
PSPX - X2: There is no " Sample Merged"
PSPX - X2: Use all layers = UNChecked
Select the 3 rectangles
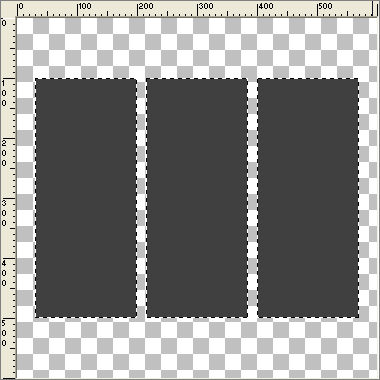
SELECTIONS >>> MODIFY >>> CONTRACT = 6
EDIT >>> CLEAR
Flood fill with LIGHT GREY #808080
SELECTIONS >>> MODIFY >>> CONTRACT = 6
EDIT >>> CLEAR
DESELECT
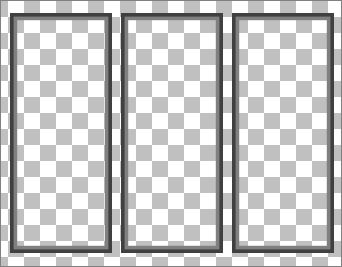
LAYERS >>> NEW RASTER LAYER
SELECTIONS >>> SELECT ALL
Flood fill with DARK GREY
SELECTIONS >>> MODIFY >>> CONTRACT = 6
Flood fill with LIGHT GREY
SELECTIONS >>> MODIFY >>> CONTRACT = 6
Flood fill with DARK GREY
SELECTIONS >>> MODIFY >>> CONTRACT = 6
EDIT >>> CLEAR
DESELECT
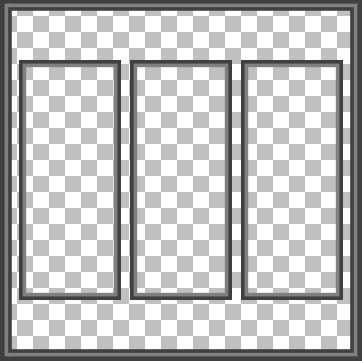
With your MAGIC WAND...Same settings
and while depressing your SHIFT KEY...
Select the 2 Dark Grey borders
EFFECTS >>> TEXTURE EFFECTS >>> SCULPTURE
COLOUR = #c0c0c0

EFFECTS >>> 3D EFFECTS >>> INNER BEVEL
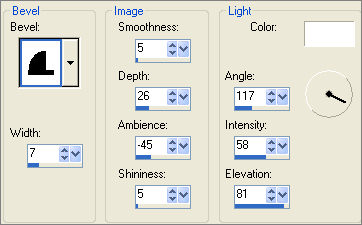
ADJUST >>> SHARPNESS >>> SHARPEN MORE
DESELECT
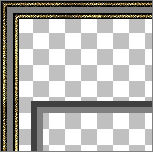
With your MAGIC WAND...Same settings
Select the middle Light Grey border
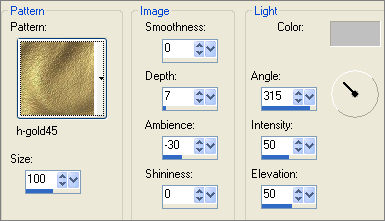
In your MATERIALS PALETTE load
goldenbeads pattern in the foreground
using these settings
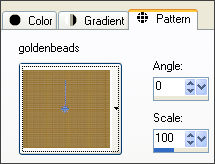
Flood fill the selected border with the goldenbeads pattern
EFFECTS >>> 3D EFFECTS >>> INNER BEVEL
Same settings BUT Change the DEPTH to 20
DESELECT

ACTIVATE RASTER 1
With your MAGIC WAND...Same settings
and while depressing your SHIFT KEY...
Select the 3 Dark Grey borders
EFFECTS >>> TEXTURE EFFECTS >>> SCULPTURE
.Same settings
EFFECTS >>> 3D EFFECTS >>> INNER BEVEL
Same settings
DESELECT
With your MAGIC WAND...Same settings
and while depressing your SHIFT KEY...
Select the 3 Light Grey borders
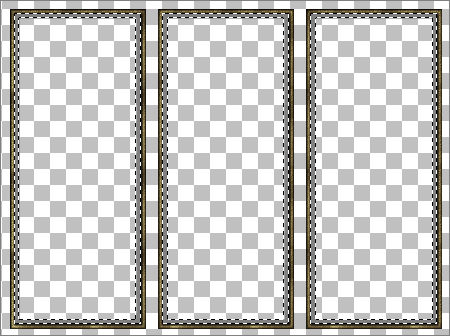
Flood fill the 3 selected borders with the goldenbeads pattern
EFFECTS >>> 3D EFFECTS >>> INNER BEVEL
Same settings
DESELECT
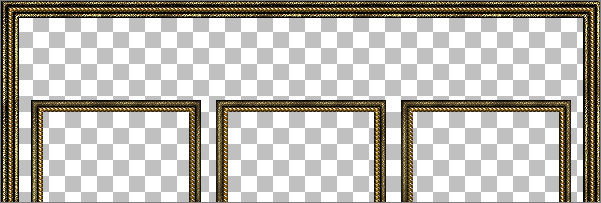
LAYERS >>> MERGE >>> MERGE VISIBLE
With your MAGIC WAND...Same settings
and while depressing your SHIFT KEY...
Select the 3 centre transparent areas within the 3 borders
SELECTIONS >>> MODIFY >>> EXPAND = 3
SELECTIONS >>> INVERT
LAYERS >>> NEW RASTER LAYER
LAYERS >>> ARRANGE >>> SEND TO BOTTOM
In your MATERIALS PALETTE load
JF177 pattern in the background using these settings
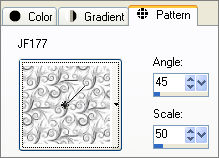
Flood fill with the JF177 pattern
DESELECT
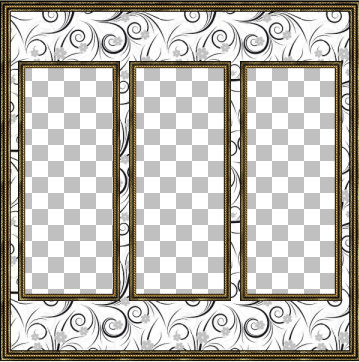
EFFECTS >>> TEXTURE EFFECTS >>> SCULPTURE
COLOUR = cev7b5
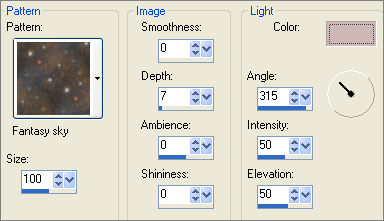
EFFECTS >>> 3D EFFECTS >>> INNER BEVEL
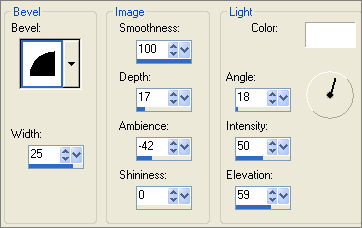
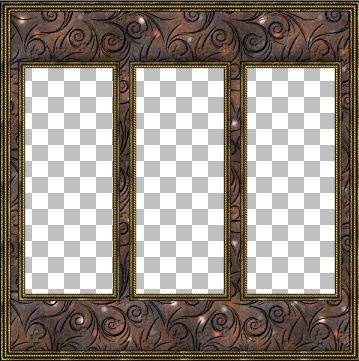
LAYERS >>> DUPLICATE
EFFECTS >>> IMAGE EFFECTS >>> PAGE CURL
COLOUR =#694d43
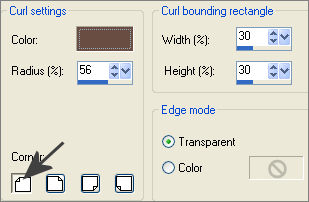
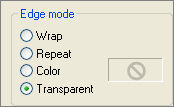
EFFECTS >>> IMAGE EFFECTS >>> PAGE CURL
Same settings


EFFECTS >>> IMAGE EFFECTS >>> PAGE CURL
Same settings

EFFECTS >>> IMAGE EFFECTS >>> PAGE CURL
Same settings

ACTIVATE " Copy of Raster 1 "
LAYERS >>> DUPLICATE
EFFECTS>>> GEOMETRIC EFFECTS >>> CIRCLE
ACTIVATE THE MERGED LAYER
With your MAGIC WAND....
Same settings.
and while depressing your SHIFT KEY..
Select the 3 centre transparent areas.
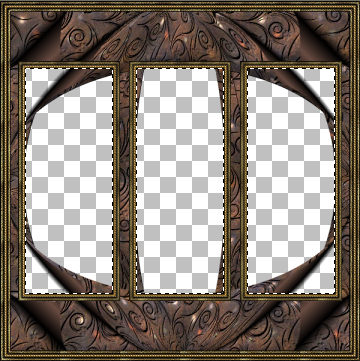
SELECTIONS >>> MODIFY >>> EXPAND = 3
ACTIVATE " Copy (2) of Raster 1 "
EDIT >>> CLEAR
DESELECT
In your LAYER PALETTE change the OPACITY to 80%
Change the BLEND MODE to LUMINANCE (L)
ACTIVATE " Copy of Raster 1 "
In your LAYER PALETTE change the OPACITY to 80%
Change the BLEND MODE to LUMINANCE (L)

ACTIVATE THE MERGED LAYER
With your MAGIC WAND....
Same settings.
and while depressing your SHIFT KEY...
Select the 3 transparent areas
SELECTIONS >>> MODIFY >>> EXPAND = 3
SELECTIONS >>> INVERT
LAYERS >>> NEW RASTER LAYER
LAYERS >>> ARRANGE >>> MOVE DOWN
EFFECTS >>> PLUGINS >>> EYE CANDY 3 >>> DROP SHADOW
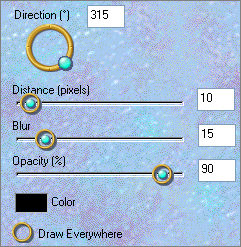
DESELECT
CLOSE the Drop Shadow Layer (Raster 2)
ACTIVATE THE MERGED LAYER
LAYERS >>> MERGE >>> MERGE VISIBLE
OPEN RASTER 2
Save as .psp image
*/*/*/*/*
Now... lets add some images to your frame.
LAYERS >>> NEW RASTER LAYER
LAYERS >>> ARRANGE >>> SEND TO BOTTOM
ACTIVATE THE MERGED LAYER
With your MAGIC WAND....
Same settings.
and while depressing your SHIFT KEY..
Select the centre transparent area.
SELECTIONS >>> MODIFY >>> EXPAND = 3
ACTIVATE THE BOTTOM LAYER
Open up the richbutcrackingup image in your PSP workspace
Choose your SELECTION TOOL
Selection Type = Rectangle
Mode = Replace
Feather = 0
Antialias = Checked
Select the area shown below
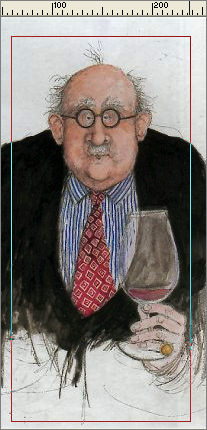
Right click on the Title Bar and select COPY from the options
Right click on the Title Bar of your frame image
and select PASTE INTO SELECTION from the options.
DESELECT
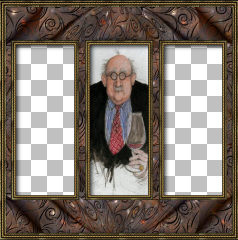
ACTIVATE THE MERGED LAYER
With your MAGIC WAND.... Same settings.
and while depressing your SHIFT KEY..
Select the RIGHT transparent area.
SELECTIONS >>> MODIFY >>> EXPAND = 3
ACTIVATE THE BOTTOM LAYER
Open up the gloriousoldfruit image in your PSP workspace
Choose your SELECTION TOOL
Selection Type = Rectangle
Mode = Replace
Feather = 0
Antialias = Checked
Select the area shown below
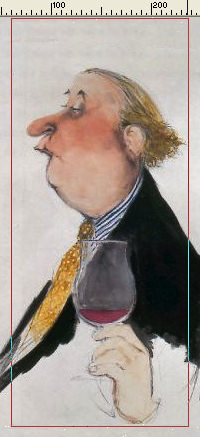
Right click on the Title Bar and select COPY from the options
Right click on the Title Bar of your frame image
and select PASTE INTO SELECTION from the options.
DESELECT
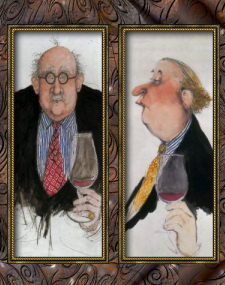
.
ACTIVATE THE MERGED LAYER
With your MAGIC WAND.... Same settings.
and while depressing your SHIFT KEY..
Select the LEFT transparent area.
SELECTIONS >>> MODIFY >>> EXPAND = 3
ACTIVATE THE BOTTOM LAYER
Open up the goodcolourforage image in your PSP workspace
Choose your SELECTION TOOL
Selection Type = Rectangle
Mode = Replace
Feather = 0
Antialias = Checked
Select the area shown below
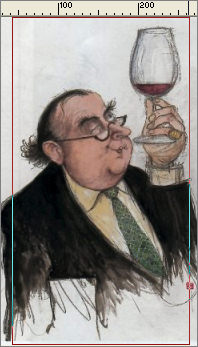
Right click on the Title Bar and select COPY from the options
Right click on the Title Bar of your frame image
and select PASTE INTO SELECTION from the options.
DESELECT
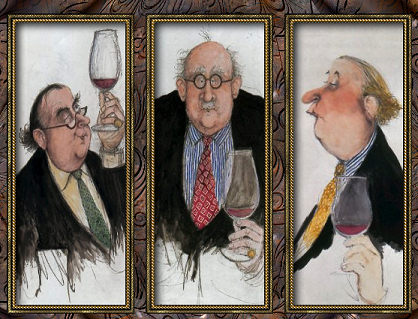
EFFECTS >>> TEXTURE EFFECTS >>> TEXTURE
COLOUR = #c0c0c0
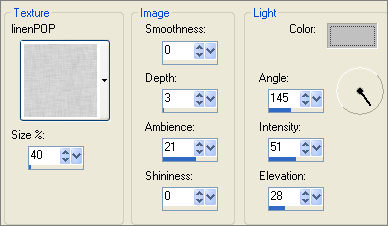
LAYERS >>> MERGE >>> MERGE ALL (Flatten)
Save as .jpg image
Testers Results
Page designed by

for

http://www.artistrypsp.com/
Copyright ©
2000-2010 Artistry In PSP / PSP Artistry
All rights reserved.
Unless specifically made available for
download,
no graphics or text may be removed from
this site for any reason
without written permission from Artistry
In PSP / PSP Artistry
|