TRIPLE TWEET
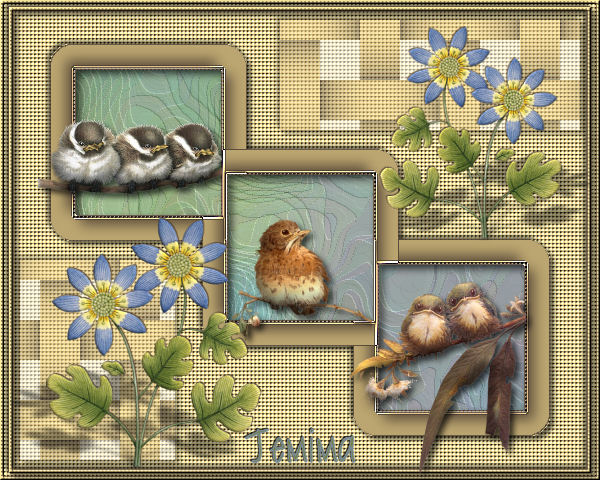
This tutorial was
created by Jemima using PSP9 ~ June 2010
BUT should be creatable using all versions of PSP
Copyright © 2010 ~ Jemima
~ All rights reserved
********************************
You will need the
following to complete this tutorial
Materials
MIRA_FLEURDM_02.PSPIMAGE
texture_bgd.jpg
hmo_birdies.pspimage
JB_baby_robin.psp
olivebirds2_ginny[1].psp
Save to a folder on your computer
Grid.bmp
Save to your PSP Textures folder
PSP8: C:\Program Files\Jasc Software\Paint Shop Pro 8\Textures
PSP9: C:\Program Files\Jasc Software\Paint Shop Pro 9\Textures
PSPX: C:\Program Files\Corel\Corel Paint Shop Pro X\Textures
PSPXI / X2: C:\Program Files\Corel\Corel Paint Shop Pro Photo X2\Corel_15
Plugins
** EYE CANDY3 **
http://www.pircnet.com/downloads.html
********************************
Open a new image 600 x 480
Transparent background
PSPX - X2: Colour Depth = 8bits/channel
Choose your SELECTION TOOL then click on the CUSTOM SELECTION
symbol
and enter these coordinates.
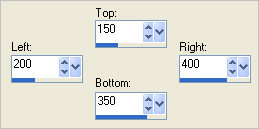
SELECTIONS >>> INVERT
Flood fill with CREME #bba570
SELECTIONS >>> INVERT
EFFECTS >>> 3D EFFECTS >>> DROP SHADOW
Vertical & Horizontal offsets = 10
Colour = Brown #4f4033
Opacity = 85
Blur = 25
Repeat Drop Shadow effect changing
Vertical & Horizontal Offsets to - ( minus ) 10
Click OK
SELECTIONS >>> MODIFY >>> EXPAND = 30
SELECTIONS >>> INVERT
EDIT >>> CLEAR
DESELECT

IMAGE >>> RESIZE = 75%
Ensure "Resize all layers" is UNCHECKED
Resample using WEIGHTED AVERAGE
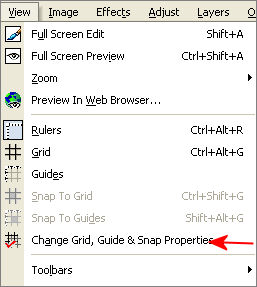
VIEW >>> Change Grid, Guide & Snap Properties
Enter the "Current image settings" shown below"
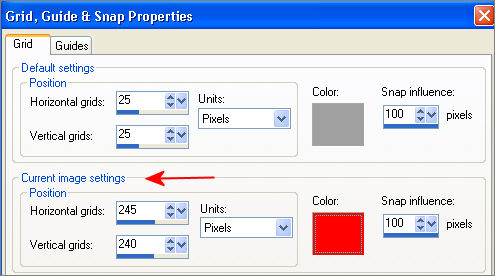
Click OK
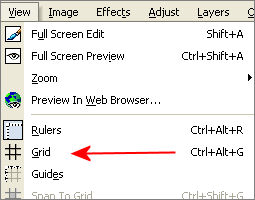
VIEW >>> GRID
.
LAYERS >>> DUPLICATE
Reposition with your MOVER tool
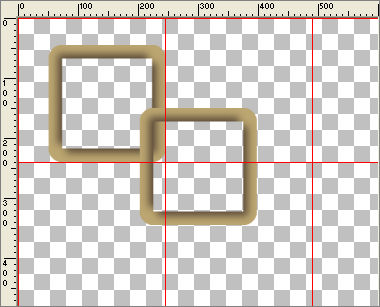
LAYERS >>> ARRANGE >>> MOVE DOWN
LAYERS >>> DUPLICATE
IMAGE >>> FLIP
IMAGE >>> MIRROR
VIEW >>> GRID (To turn GRID off)
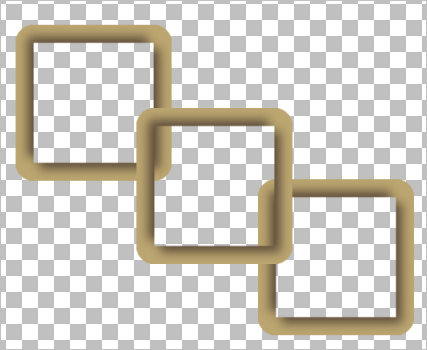

With your MAGIC WAND
Mode = Replace
Match Mode = RGB Value
Tolerance = 0
Feather = 0
Antialias = UNchecked
Sample Merged = UNCHECKED
PSP9 - X2: Check CONTIGUOUS
PSPX - X2: There is no " Sample Merged"
PSPX - X2: Use all layers = UNChecked
Select the CENTRE transparent area of the bottom right frame
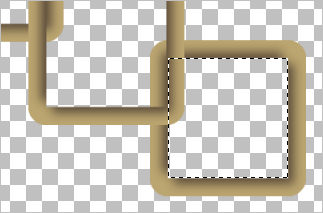
ACTIVATE RASTER 1
EDIT >>> CLEAR
DESELECT
ACTIVATE Copy of Raster 1
With your MAGIC WAND ... same settings
Select the CENTRE transparent area of the top left frame
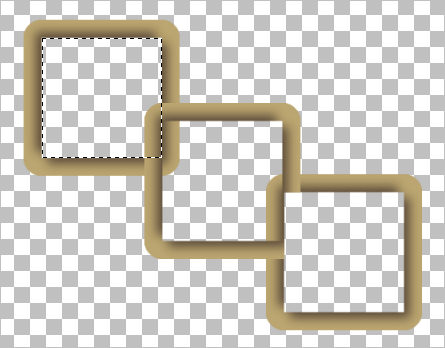
ACTIVATE RASTER 1
EDIT >>> CLEAR
DESELECT
EFFECTS >>> 3D EFFECTS >>> DROP SHADOW
Vertical & Horizontal offsets = 1
Colour = Brown #4f4033
Opacity = 85
Blur = 0
ACTIVATE Copy (2) of Raster 1
EDIT >>> Repeat Drop Shadow.
ACTIVATE Copy of Raster 1
EDIT >>> Repeat Drop Shadow.
Repeat Drop Shadow effect changing
Vertical & Horizontal Offsets to - ( minus ) 1
Click OK
ACTIVATE Copy (2) of Raster 1
EDIT >>> Repeat Drop Shadow.
ACTIVATE RASTER 1
EDIT >>> Repeat Drop Shadow.
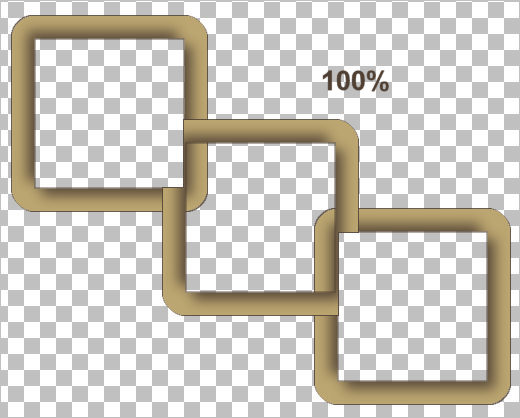
With your MAGIC WAND ... same settings
Select the CENTRE transparent area of the centre frame
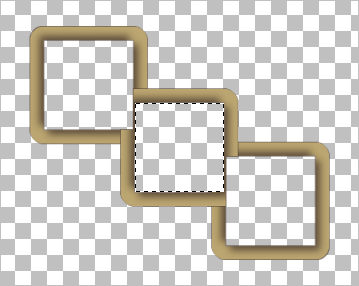
ACTIVATE Copy (2) of Raster 1
EDIT >>> CLEAR
ACTIVATE Copy of Raster 1
EDIT >>> CLEAR
DESELECT
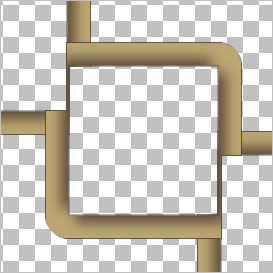
LAYERS >>> MERGE >>> MERGE VISIBLE
LAYERS >>> NEW RASTER LAYER
LAYERS >>> ARRANGE >>> SEND TO BOTTOM
Flood fill with LIGHT CREAM #f7da95
EFFECTS >>> TEXTURE EFFECTS >>> TEXTURE
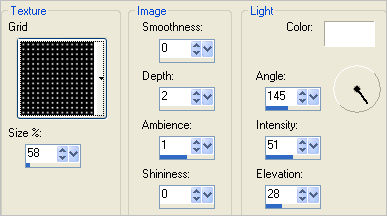
ACTIVATE THE MERGED LAYER
With your MAGIC WAND ... same settings
and while depressing your SHIFT KEY...
Select the centres of the 3 frames
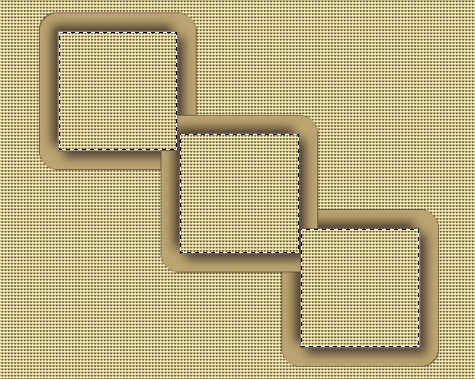
SELECTIONS >>> MODIFY >>> CONTRACT = 1
ACTIVATE RASTER 1
EDIT >>> CLEAR
SELECTIONS >>> MODIFY >>> EXPAND = 4
EFFECTS >>> EDGE EFFECTS >>> ENHANCE
ACTIVATE THE MERGED LAYER
EFFECTS >>> 3D EFFECTS >>> DROP SHADOW
Vertical & Horizontal offsets = 1
Colour = Brown #4f4033
Opacity = 85
Blur = 0
Repeat
Drop Shadow effect changing
Vertical & Horizontal Offsets to - ( minus ) 1
Click OK
EFFECTS >>> EDGE EFFECTS >>> ENHANCE MORE
DESELECT
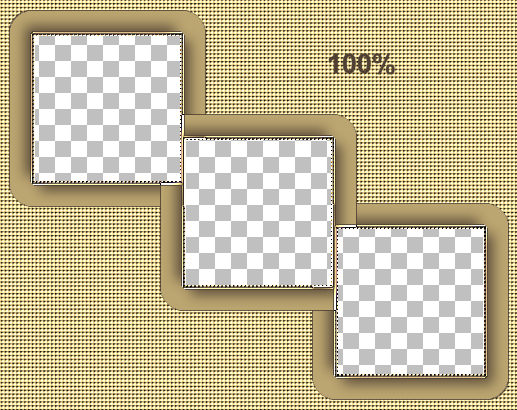
ACTIVATE RASTER 1
With your MAGIC WAND ... same settings
and while depressing your SHIFT KEY...
Select the centres of the 3 frames
EFFECTS >>> 3D EFFECTS >>> DROP SHADOW
Vertical & Horizontal offsets = 1
Colour = Brown #4f4033
Opacity = 85
Blur = 0
Repeat Drop Shadow effect changing
Vertical & Horizontal Offsets to - ( minus ) 1
Click OK
DESELECT
ACTIVATE THE MERGED LAYER
With your MAGIC WAND ... same settings
Select the area outside the triple frame
SELECTIONS >>> INVERT
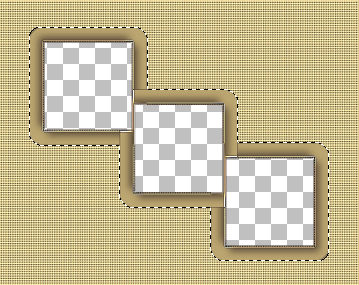
EFFECTS >>> PLUGINS >>> EYE CANDY 3 >>> DROP SHADOW
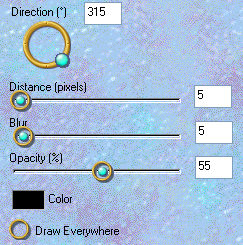
EDIT >>> Repeat Drop Shadow.. change DIRECTION to 135
DESELECT
LAYERS >>> NEW RASTER LAYER
Choose your SELECTION TOOL then click on the CUSTOM SELECTION
symbol
and enter these coordinates.
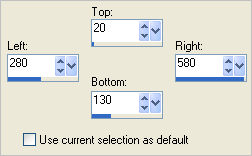
Flood fill with LIGHT CREAM #f7da95
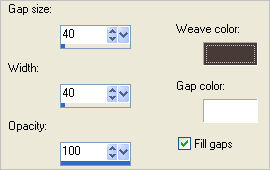
EFFECTS >>> TEXTURE EFFECTS >>> WEAVE
COLOUR =
#483a36
EFFECTS >>> 3D EFFECTS >>> DROP SHADOW
Vertical & Horizontal offsets = 1
Colour = Brown #4f4033
Opacity = 85
Blur = 0
Repeat Drop Shadow effect changing
Vertical & Horizontal Offsets to - ( minus ) 1
Click OK
DESELECT
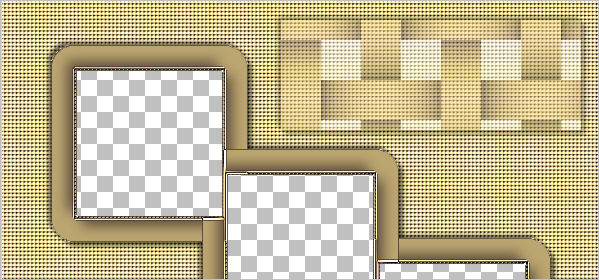
In your LAYER PALETTE change the OPACITY to 50%
EFFECTS >>> PLUGINS >>> EYE CANDY 3 >>> DROP SHADOW
Same settings
EDIT >>> Repeat Drop Shadow.. change DIRECTION to 315
NEXT PAGE
Page designed by

for

http://www.artistrypsp.com/
Copyright © 2000-2010 Artistry In PSP / PSP Artistry
All rights reserved.
Unless specifically made available for
download,
no graphics or text may be removed from
this site for any reason
without written permission from Artistry
In PSP / PSP Artistry
|