ST. PATRICK 2010
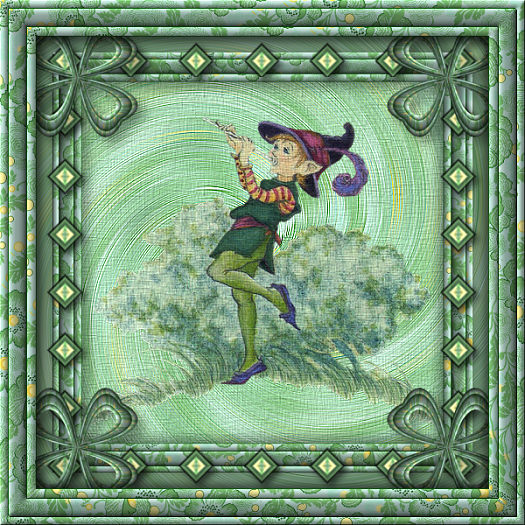
This tutorial was
created by Jemima using PSP9 ~ November 2009
BUT should be creatable using all versions of PSP
Copyright © 2010 ~ Jemima
~ All rights reserved
********************************
You will need the
following to complete this tutorial
Materials
aircm~2006StPatricksDayIrishWish-BJANETsmall.pspimage
Save to a folder on your computer
JF_G_Bgd913.jpg
Save to your PSP Patterns folder
PSP8: C:\Program Files\Jasc Software\Paint Shop Pro 8\Patterns
PSP9: C:\Program Files\Jasc Software\Paint Shop Pro 9\Patterns
PSPX: C:\Program Files\Corel\Corel Paint Shop Pro X\Patterns
PSPXI / X2: C:\Program Files\Corel\Corel Paint Shop Pro Photo X2\Corel_08
linenPOP.bmp
Save to your PSP Textures folder
PSP8: C:\Program Files\Jasc Software\Paint Shop Pro 8\Textures
PSP9: C:\Program Files\Jasc Software\Paint Shop Pro 9\Textures
PSPX: C:\Program Files\Corel\Corel Paint Shop Pro X\Textures
PSPXI / X2: C:\Program Files\Corel\Corel Paint Shop Pro Photo X2\Corel_15
Plugins
** EYE CANDY3 **
http://www.pircnet.com/downloads.html
********************************
REMEMBER TO SAVE YOUR WORK OFTEN
********************************
In your MATERIALS PALETTE
Load the ' JF_G_Bgd913 ' pattern in your foreground
using the settings below.
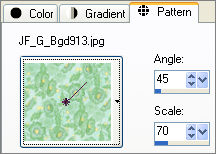
Load SOLID GREEN ' #609159 ' in your background
Open a new image 600 x 600
Transparent background
PSPX/XI/X2 = RASTER BACKGROUND
PSPX/XI/X2: Colour Depth = 8bits/channel
Flood fill with the pattern
SELECTIONS >>> SELECT ALL
SELECTIONS >>> MODIFY >>> CONTRACT = 10
EDIT >>> CLEAR
EFFECTS >>> 3D EFFECTS >>> DROP SHADOW
Vertical & Horizontal offsets = 1
Colour = GREEN #0e500e
Opacity = 85
Blur = 0
Repeat Drop Shadow effect changing
Vertical & Horizontal Offsets to - ( minus ) 1
Click OK
SELECTIONS >>> INVERT
EFFECTS >>> 3D EFFECTS >>> INNER BEVEL
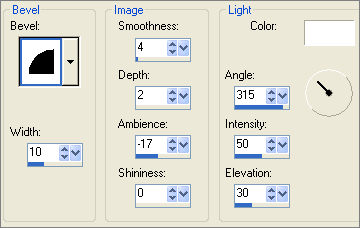
SELECTIONS >>> INVERT
LAYERS >>> NEW RASTER LAYER
In your MATERIALS PALETTE
Change the SCALEof the pattern to 60
Flood fill with the pattern
SELECTIONS >>> MODIFY >>> CONTRACT = 20
EDIT >>> CLEAR
DESELECT
REPEAT the 2 Drop Shadows
EFFECTS >>> 3D EFFECTS >>> INNER BEVEL
Same settings
EDIT >>> Repeat Inner Bevel
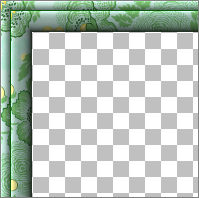
With your MAGIC WAND
Mode = Replace
Match Mode = RGB Value
Tolerance = 0
Feather = 0
Antialias = UNchecked
Sample Merged = UNCHECKED
PSP9/X/XI/X2: Check CONTIGUOUS
PSPX/XI/X2: There is no " Sample Merged"
PSPX/XI/X2: Use all layers = UNChecked
Select the CENTRE transparent area
LAYERS >>> NEW RASTER LAYER
In your MATERIALS PALETTE
Change the SCALEof the pattern to 70
Flood fill with the pattern
SELECTIONS >>> MODIFY >>> CONTRACT = 10
EDIT >>> CLEAR
DESELECT
REPEAT the 2 Drop Shadows
EFFECTS >>> 3D EFFECTS >>> INNER BEVEL
Same settings
LAYERS >>> MERGE >>> MERGE VISIBLE
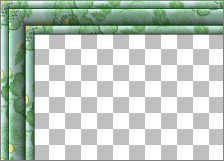
LAYERS >>> DUPLICATE
IMAGE >>> RESIZE = 80%
Ensure "Resize all layers" is UNCHECKED
Resample using WEIGHTED AVERAGE
IMAGE >>> MIRROR
LAYERS >>> DUPLICATE
EFFECTS >>> DISTORTION EFFECTS >>> POLAR COORDINATES
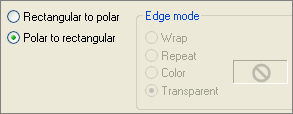
Select your DEFORMATION tool
Mode = SCALE
use default settings
PSPX/XI/XII:Select your PICK tool
Drag CENTRE TOP & CENTRE SIDE nodes
as shown below

Click the RESET RECTANGLE arrow

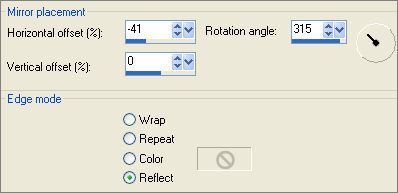
EFFECTS >>> REFLECTION EFFECTS >>>ROTATING MIRROR
Choose your SELECTION TOOL then click on the CUSTOM SELECTION
symbol
and enter these coordinates.
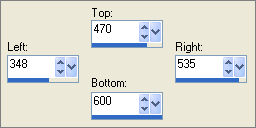
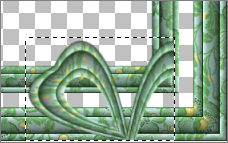
SELECTIONS >>> INVERT
EDIT >>> CLEAR
DESELECT
Reposition with your MOVER tool to the centre of your image
IMAGE >>> RESIZE = 55%
Ensure "Resize all layers" is UNCHECKED
Resample using WEIGHTED AVERAGE
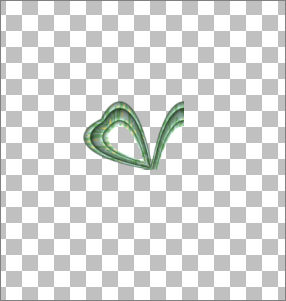
LAYERS >>> DUPLICATE
IMAGE >>> MIRROR
Using your MOVER TOOL slide the right image over the top of the left image.
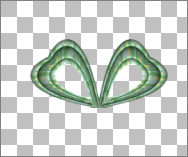
In your LAYER PALETTE
CLOSE the bottom 2 layers
LAYERS >>> MERGE >>> MERGE VISIBLE
LAYERS >>> DUPLICATE
IMAGE >>> FLIP
Using your MOVER TOOL slide the bottom image up to meet the top image
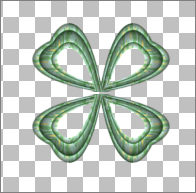 . . 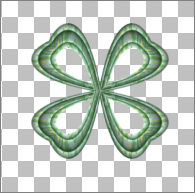
LAYERS >>> MERGE >>> MERGE VISIBLE
Rename this layer MERGED 2
OPEN the bottom 2 layers
Using your MOVER TOOL slide the 'shamrock' to the top left of your frame
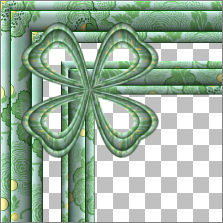
EFFECTS >>> 3D EFFECTS >>> INNER BEVEL
Same settings
EFFECTS >>> PLUGINS >>> SIMPLE >>> TOP LEFT MIRROR
ACTIVATE THE MERGED LAYER
LAYERS >>> ARRANGE >>> BRING TO TOP

ACTIVATE the Copy of Merged layer
LAYERS >>> NEW RASTER LAYER
LAYERS >>> ARRANGE >>> MOVE DOWN
Flood fill with pattern
EFFECTS >>> ART MEDIA EFFECTS >>> BRUSH STROKES
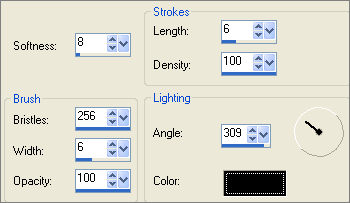
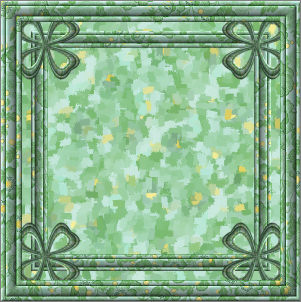
EFFECTS >>> EDGE EFFECTS >>> ENHANCE
ADJUST >>> BLUR >>> RADIAL BLUR

EFFECTS >>> EDGE EFFECTS >>> ENHANCE MORE
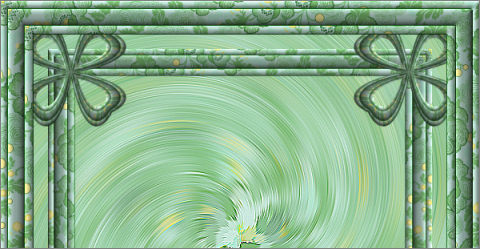
ACTIVATE the Copy of Merged layer
With your MAGIC WAND....
Same settings.
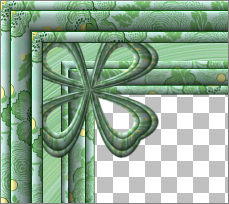
Select the CENTRE area of the image
SELECTIONS >>> MODIFY >>> EXPAND = 3
ACTIVATE RASTER 1
EDIT >>> CLEAR
DESELECT
ACTIVATE THE Copy of Merged LAYER
LAYERS >>> DUPLICATE
LAYERS >>> ARRANGE >>> BRING TO TOP
EFFECTS >>> 3D EFFECTS >>> DROP SHADOW
COLOUR = #73a66d
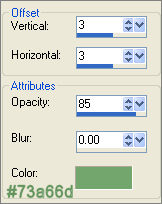
Repeat
Drop Shadow effect changing
Vertical & Horizontal Offsets to - ( minus ) 3
Click OK
EFFECTS >>> 3D EFFECTS >>> DROP SHADOW
Vertical & Horizontal offsets = 1
Colour = Black
Opacity = 85
Blur = 0
Repeat Drop Shadow effect changing
Vertical & Horizontal Offsets to - ( minus ) 1
Click OK
EFFECTS >>> REFLECTION EFFECTS >>> PATTERN
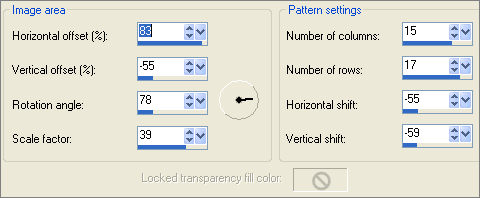
EFFECTS >>> 3D EFFECTS >>> DROP SHADOW
Vertical & Horizontal offsets = 1
Colour = Black
Opacity = 70
Blur = 0
Repeat Drop Shadow effect changing
Vertical & Horizontal Offsets to - ( minus ) 1
Click OK
Choose your SELECTION TOOL then click on the CUSTOM SELECTION
symbol
and enter these coordinates.
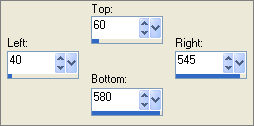
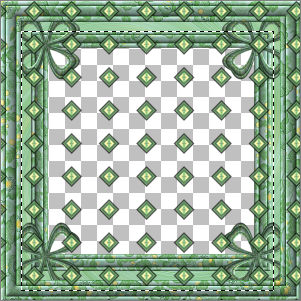
SELECTIONS >>> INVERT
EDIT >>> CLEAR
DESELECT
Choose your SELECTION TOOL then click on the CUSTOM SELECTION
symbol
and enter these coordinates.
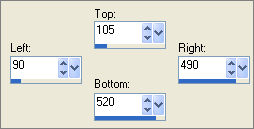
EDIT >>> CLEAR
DESELECT
Reposition with your MOVER tool
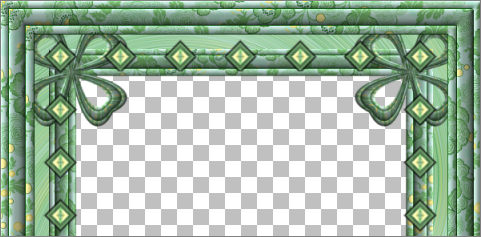
EFFECTS >>> PLUGINS >>> EYE CANDY 3 >>> DROP SHADOW
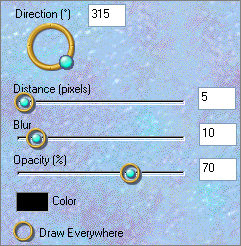
LAYERS >>> ARRANGE >>> MOVE DOWN
EDIT >>> Repeat Move layer down
ACTIVATE THE MERGED LAYER
EFFECTS >>> PLUGINS >>> EYE CANDY 3 >>> DROP SHADOW
Change DISTANCE to 12
Change BLUR to 16
EDIT >>> Repeat Drop Shadow.. change DIRECTION to 135
ACTIVATE THE Copy of Merged LAYER
EFFECTS >>> PLUGINS >>> EYE CANDY 3 >>> DROP SHADOW
Change OPACITY to 35
EDIT >>> Repeat Drop Shadow.. change DIRECTION to 315
ACTIVATE THE MERGED 2 LAYER
EFFECTS >>> PLUGINS >>> EYE CANDY 3 >>> DROP SHADOW
Same settings
LAYERS >>> MERGE >>> MERGE VISIBLE
Save as .psp image
LAYERS >>> NEW RASTER LAYER
LAYERS >>> ARRANGE >>> MOVE DOWN
Flood fill with pattern
EFFECTS >>> ART MEDIA EFFECTS >>> BRUSH STROKES
Same settings
EFFECTS >>> EDGE EFFECTS >>> ENHANCE
ADJUST >>> BLUR >>> RADIAL BLUR
Same settings
EFFECTS >>> EDGE EFFECTS >>> ENHANCE MORE
EFFECTS >>> TEXTURE EFFECTS >>> TEXTURE
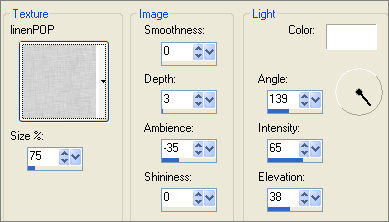
ADJUST >>> SHARPNESS >>> SHARPEN
Open up the aircm~2006StPatricksDayIrishWish-BJANETsmall image
in your PSP workspace
Right click on the Title Bar and select COPY from the options
Go to your frame image
Right click on the Title Bar of your frame image
and select PASTE AS NEW LAYER from the options.
EFFECTS >>> TEXTURE EFFECTS >>> TEXTURE
Same settings
ADJUST >>> SHARPNESS >>> SHARPEN
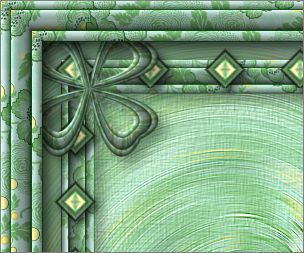
LAYERS >>> MERGE >>> MERGE ALL (Flatten)
Save as .jpg image
Testers Results
Page designed by

for

http://www.artistrypsp.com/
Copyright ©
2000-2010 Artistry In PSP / PSP Artistry
All rights reserved.
Unless specifically made available for
download,
no graphics or text may be removed from
this site for any reason
without written permission from Artistry
In PSP / PSP Artistry
|