FLOPPY
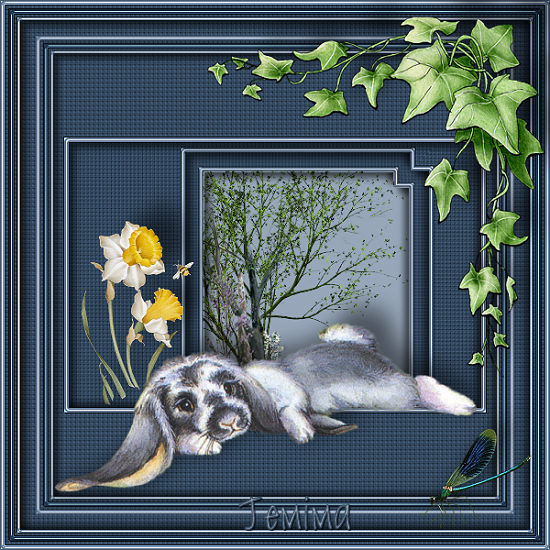
This tutorial was
created by Jemima using PSP9 ~ November 2009
BUT should be creatable using all versions of PSP
Copyright © 2010 ~ Jemima
~ All rights reserved
********************************
You will need the
following to complete this tutorial
Materials
1daffodil.tub
BT-FloppyEars.psp
CNRIvyCNP.psp
TREES W3523 PJW.psp
Saphiere_Insect_A3.pspimage
Save to a folder on your computer
Dark_Weave.jpg
Save to your PSP Textures folder
Plugins
** EYE CANDY3 **
http://www.pircnet.com/downloads.html
********************************
REMEMBER TO SAVE YOUR WORK OFTEN
********************************
In your MATERIALS PALETTE
Load SOLID Dark Blue' #33475e ' in your foreground
Load SOLID Light Blue ' #97a7b9 ' in your background
Open a new image 600 x 600
Transparent background
PSPX/XI/X2 = RASTER BACKGROUND
PSPX/XI/X2: Colour Depth = 8bits/channel
Flood fill with Dark Blue
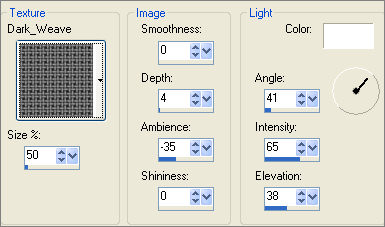
EFFECTS >>> TEXTURE EFFECTS >>> TEXTURE
Choose your SELECTION TOOL then click on the CUSTOM SELECTION
symbol
and enter these coordinates.
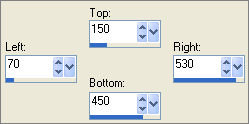
EDIT >>> CLEAR
LAYERS >>> NEW RASTER LAYER
Flood fill with Light Blue
SELECTIONS >>> MODIFY >>> CONTRACT = 5
EDIT >>> CLEAR
DESELECT
EFFECTS >>> 3D EFFECTS >>> DROP SHADOW
Vertical & Horizontal offsets = 1
Colour = Black
Opacity = 80
Blur = 0
Repeat Drop Shadow effect changing
Vertical & Horizontal Offsets to - ( minus ) 1
Click OK
EFFECTS >>> 3D EFFECTS >>> INNER BEVEL
COLOUR = Light Blue ' #97a7b9 '
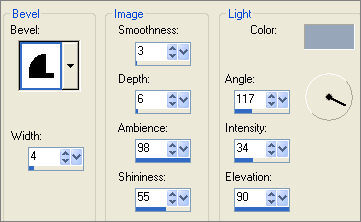
LAYERS >>> MERGE >>> MERGE VISIBLE
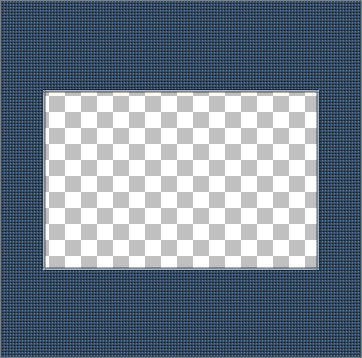
LAYERS >>> DUPLICATE
LAYERS >>> ARRANGE >>> MOVE DOWN
IMAGE >>> RESIZE = 85%
Ensure "Resize all layers" is UNCHECKED
Resample using WEIGHTED AVERAGE
EFFECTS >>> REFLECTION EFFECTS >>> ROTATING MIRROR
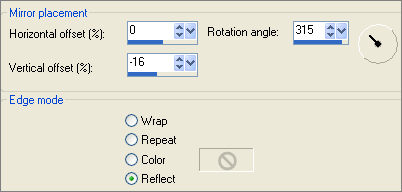
Reposition with your MOVER tool
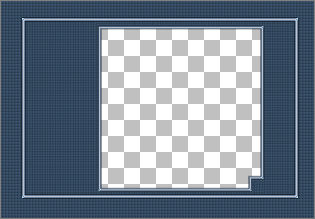
IMAGE >>> FLIP
LAYERS >>> DUPLICATE
LAYERS >>> ARRANGE >>> MOVE DOWN
IMAGE >>> RESIZE = 85%
Ensure "Resize all layers" is UNCHECKED
Resample using WEIGHTED AVERAGE
Reposition with your MOVER tool
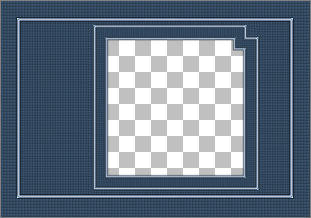
ADJUST >>> SHARPEN >>> SHARPEN
ACTIVATE THE Copy of Merged layer
EDIT >>> Repeat Sharpen
ACTIVATE THE MERGED LAYER
EDIT >>> Repeat Sharpen
LAYERS >>> NEW RASTER LAYER
Flood fill with Light Blue
SELECTIONS >>> SELECT ALL
SELECTIONS >>> MODIFY >>> CONTRACT = 5
EDIT >>> CLEAR
SELECTIONS >>> INVERT
EFFECTS >>> 3D EFFECTS >>> DROP SHADOW
Vertical & Horizontal offsets = 1
Colour = Black
Opacity = 80
Blur = 0
Repeat Drop Shadow effect changing
Vertical & Horizontal Offsets to - ( minus ) 1
Click OK
EFFECTS >>> 3D EFFECTS >>> INNER BEVEL
Same settings EXCEPT... Change the WIDTH to 3
SELECTIONS >>> INVERT
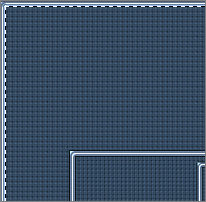
LAYERS >>> NEW RASTER LAYER
SELECTIONS >>> MODIFY >>> CONTRACT = 5
Flood fill with Dark Blue
SELECTIONS >>> MODIFY >>> CONTRACT = 5
EDIT >>> CLEAR
DESELECT
SELECTIONS >>> SELECT ALL
SELECTIONS >>> FLOAT
SELECTIONS >>> DEFLOAT
EFFECTS >>> 3D EFFECTS >>> DROP SHADOW
Vertical & Horizontal offsets = 1
Colour = Black
Opacity = 80
Blur = 0
Repeat Drop Shadow effect changing
Vertical & Horizontal Offsets to - ( minus ) 1
Click OK
EFFECTS >>> 3D EFFECTS >>> INNER BEVEL
Same settings
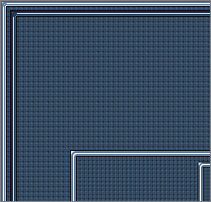
DESELECT
With your MAGIC WAND
Mode = Replace
Match Mode = RGB Value
Tolerance = 0
Feather = 0
Antialias = UNchecked
Sample Merged = UNCHECKED
PSP9/X/XI/X2: Check CONTIGUOUS
PSPX/XI/X2: There is no " Sample Merged"
PSPX/XI/X2: Use all layers = UNChecked
Select the CENTRE of the image
LAYERS >>> NEW RASTER LAYER
SELECTIONS >>> MODIFY >>> CONTRACT = 3
Flood fill with Light Blue
SELECTIONS >>> MODIFY >>> CONTRACT = 3
EDIT >>> CLEAR
DESELECT
SELECTIONS >>> SELECT ALL
SELECTIONS >>> FLOAT
SELECTIONS >>> DEFLOAT
EFFECTS >>> 3D EFFECTS >>> DROP SHADOW
Vertical & Horizontal offsets = 1
Colour = Black
Opacity = 80
Blur = 0
Repeat Drop Shadow effect changing
Vertical & Horizontal Offsets to - ( minus ) 1
Click OK
EFFECTS >>> 3D EFFECTS >>> INNER BEVEL
Same settings
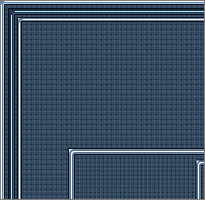
CLOSE the bottom 3 layers
LAYERS >>> MERGE >>> MERGE VISIBLE
Rename this layer MERGED 2
OPEN ALL LAYERS
With your MAGIC WAND....
Same settings.
Select the CENTRE of the image
SELECTIONS >>> INVERT
EFFECTS >>> PLUGINS >>> EYE CANDY 3 >>> DROP SHADOW
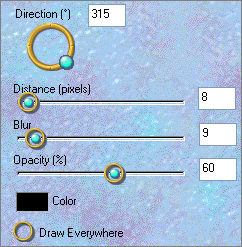
EDIT >>> Repeat Drop Shadow.. change DIRECTION to 135
DESELECT
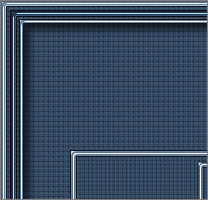
LAYERS >>> DUPLICATE
IMAGE >>> RESIZE = 87%
Ensure "Resize all layers" is UNCHECKED
Resample using WEIGHTED AVERAGE
ACTIVATE THE MERGED LAYER
With your MAGIC WAND....
Same settings.
Select the CENTRE of the image
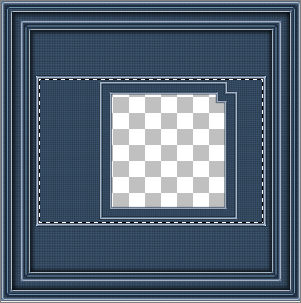
SELECTIONS >>> INVERT
EFFECTS >>> PLUGINS >>> EYE CANDY 3 >>> DROP SHADOW
Same settings
EDIT >>> Repeat Drop Shadow.. change DIRECTION to 315
DESELECT
ACTIVATE THE Copy of Merged LAYER
With your MAGIC WAND.... Same settings.
Select the CENTRE of the image
SELECTIONS >>> INVERT
EFFECTS >>> PLUGINS >>> EYE CANDY 3 >>> DROP SHADOW
Same settings
EDIT >>> Repeat Drop Shadow.. change DIRECTION to 135
DESELECT
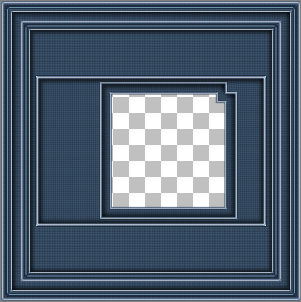
ACTIVATE THE Copy(2) of Merged LAYER
With your MAGIC WAND.... Same settings.
Select the CENTRE of the image
SELECTIONS >>> INVERT
EFFECTS >>> PLUGINS >>> EYE CANDY 3 >>> DROP SHADOW
Same settings
EDIT >>> Repeat Drop Shadow.. change DIRECTION to 315
DESELECT
LAYERS >>> NEW RASTER LAYER
LAYERS >>> ARRANGE >>> MOVE DOWN
Flood fill with Light Blue
Save as .psp image
-/-/-/-/-/-/-/-/-/-
This is you basic frame which you can decorate any way you like.
To end up with my creation... continue....
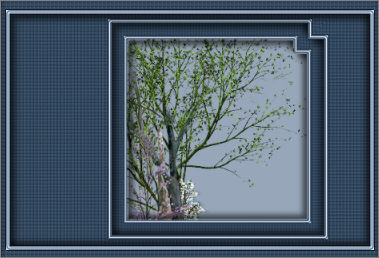
Open up the TREES W3523 PJW image in your PSP workspace
Right click on the Title Bar and select COPY from the options
Right click on the Title Bar of your frame image
and select PASTE AS NEW LAYER from the options.
ACTIVATE THE Copy of Merged LAYER
Open up the 1daffodil image in your PSP workspace
Right click on the Title Bar and select COPY from the options
Right click on the Title Bar of your frame image
and select PASTE AS NEW LAYER from the options.
IMAGE >>> MIRROR
IMAGE >>> RESIZE = 50%
Ensure "Resize all layers" is UNCHECKED
Resample using WEIGHTED AVERAGE
ADJUST >>> SHARPNESS >>> SHARPEN
EFFECTS >>> PLUGINS >>> EYE CANDY 3 >>> PERSPECTIVE SHADOW
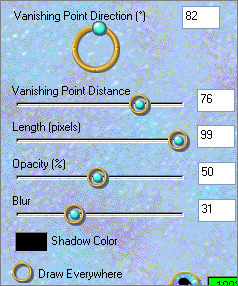
Reposition with your MOVER tool
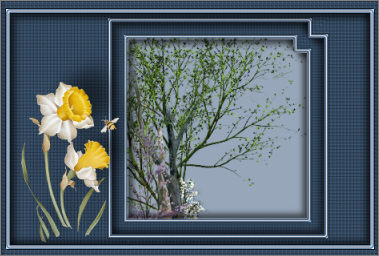
ACTIVATE THE Copy of Merged 2 LAYER
Open up the CNRIvyCNP image in your PSP workspace
Right click on the Title Bar and select COPY from the options
Right click on the Title Bar of your frame image
and select PASTE AS NEW LAYER from the options.
IMAGE >>> MIRROR
IMAGE >>> RESIZE = 80%
Ensure "Resize all layers" is UNCHECKED
Resample using WEIGHTED AVERAGE
ADJUST >>> SHARPNESS >>> SHARPEN
EFFECTS >>> PLUGINS >>> EYE CANDY 3 >>> PERSPECTIVE SHADOW
Same settings
Reposition with your MOVER tool
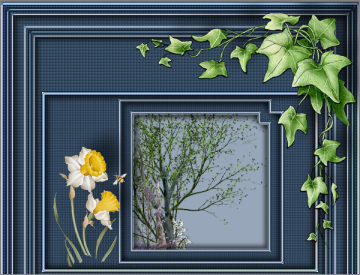
Open up the BT-FloppyEars image in your PSP workspace
Right click on the Title Bar and select COPY from the options
Right click on the Title Bar of your frame image
and select PASTE AS NEW LAYER from the options.
IMAGE >>> RESIZE = 80%
Ensure "Resize all layers" is UNCHECKED
Resample using WEIGHTED AVERAGE
ADJUST >>> SHARPNESS >>> SHARPEN
PSP8/9:- ADJUST >>> BRIGHTNESS and CONTRAST >>> GAMMA CORRECTION
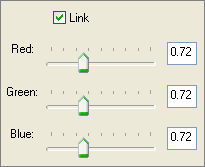
PSPX/XI/X2:- ADJUST >>> Brightness & Contrast >>> Histogram Adjustment

EFFECTS >>> PLUGINS >>> EYE CANDY 3 >>> PERSPECTIVE SHADOW
Same settings
Reposition with your MOVER tool
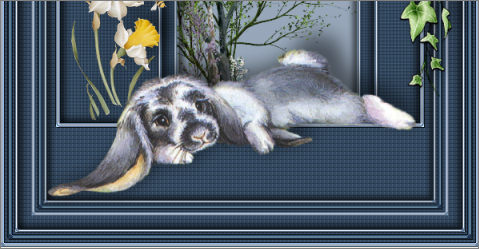
Open up the Saphiere_Insect_A3 image in your PSP workspace
Right click on the Title Bar and select COPY from the options
Right click on the Title Bar of your frame image
and select PASTE AS NEW LAYER from the options.
IMAGE >>> MIRROR
IMAGE >>> RESIZE = 40%
Ensure "Resize all layers" is UNCHECKED
Resample using WEIGHTED AVERAGE
ADJUST >>> SHARPNESS >>> SHARPEN
EFFECTS >>> PLUGINS >>> EYE CANDY 3 >>> PERSPECTIVE SHADOW
Same settings
Reposition with your MOVER tool
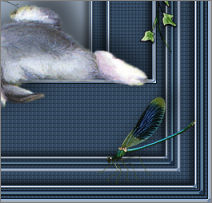
LAYERS >>> MERGE >>> MERGE ALL (Flatten)
Save as .jpg image
(I reduced my result to 550 x 550 to fit on this page)
Testers Results & another example
Page designed by

for

http://www.artistrypsp.com/
Copyright ©
2000-2010 Artistry In PSP / PSP Artistry
All rights reserved.
Unless specifically made available for
download,
no graphics or text may be removed from
this site for any reason
without written permission from Artistry
In PSP / PSP Artistry
|