FIRST LOVE
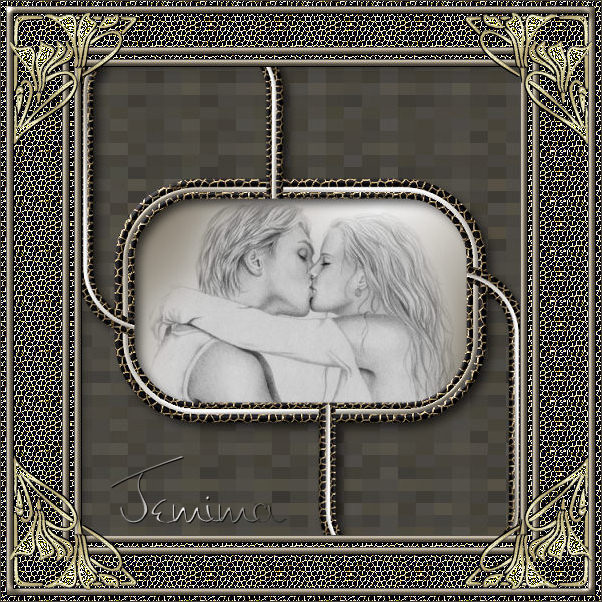
This tutorial was
created by Jemima using PSP9 ~ April 2010
BUT should be creatable using all versions of PSP
Copyright © 2010 ~ Jemima
~ All rights reserved
********************************
You will need the
following to complete this tutorial
Materials
102ACOIN8.PspTube
FirstloveSC.pspimage
Save to a folder on your computer
bhw_25.PspGradient
Save to your PSP Gradients folder
PSP8: C:\Program Files\Jasc Software\Paint Shop Pro 8\Gradients
PSP9: C:\Program Files\Jasc Software\Paint Shop Pro 9\Gradients
PSPX: C:\Program Files\Corel\Corel Paint Shop Pro X\Gradients
PSPXI / X2: C:\Program Files\Corel\Corel Paint Shop Pro Photo X2\Corel_06
esp_gold_web_orig.jpg
Save to your PSP Patterns folder
PSP8: C:\Program Files\Jasc Software\Paint Shop Pro 8\Patterns
PSP9: C:\Program Files\Jasc Software\Paint Shop Pro 9\Patterns
PSPX: C:\Program Files\Corel\Corel Paint Shop Pro X\Patterns
PSPXI / X2: C:\Program Files\Corel\Corel Paint Shop Pro Photo X2\Corel_08
Plugins
** EYE CANDY3 **
http://www.pircnet.com/downloads.html
** SIMPLE FILTERS **
Simple Filters
********************************
In your MATERIALS PALETTE
Load the ' bhw_25 ' gradient in your background
using the settings below.
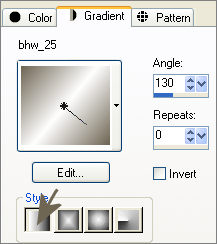
In your MATERIALS PALETTE
Load SOLID TAN ' #6e6553 ' in your foreground
NULL the gradient background
Open a new image 600 x 600
Transparent background
PSPX - X2: Colour Depth = 8bits/channel
Select your PRESET SHAPES tool
RECTANGLE

and to create the 'rounded' effect...
use these settings
(ignore any settings in 'Left', 'Top', 'Width' and 'Height' )

Starting at 75 pixels across and 150 pixels down
drag your cursor to 530 pixels across and 445 pixels down and release
Go to your LAYER PALETTE
Right click on the Vector layer and select
Convert to Raster layer
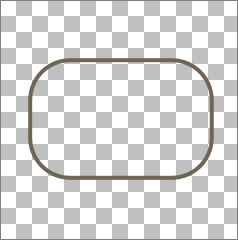
To make sure the image is centred...
Right click on the Title Bar of your frame image and select COPY from the options
Right click on the Title Bar of your frame image
and select PASTE AS NEW LAYER from the options.
DELETE Raster 2 in your LAYER PALETTE
ACTIVATE RASTER 3
EFFECTS >>> TEXTURE EFFECTS >>> SCULPTURE
COLOUR = #c0c0c0
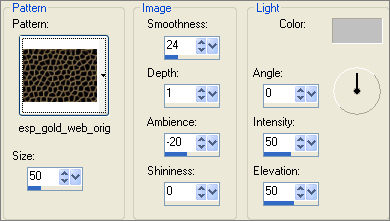
EFFECTS >>> 3D EFFECTS >>> INNER BEVEL
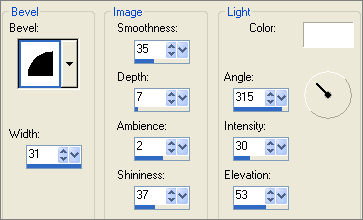
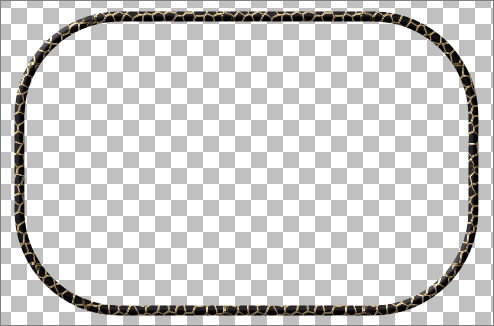
In your MATERIALS PALETTE
OPEN the background gradient
With your MAGIC WAND
Mode = Replace
Match Mode = RGB Value
Tolerance = 0
Feather = 0
Antialias = UNchecked
Sample Merged = UNCHECKED
PSP9 - X2: Check CONTIGUOUS
PSPX - X2: There is no " Sample Merged"
PSPX - X2: Use all layers = UNChecked
Select the CENTRE transparent area
SELECTIONS >>> MODIFY >>> EXPAND = 2
LAYERS >>> NEW RASTER LAYER
LAYERS >>> ARRANGE >>> MOVE DOWN
Flood fill with the Gradient
SELECTIONS >>> MODIFY >>> CONTRACT = 10
EDIT >>> CLEAR
DESELECT
EFFECTS >>> 3D EFFECTS >>> INNER BEVEL
Same settings

With your MAGIC WAND
Same settings
Select the CENTRE transparent area
SELECTIONS >>> MODIFY >>> EXPAND = 2
LAYERS >>> NEW RASTER LAYER
Flood fill with TAN ' #6e6553 '
EFFECTS >>> TEXTURE EFFECTS >>> SCULPTURE
Same settings
SELECTIONS >>> MODIFY >>> CONTRACT = 8
EDIT >>> CLEAR
DESELECT
EFFECTS >>> 3D EFFECTS >>> INNER BEVEL
Same settings

CLOSE RASTER 1
LAYERS >>> MERGE >>> MERGE VISIBLE
LAYERS >>> DUPLICATE
IMAGE >>> RESIZE = 85%
Ensure "Resize all layers" is UNCHECKED
Resample using WEIGHTED AVERAGE
EFFECTS >>> REFLECTION EFFECTS >>> ROTATING MIRROR
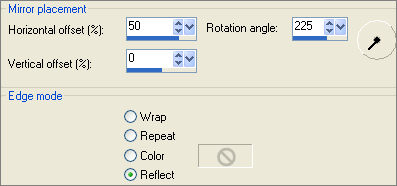
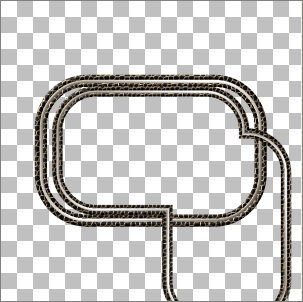
LAYERS >>> DUPLICATE
IMAGE >>> FLIP
IMAGE >>> MIRROR
ACTIVATE THE MERGED LAYER
With your MAGIC WAND....
Same settings.
Select the CENTRE transparent area
ACTIVATE Copy of Merged layer
EDIT >>> CLEAR
ACTIVATE Copy (2) of Merged layer
EDIT >>> CLEAR
DESELECT
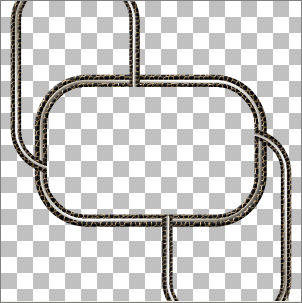
LAYERS >>> MERGE >>> MERGE VISIBLE
IMAGE >>> RESIZE = 80%
Ensure "Resize all layers" is UNCHECKED
Resample using WEIGHTED AVERAGE
ADJUST >>> SHARPNESS >>> SHARPEN
Choose your SELECTION TOOL then click on the CUSTOM SELECTION
symbol
and enter these coordinates
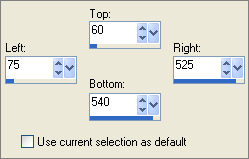
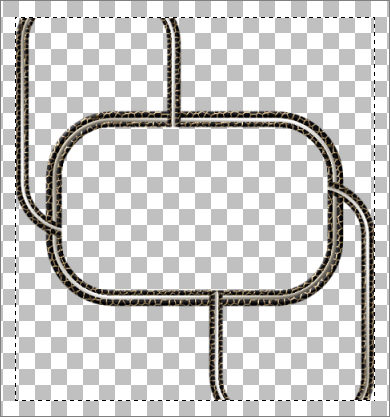
EFFECTS >>> 3D EFFECTS >>> DROP SHADOW
Vertical & Horizontal offsets = 1
Colour = Black
Opacity = 100
Blur = 0
Repeat Drop Shadow effect changing
Vertical & Horizontal Offsets to - ( minus ) 1
Click OK
DESELECT
Select yourPUSH BRUSH tool
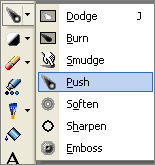
Use these settings
PSPX - PSPXII: Use all layers = UNCHECKED
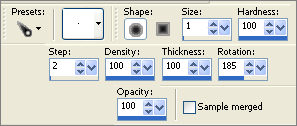
ZOOM IN to the top right corner of the drop shadow
Place your cursor on the top black line and drag to the right, level with the vertical line.
Then place
your cursor on the vertical line and drag it up, level with the top black line.
 .. .. 
Repeat this process at the bottom left corner of the drop shadow.
With your MAGIC WAND
Same settings
Select the OUTER transparent area
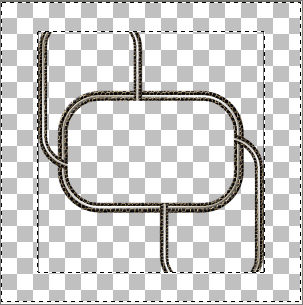
LAYERS >>> NEW RASTER LAYER
Flood fill with TAN
EFFECTS >>> TEXTURE EFFECTS >>> SCULPTURE
CHANGE SIZE TO 25
EFFECTS >>> EDGE EFFECTS >>> ENHANCE

LAYERS >>> NEW RASTER LAYER
SELECTIONS >>> MODIFY >>> CONTRACT = 6
Flood fill with TAN
SELECTIONS >>> MODIFY >>> CONTRACT = 6
EDIT >>> CLEAR
DESELECT

EFFECTS >>> 3D EFFECTS >>> DROP SHADOW
Vertical & Horizontal offsets = 1
Colour = Black
Opacity = 100
Blur = 0
Repeat Drop Shadow effect changing
Vertical & Horizontal Offsets to - ( minus ) 1
Click OK
EFFECTS >>> 3D EFFECTS >>> INNER BEVEL
Same settings
EDIT >>> Repeat Inner Bevel

ACTIVATE RASTER 2
With your MAGIC WAND....
Same settings.
Select the CENTRE transparent area
LAYERS >>> NEW RASTER LAYER
Flood fill with TAN
SELECTIONS >>> MODIFY >>> CONTRACT = 6
EDIT >>> CLEAR
DESELECT
EFFECTS >>> 3D EFFECTS >>> DROP SHADOW
Vertical & Horizontal offsets = 1
Colour = Black
Opacity = 100
Blur = 0
Repeat Drop Shadow effect changing
Vertical & Horizontal Offsets to - ( minus ) 1
Click OK
EFFECTS >>> 3D EFFECTS >>> INNER BEVEL
Same settings
EDIT >>> Repeat Inner Bevel

ACTIVATE THE MERGED LAYER
With your MAGIC WAND....
Same settings.
and while depressing your SHIFT KEY...
Select the outer transparent areas shown below
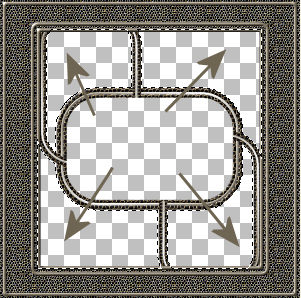
SELECTIONS >>> MODIFY >>> EXPAND = 2
LAYERS >>> NEW RASTER LAYER
LAYERS >>> ARRANGE >>> MOVE DOWN
Flood fill with TAN
EFFECTS >>> TEXTURE EFFECTS >>> SCULPTURE
Same settings
EFFECTS >>> EDGE EFFECTS >>> ENHANCE
EFFECTS >>> DISTORTION EFFECTS >>> PIXILATE


SELECTIONS >>> INVERT
LAYERS >>> NEW RASTER LAYER
EFFECTS >>> PLUGINS >>> EYE CANDY 3 >>> DROP SHADOW
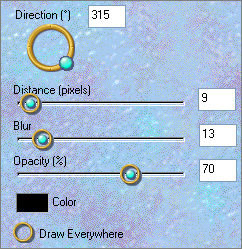
DESELECT
ACTIVATE THE TOP LAYER
Open up the 102ACOIN8 image in your PSP workspace
Right click on the Title Bar and select COPY from the options
Right click on the Title Bar of your frame image
and select PASTE AS NEW LAYER from the options.
IMAGE >>> FLIP
EFFECTS >>> 3D EFFECTS >>> DROP SHADOW
Vertical & Horizontal offsets = 1
Colour = Black
Opacity = 100
Blur = 0
Reposition with your MOVER tool
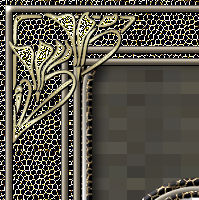
EFFECTS >>> PLUGINS >>> SIMPLE >>> TOP LEFT MIRROR
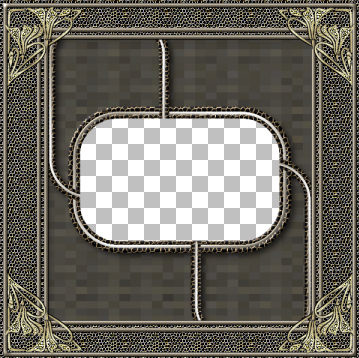
LAYERS >>> MERGE >>> MERGE VISIBLE
Save as .psp image
With your MAGIC WAND....
Same settings.
Select the CENTRE transparent area
OPEN AND ACTIVATE RASTER 1
SELECTIONS >>> MODIFY >>> EXPAND = 2
Flood fill with gradient
LAYERS >>> NEW RASTER LAYER
SELECTIONS >>> INVERT
EFFECTS >>> PLUGINS >>> EYE CANDY 3 >>> DROP SHADOW
Same settings
DESELECT
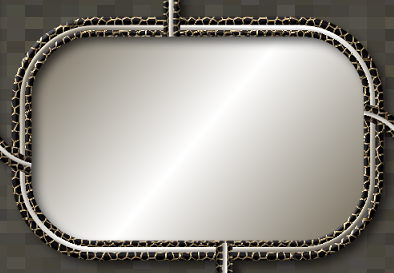
.
ACTIVATE RASTER 1
Open up the FirstloveSC image in your PSP workspace
Right click on the Title Bar of your frame image
and select PASTE AS NEW LAYER from the options.
IMAGE >>> RESIZE = 70%
Ensure "Resize all layers" is UNCHECKED
Resample using WEIGHTED AVERAGE
ADJUST >>> BRIGHTNESS and CONTRAST >>> BRIGHTNESS/CONTRAST

Reposition with your MOVER tool
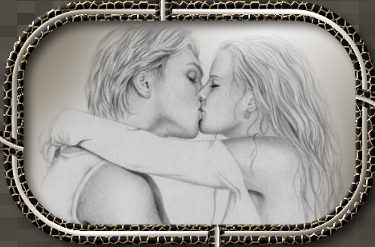
LAYERS >>> MERGE >>> MERGE ALL (Flatten)
IMAGE >>> ADD BORDERS = 1 symmetric
COLOUR = #413d36
Save as .jpg image
Testers Results
Page designed by

for

http://www.artistrypsp.com/
Copyright ©
2000-2010 Artistry In PSP / PSP Artistry
All rights reserved.
Unless specifically made available for
download,
no graphics or text may be removed from
this site for any reason
without written permission from Artistry
In PSP / PSP Artistry
|