CURIOUS
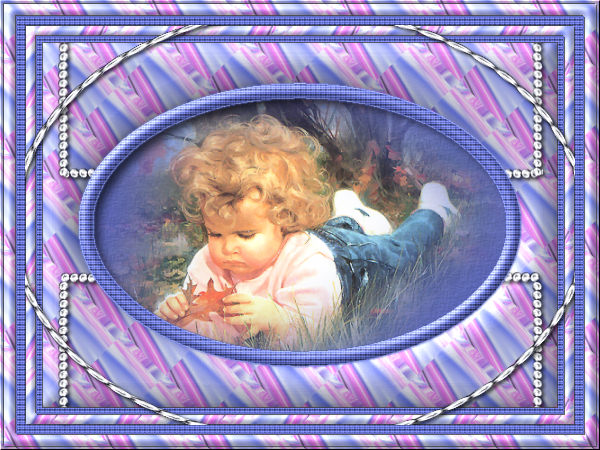
This tutorial was
created by Jemima using PSP9 ~ APRIL 2010
BUT should be creatable using all versions of PSP
Copyright © 2010 ~ Jemima
~ All rights reserved
********************************
You will need the
following to complete this tutorial
Materials
JF_Patt_P01.jpg
JF_Pearls.pspimage
22-09-06zolan-septembergirl_sw.pspimage
Save to a folder on your computer
JF5.jpg
Save to your PSP Textures folder
PSP8: C:\Program Files\Jasc Software\Paint Shop Pro 8\Textures
PSP9: C:\Program Files\Jasc Software\Paint Shop Pro 9\Textures
PSPX: C:\Program Files\Corel\Corel Paint Shop Pro X\Textures
PSPXI / X2: C:\Program Files\Corel\Corel Paint Shop Pro Photo X2\Corel_15
Plugins
** EYE CANDY3 **
http://www.pircnet.com/downloads.html
** SIMPLE FILTERS **
Simple Filters
********************************
REMEMBER TO SAVE YOUR WORK OFTEN
********************************
Open up the downloaded images in your PSP workspace and minimize.
In your MATERIALS PALETTE
Load the ' JF_Patt_P01 ' pattern in your foreground
using the settings below.
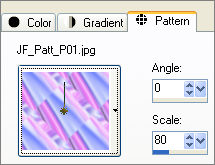
Load SOLID BLUE ' #7d8cfe ' in your background
Open a new image 600 x 450
Transparent background
PSPX - X2: Colour Depth = 8bits/channel
Flood fill with pattern
SELECTIONS >>> SELECT ALL
SELECTIONS >>> MODIFY >>> CONTRACT = 4
EDIT >>> CUT
(By using "CUT" instead of "CLEAR" the cut section is saved to your clipboard)
SELECTIONS >>> INVERT
EFFECTS >>> 3D EFFECTS >>> INNER BEVEL
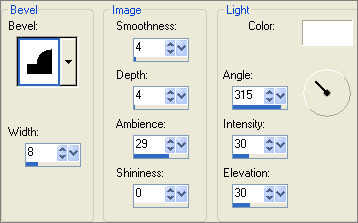
SELECTIONS >>> INVERT
LAYERS >>> NEW RASTER LAYER
Right click on the Title Bar of your frame image
and select PASTE INTO SELECTION from the options.
(This is the CUT section from above instruction)
SELECTIONS >>> MODIFY >>> CONTRACT = 12
EDIT >>> CLEAR
DESELECT
EFFECTS >>> 3D EFFECTS >>> INNER BEVEL
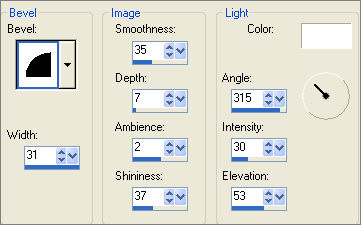

With your MAGIC WAND
Mode = Replace
Match Mode = RGB Value
Tolerance = 0
Feather = 0
Antialias = UNchecked
Sample Merged = UNCHECKED
PSP9 - X2: Check CONTIGUOUS
PSPX - X2: There is no " Sample Merged"
PSPX - X2: Use all layers = UNChecked
Select the CENTRE transparent area
LAYERS >>> NEW RASTER LAYER
Flood fill with BLUE
EFFECTS >>> TEXTURE EFFECTS >>> TEXTURE
COLOUR = #c0c0c0
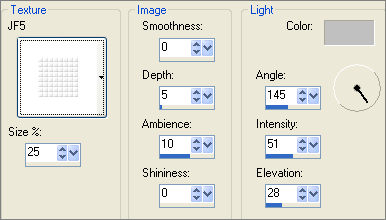
EFFECTS >>> EDGE EFFECTS >>> ENHANCE
SELECTIONS >>> MODIFY >>> CONTRACT = 10
EDIT >>> CLEAR

LAYERS >>> NEW RASTER LAYER
In your MATERIALS PALETTE
Change the SCALE of the pattern to 70
Flood fill with the pattern
IMAGE >>> MIRROR
SELECTIONS >>> DEFLOAT
SELECTIONS >>> MODIFY >>> CONTRACT = 10
EDIT >>> CLEAR
DESELECT
EFFECTS >>> 3D EFFECTS >>> INNER BEVEL
Same settings

With your MAGIC WAND ...Same settings
Select the CENTRE transparent area
LAYERS >>> NEW RASTER LAYER
Flood fill with BLUE
EFFECTS >>> TEXTURE EFFECTS >>> TEXTURE
Same settings
EFFECTS >>> EDGE EFFECTS >>> ENHANCE
SELECTIONS >>> MODIFY >>> CONTRACT = 6
EDIT >>> CLEAR
DESELECT

With your MAGIC WAND ...Same settings
Select the CENTRE transparent area
LAYERS >>> NEW RASTER LAYER
LAYERS >>> ARRANGE >>> MOVE DOWN
SELECTIONS >>> MODIFY >>> EXPAND = 3
Flood fill with the pattern
DESELECT
Choose your SELECTION TOOL
Selection Type = ELLIPSE
Mode = Replace
Feather = 1
Antialias = Checked
Starting at 300 pixels across and 225 pixels down
drag your cursor to 520 pixels across and 365 pixels down and release
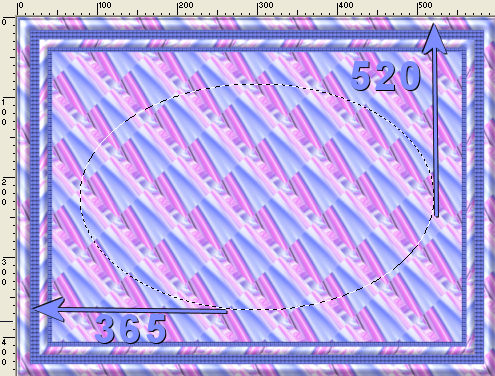
EDIT >>> CLEAR
DESELECT
EFFECTS >>> 3D EFFECTS >>> INNER BEVEL
Same settings BUT... CHANGE AMBIENCE to -15
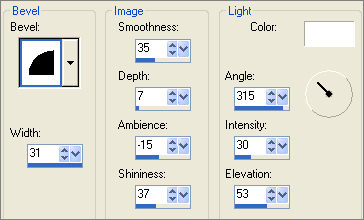
With your MAGIC WAND ...Same settings but
Change FEATHER to 2
Select the CENTRE transparent area
SELECTIONS >>> MODIFY >>> EXPAND = 3
LAYERS >>> NEW RASTER LAYER
LAYERS >>> ARRANGE >>> MOVE UP
Flood fill with BLUE
EFFECTS >>> TEXTURE EFFECTS >>> TEXTURE
Same settings
SELECTIONS >>> MODIFY >>> CONTRACT = 15
EDIT >>> CLEAR
DESELECT
SELECTIONS >>> SELECT ALL
SELECTIONS >>> FLOAT
SELECTIONS >>> DEFLOAT
EFFECTS >>> EDGE EFFECTS >>> ENHANCE
EFFECTS >>> 3D EFFECTS >>> INNER BEVEL
Same settings BUT... CHANGE AMBIENCE to 2
DESELECT
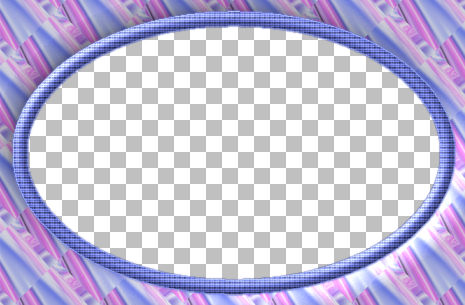
ACTIVATE RASTER 2
EFFECTS >>> 3D EFFECTS >>> DROP SHADOW
Vertical & Horizontal offsets = 1
Colour = DARK GREY #404040
Opacity = 80
Blur = 0
ACTIVATE RASTER 3
EDIT >>> Repeat
Drop Shadow
ACTIVATE RASTER 4
EDIT >>> Repeat Drop Shadow
ACTIVATE RASTER 5
EDIT >>> Repeat Drop Shadow
Repeat
Drop Shadow effect changing
Vertical & Horizontal Offsets to - ( minus ) 1
Click OK
ACTIVATE RASTER 4
EDIT >>> Repeat Drop Shadow
ACTIVATE RASTER 3
EDIT >>> Repeat Drop Shadow
ACTIVATE RASTER 2
EDIT >>> Repeat Drop Shadow
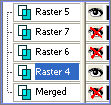
CLOSE THE TOP 4 LAYERS
LAYERS >>> MERGE >>> MERGE VISIBLE
CLOSE the MERGED layer and RASTER 6 and RASTER 7
ACTIVATE RASTER 4
LAYERS >>> MERGE >>> MERGE VISIBLE
Rename this layer MERGED 2
OPEN ALL LAYERS
ACTIVATE THE MERGED LAYER
Open up the JF_Pearls image in your PSP workspace
Right click on the Title Bar and select COPY from the options
Right click on the Title Bar of your frame image
and select PASTE AS NEW LAYER from the options.
Reposition with your MOVER tool

LAYERS >>> DUPLICATE
IMAGE >>> FLIP
LAYERS >>> DUPLICATE
PSP8 - PSP9: IMAGE >>> ROTATE >>> FREE ROTATE = RIGHT 90
Ensure "All layers" is UNCHECKED
PSPX - PSPX2: IMAGE >>> FREE ROTATE = RIGHT 90
Ensure "All layers" is UNCHECKED
Reposition with your MOVER tool
.

LAYERS >>> DUPLICATE
IMAGE >>> MIRROR
CLOSE THE LAYERS SHOWN BELOW
so only the pearls are showing
ACTIVATE one of the pearl layers
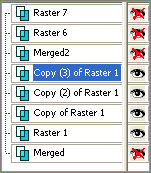
LAYERS >>> MERGE >>> MERGE VISIBLE
Rename this layer " Pearls "
Choose your SELECTION TOOL then click on the CUSTOM SELECTION
symbol
and enter these coordinates.
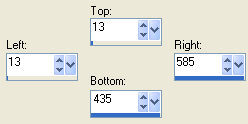
SELECTIONS >>> INVERT
EDIT >>> CLEAR
DESELECT
LAYERS >>> DUPLICATE
LAYERS >>> MERGE >>> MERGE VISIBLE
Rename this layer " Pearls "
OPEN ALL LAYERS
ZOOM IN and check ALL the corners of the Pearls layer for any 'broken' pearls
Choose your FREEHAND SELECTION TOOL

Carefully select any unwanted corner sections
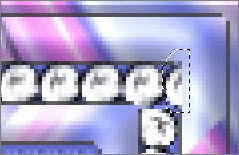
EDIT >>> CLEAR
LAYERS >>> DUPLICATE
LAYERS >>> ARRANGE >>> BRING TO TOP
IMAGE >>> RESIZE = 85%
Ensure "Resize all layers" is UNCHECKED
Resample using WEIGHTED AVERAGE
EFFECTS >>> PLUGINS >>> SIMPLE >>> TOP BOTTOM WRAP
Go to your LAYER PALETTE and rearrange the layers as shown below
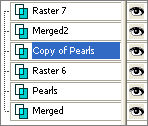
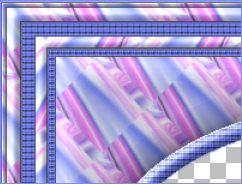
This is how your frame should look now.
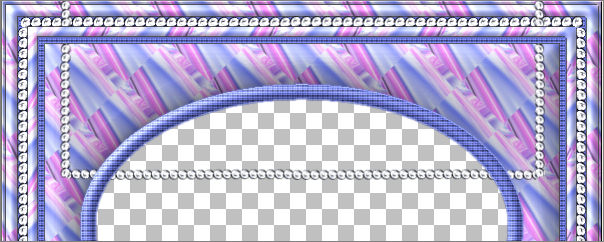
ACTIVATE RASTER 7
With your MAGIC WAND ...Same settings
Select the CENTRE transparent area
SELECTIONS >>> MODIFY >>> EXPAND = 5
ACTIVATE the Copy of Pearls layer
EDIT >>> CLEAR
DESELECT
ACTIVATE THE MERGED LAYER
With your MAGIC WAND ...Same settings
Select the CENTRE transparent area
SELECTIONS >>> INVERT
ACTIVATE the Copy of Pearls layer
EDIT >>> CLEAR
DESELECT
EFFECTS >>> PLUGINS >>> EYE CANDY 3 >>> DROP SHADOW
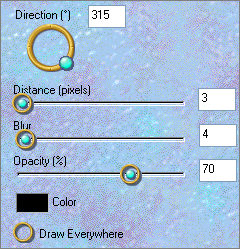
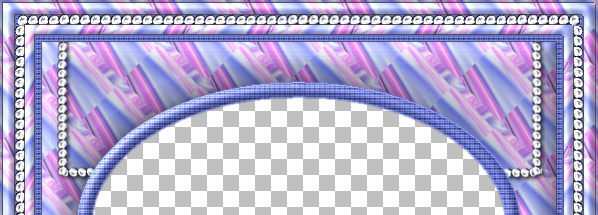
ACTIVATE the PEARLS layer
LAYERS >>> ARRANGE >>> BRING TO TOP
EFFECTS>>> DISTORTION EFFECTS >>> POLAR COORDINATES
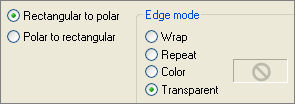
Choose your SELECTION TOOL ...Same settings
Select the area shown below
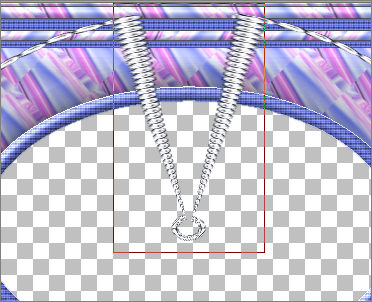
EDIT >>> CLEAR
DESELECT
LAYERS >>> DUPLICATE
IMAGE >>> FLIP
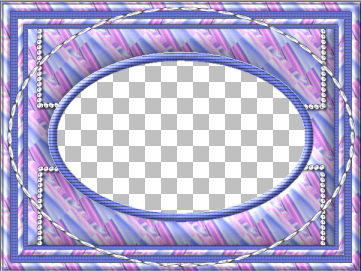
CLOSE all but the top 2 layers
LAYERS >>> MERGE >>> MERGE VISIBLE
EFFECTS >>> PLUGINS >>> EYE CANDY 3 >>> DROP SHADOW
Same settings
OPEN all layers
ACTIVATE THE BOTTOM MERGED LAYER
With your MAGIC WAND....
Same settings.
SELECTIONS >>> MODIFY >>> EXPAND = 2
SELECTIONS >>> INVERT
ACTIVATE THE TOP MERGED LAYER
EDIT >>> CLEAR
DESELECT
LAYERS >>> MERGE >>> MERGE VISIBLE
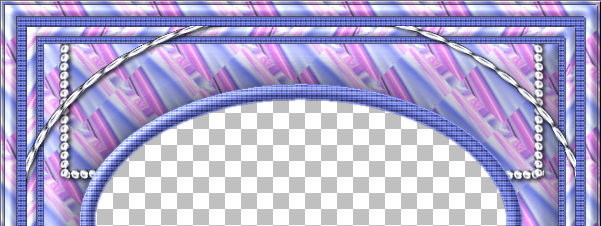
Save as .psp image
. With your MAGIC WAND....
Same settings.
Select the CENTRE transparent area
SELECTIONS >>> MODIFY >>> EXPAND = 4
SELECTIONS >>> INVERT
LAYERS >>> NEW RASTER LAYER
LAYERS >>> ARRANGE >>> MOVE DOWN
EFFECTS >>> PLUGINS >>> EYE CANDY 3 >>> DROP SHADOW

DESELECT
LAYERS >>> MERGE >>> MERGE VISIBLE
LAYERS >>> NEW RASTER LAYER
LAYERS >>> ARRANGE >>> MOVE DOWN
Flood fill with BLUE
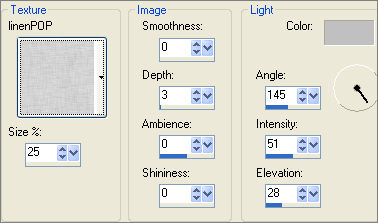
EFFECTS >>> TEXTURE EFFECTS >>> TEXTURE
COLOUR = #c0c0c0
Open up the 22-09-06zolan-septembergirl_sw image in your PSP workspace
Right click on the Title Bar and select COPY from the options
Right click on the Title Bar of your frame image
and select PASTE AS NEW LAYER from the options.
IMAGE >>> RESIZE = 90%
Ensure "Resize all layers" is UNCHECKED
Resample using WEIGHTED AVERAGE
LAYERS >>> MERGE >>> MERGE ALL (Flatten)
Save as .jpg image
Testers Results
Page designed by

for

http://www.artistrypsp.com/
Copyright ©
2000-2010 Artistry In PSP / PSP Artistry
All rights reserved.
Unless specifically made available for
download,
no graphics or text may be removed from
this site for any reason
without written permission from Artistry
In PSP / PSP Artistry
|