BUTTERCUPS
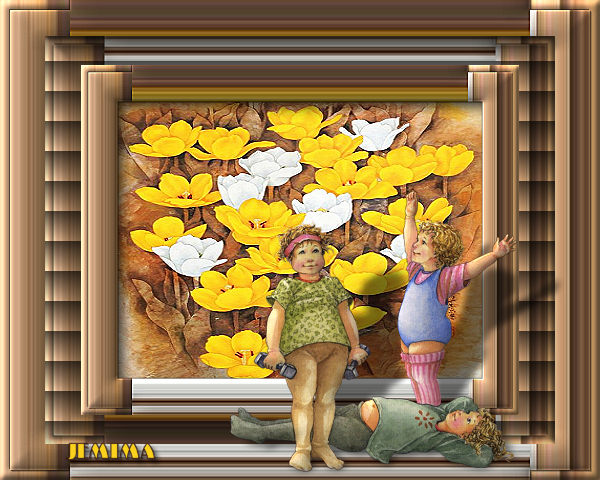
This tutorial was
created by Jemima using PSP9 ~ April 2010
BUT should be creatable using all versions of PSP
Copyright © 2010 ~ Jemima
~ All rights reserved
********************************
You will need the
following to complete this tutorial
Materials
Flowers_14.jpg
JER_CMC_2008_CathSimpson_ForeverYoung_1.pspimage
Save to a folder on your computer
Plugins
** EYE CANDY3 **
http://www.pircnet.com/downloads.html
********************************
Open up the Flowers_14 image in your PSP workspace
Choose your SELECTION TOOL then click on the CUSTOM SELECTION
symbol
and enter these coordinates.
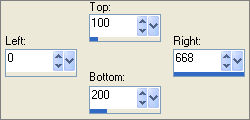
Right click on the Title Bar and select COPY from the options
Right click in your PSP workspace
and select PASTE AS NEW IMAGE from the options.
In your MATERIALS PALETTE load
this pattern in the foreground using these settings.
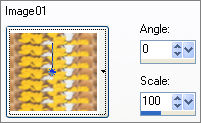
Open a new image 600 x 1
Transparent background
PSPX - X2: Colour Depth = 8bits/channel
Flood fill with the pattern ... you may have to ZOOM in to do this
IMAGE >>> RESIZE
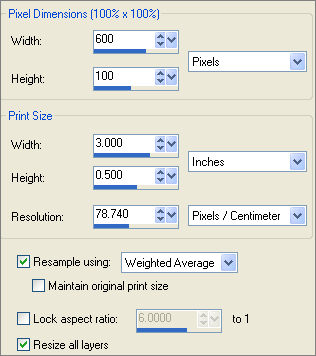

In your MATERIALS PALETTE change to
this pattern in the foreground using these settings.
(Pay no attention to the Image number... yours will be different)
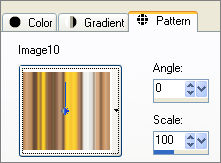
Open a new image 600 x 480
Transparent background
PSPX - X2: Colour Depth = 8bits/channel
Flood fill with the stripe pattern
SELECTIONS >>> SELECT ALL
SELECTIONS >>> MODIFY >>> CONTRACT = 10
EDIT >>> CLEAR
SELECTIONS >>> INVERT
EFFECTS >>> 3D EFFECTS >>> INNER BEVEL
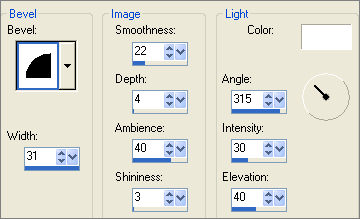
SELECTIONS >>> INVERT

DO NOT DESELECT
LAYERS >>> NEW RASTER LAYER
Flood fill with the stripe pattern
PSP8 - PSP9: IMAGE >>> ROTATE >>> FREE ROTATE = RIGHT 90
Ensure "All layers" is UNCHECKED
PSPX - PSPX2: IMAGE >>> FREE ROTATE = RIGHT 90
Ensure "All layers" is UNCHECKED
DESELECT
Choose your SELECTION TOOL then click on the CUSTOM SELECTION
symbol
and enter these coordinates.
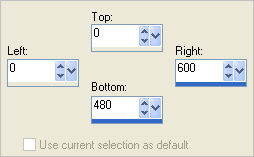
SELECTIONS >>> INVERT
EDIT >>> CLEAR
DESELECT
(By doing this we eliminate the excess from the top and bottom of the image on Raster 2)
SELECTIONS >>> SELECT ALL
SELECTIONS >>> MODIFY >>> CONTRACT = 50
EDIT >>> CLEAR
DESELECT
EFFECTS >>> 3D EFFECTS >>> INNER BEVEL
Same settings BUT CHANGE AMBIENCE to 20

EFFECTS >>> 3D EFFECTS >>> DROP SHADOW
Vertical & Horizontal offsets = 1
Colour = Black
Opacity = 50
Blur = 0
EDIT >>> Repeat Drop Shadow
EFFECTS >>> 3D EFFECTS >>> DROP SHADOW
Vertical & Horizontal offsets = - ( minus ) 1
Colour = Black
Opacity = 50
Blur = 0
ADJUST >>> SHARPNESS >>> SHARPEN MORE

ACTIVATE RASTER 1
ADJUST >>> SHARPNESS >>> SHARPEN MORE
LAYERS >>> MERGE >>> MERGE VISIBLE
EFFECTS >>> 3D EFFECTS >>> INNER BEVEL
Same settings
LAYERS >>> DUPLICATE
IMAGE >>> RESIZE = 85%
Ensure "Resize all layers" is UNCHECKED
Resample using WEIGHTED AVERAGE
IMAGE >>> FLIP
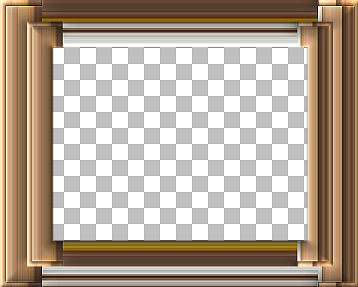
EFFECTS >>> TEXTURE EFFECTS >>> BLINDS
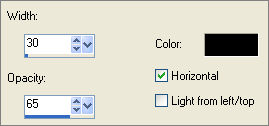

ACTIVATE THE MERGED LAYER
LAYERS >>> DUPLICATE
LAYERS >>> ARRANGE >>> BRING TO TOP
IMAGE >>> RESIZE = 73%
Ensure "Resize all layers" is UNCHECKED
Resample using WEIGHTED AVERAGE
ADJUST >>> SHARPNESS >>> SHARPEN
With your MAGIC WAND
Mode = Replace
Match Mode = RGB Value
Tolerance = 0
Feather = 0
Antialias = UNchecked
Sample Merged = UNCHECKED
PSP9 - X2: Check CONTIGUOUS
PSPX - X2: There is no " Sample Merged"
PSPX - X2: Use all layers = UNChecked
Select the CENTRE transparent area
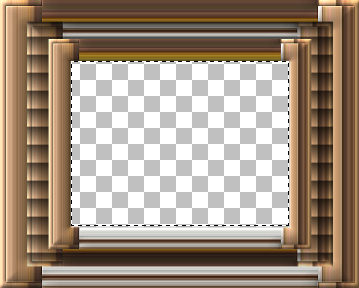
SELECTIONS >>> MODIFY >>> EXPAND = 4
SELECTIONS >>> INVERT
LAYERS >>> NEW RASTER LAYER
LAYERS >>> ARRANGE >>> MOVE DOWN
EFFECTS >>> PLUGINS >>> EYE CANDY 3 >>> DROP SHADOW
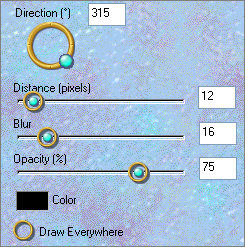
DESELECT
LAYERS >>> MERGE >>> MERGE VISIBLE
Save as .psp image
Open up the Flowers_14 image in your PSP workspace
Make sure you have deselected the selection used to make the pattern.
Right click on the Title Bar and select COPY from the options
Right click on the Title Bar of your frame image
and select PASTE AS NEW LAYER from the options.
IMAGE >>> RESIZE = 55%
Ensure "Resize all layers" is UNCHECKED
Resample using WEIGHTED AVERAGE
LAYERS >>> ARRANGE >>> MOVE DOWN
Select your DEFORMATION tool
Mode = SCALE
use default settings
PSPX - XII:Select your PICK tool
Drag the centre top, bottom and side nodes to the positions shown below.
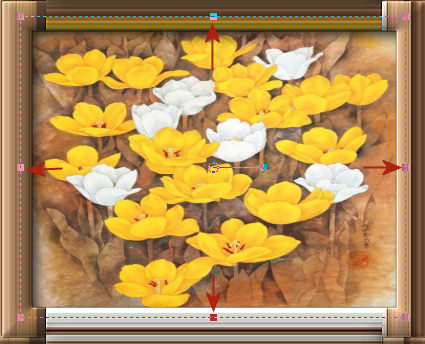
Click the RESET RECTANGLE arrow
LAYERS >>> DUPLICATE
EFFECTS >>> EDGE EFFECTS >>> ERODE
In your LAYER PALETTE change the OPACITY to 64%
Change the BLEND MODE to SOFT LIGHT
ACTIVATE RASTER 1
.
EFFECTS >>> EDGE EFFECTS >>> ENHANCE
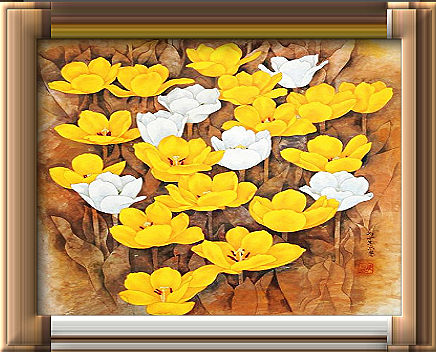
ACTIVATE THE MERGED LAYER
Open up the JER_CMC_2008_CathSimpson_ForeverYoung_1 image in your PSP workspace
Right click on the Title Bar and select COPY from the options
Right click on the Title Bar of your frame image
and select PASTE AS NEW LAYER from the options.
IMAGE >>> RESIZE = 50%
Ensure "Resize all layers" is UNCHECKED
Resample using WEIGHTED AVERAGE
Reposition with your MOVER tool
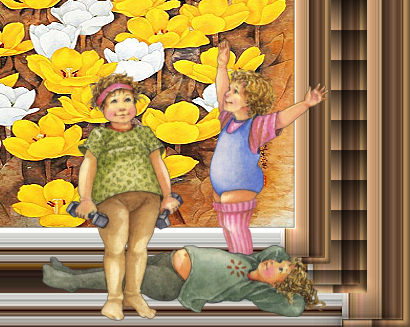
ADJUST >>> SHARPNESS >>> SHARPEN
EFFECTS >>> 3D EFFECTS >>> INNER BEVEL
Same settings
EFFECTS >>> PLUGINS >>> EYE CANDY 3 >>> PERSPECTIVE SHADOW
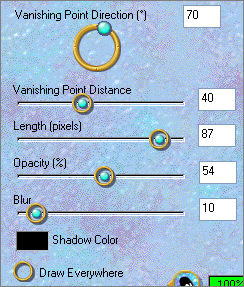
LAYERS >>> MERGE >>> MERGE ALL (Flatten)
Save as .jpg image
Testers Results
Page designed by

for

http://www.artistrypsp.com/
Copyright ©
2000-2010 Artistry In PSP / PSP Artistry
All rights reserved.
Unless specifically made available for
download,
no graphics or text may be removed from
this site for any reason
without written permission from Artistry
In PSP / PSP Artistry
|