LILAC TIME
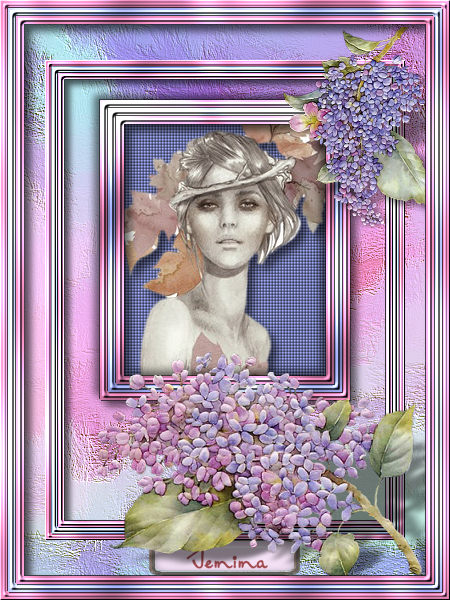
This tutorial was
created by Jemima using PSP9 ~ June 2009
BUT should be creatable using all versions of PSP
Copyright © 2009 ~ Jemima
~ All rights reserved
********************************
You will need the
following to complete this tutorial
Materials
Lilac_Materials ZIP
abstract110.jpg
1 LD_Lilac1_0517.pspimage
1 LD_Lilac3_0517.tub
autumnvision.pspimage
barrinha_fantastic1.pspimage
Save to a folder on your computer
Plugins
** EYE CANDY3 **
http://www.pircnet.com/downloads.html
Greg's Factory
Output Vol 2
download
********************************
Open up the downloaded images in your PSP workspace
and minimize.
In your MATERIALS PALETTE
Load SOLID PINK ' #dc81ae ' in your foreground
Load SOLID BLUE ' #a6b2ff ' in your background

Open a new image 450 x 600
Transparent background
PSPX: Colour Depth = 8bits/channel
Maximize the abstract110 image in your PSP workspace
Right click on the Title Bar and select COPY from the options
Right click on the Title Bar of your new blank image
and select PASTE AS NEW LAYER from the options.
EFFECTS >>> ART MEDIA EFFECTS >>> BRUSH STROKES
COLOUR = #8080ff
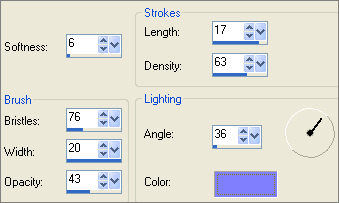
LAYERS >>> NEW RASTER LAYER
Choose your SELECTION TOOL then click on the CUSTOM SELECTION
symbol
and enter these coordinates.
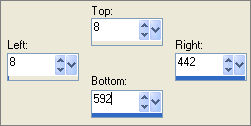
SELECTIONS >>> INVERT
Flood fill with PINK
SELECTIONS >>> INVERT
LAYERS >>> NEW RASTER LAYER
Flood fill with BLUE
SELECTIONS >>> MODIFY >>> CONTRACT = 8
EDIT >>> CLEAR
LAYERS >>> NEW RASTER LAYER
Flood fill with PINK
SELECTIONS >>> MODIFY >>> CONTRACT = 8
EDIT >>> CLEAR

EFFECTS >>> 3D EFFECTS >>> DROP SHADOW
Vertical & Horizontal offsets = 1
Colour = Black
Opacity = 70
Blur = 0
Repeat Drop Shadow effect changing
Vertical & Horizontal Offsets to - ( minus ) 1
Click OK
DESELECT
ACTIVATE RASTER 4
Repeat BOTH Drop Shadows
ACTIVATE RASTER 3
Repeat BOTH Drop Shadows
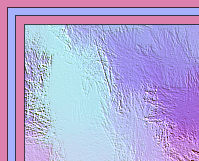
EFFECTS >>> PLUGINS >>> GREG'S FACTORY OUTPUT VOL II >>> POOL SHADOW
Use these settings
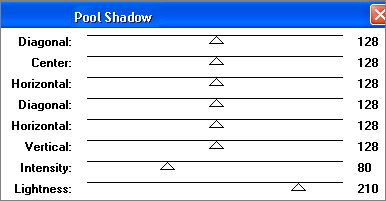
ACTIVATE RASTER 4
EDIT >>> Repeat Pool Shadow
ACTIVATE RASTER 5
EDIT >>> Repeat Pool Shadow
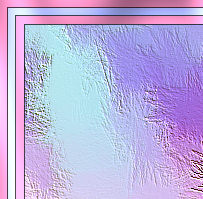
EFFECTS >>> 3D EFFECTS >>> INNER BEVEL
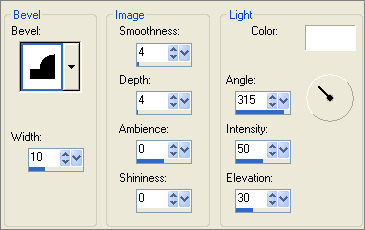
EDIT >>> Repeat Inner Bevel
ACTIVATE RASTER 4
EDIT >>> Repeat Inner Bevel
ACTIVATE RASTER 3
EDIT >>> Repeat Inner Bevel
CLOSE Layers 1 & 2
LAYERS >>> MERGE >>> MERGE VISIBLE
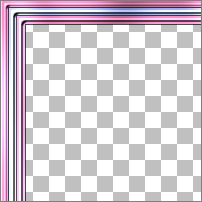
With your MAGIC WAND
Mode = Replace
Match Mode = RGB Value
Tolerance = 0
Feather = 0
Antialias = UNchecked
Sample Merged = UNCHECKED
PSP9/X: Check CONTIGUOUS
PSPX: There is no " Sample Merged"
PSPX: Use all layers = UNChecked
Select the CENTRE transparent area
SELECTIONS >>> INVERT
EFFECTS >>> PLUGINS >>> EYE CANDY 3 >>> DROP SHADOW
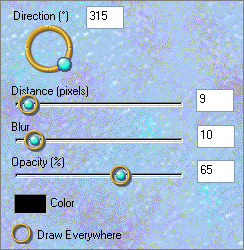
DESELECT
LAYERS >>> NEW RASTER LAYER
Choose your SELECTION TOOL then click on the CUSTOM SELECTION
symbol
and enter these coordinates.
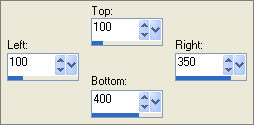
Flood fill with PINK
SELECTIONS >>> MODIFY >>> CONTRACT = 8
EDIT >>> CLEAR
LAYERS >>> NEW RASTER LAYER
Flood fill with BLUE
SELECTIONS >>> MODIFY >>> CONTRACT = 8
EDIT >>> CLEAR
LAYERS >>> NEW RASTER LAYER
Flood fill with PINK
SELECTIONS >>> MODIFY >>> CONTRACT = 8
EDIT >>> CLEAR
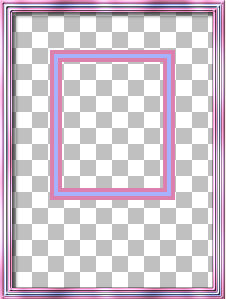
EFFECTS >>> 3D EFFECTS >>> DROP SHADOW
Vertical & Horizontal offsets = 1
Colour = Black
Opacity = 70
Blur = 0
Repeat Drop Shadow effect changing
Vertical & Horizontal Offsets to - ( minus ) 1
Click OK
DESELECT
ACTIVATE RASTER 4
Repeat BOTH Drop Shadows
ACTIVATE RASTER 3
Repeat BOTH Drop Shadows
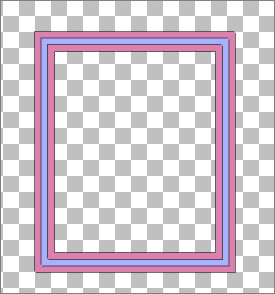
EFFECTS >>> PLUGINS >>> GREG'S FACTORY OUTPUT VOL II >>> POOL SHADOW
Same settings
ACTIVATE RASTER 4
EDIT >>> Repeat Pool Shadow
ACTIVATE RASTER 5
EDIT >>> Repeat Pool Shadow
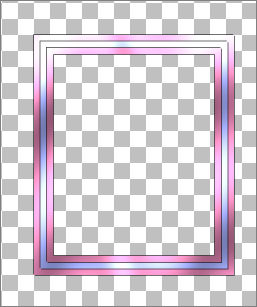
EFFECTS >>> 3D EFFECTS >>> INNER BEVEL
Same settings
ACTIVATE RASTER 4
EDIT >>> Repeat Inner Bevel
ACTIVATE RASTER 3
EDIT >>> Repeat Inner Bevel
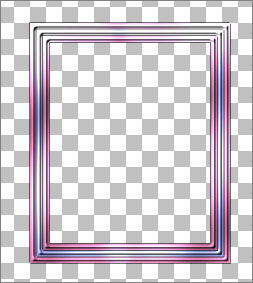
CLOSE the MERGED Layer
LAYERS >>> MERGE >>> MERGE VISIBLE
Rename this "Merged 2"
OPEN ALL LAYERS
ACTIVATE
the MERGED Layer
LAYERS >>> DUPLICATE
IMAGE >>> RESIZE = 80%
Ensure "Resize all layers" is UNCHECKED
Resample using WEIGHTED AVERAGE
ADJUST >>> SHARPNESS >>> SHARPEN MORE
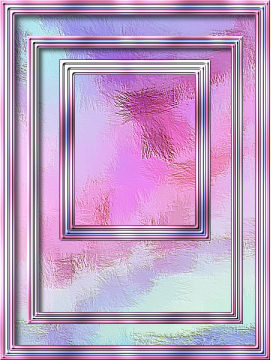
ACTIVATE
the MERGED 2 Layer
With your MAGIC WAND
Same settings..
Select the CENTRE area of the frame
SELECTIONS >>> MODIFY >>> EXPAND = 3
ACTIVATE RASTER 2
EDIT >>> CLEAR
ACTIVATE RASTER 1
Flood fill with BLUE
EFFECTS >>> TEXTURE EFFECTS >>> BLINDS
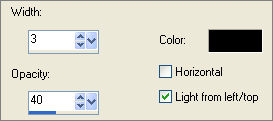
EFFECTS >>> TEXTURE EFFECTS >>> BLINDS
Check HORIZONTAL: setting
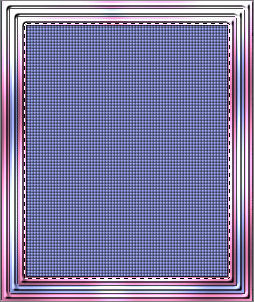
DESELECT
ACTIVATE
the MERGED 2 Layer
EFFECTS >>> PLUGINS >>> EYE CANDY 3 >>> DROP SHADOW
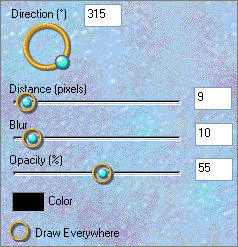
EFFECTS >>> PLUGINS >>> EYE CANDY 3 >>> DROP SHADOW
Change DIRECTION to 135
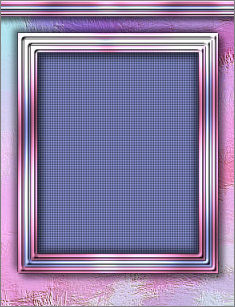
Save as .psp image
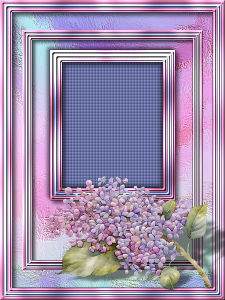
Maximize the 1 LD_Lilac1_0517 image in your PSP workspace
Right click on the Title Bar and select COPY from the options
Right click on the Title Bar of your frame image
and select PASTE AS NEW LAYER from the options.
IMAGE >>> RESIZE = 80%
Ensure "Resize all layers" is UNCHECKED
Resample using WEIGHTED AVERAGE
ADJUST >>> SHARPNESS >>> SHARPEN
Reposition with your MOVER tool to the bottom right corner
(See image below)
EFFECTS >>> PLUGINS >>> EYE CANDY 3 >>> PERSPECTIVE SHADOW
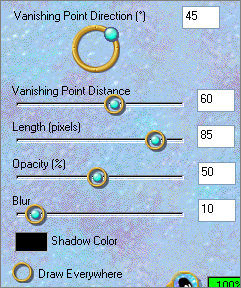 . .
ACTIVATE the MERGED 2 layer
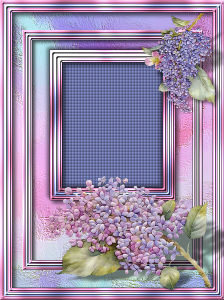
Maximize the 1 LD_Lilac3_0517 image in your PSP workspace
Right click on the Title Bar and select COPY from the options
Right click on the Title Bar of your frame image
and select PASTE AS NEW LAYER from the options.
IMAGE >>> RESIZE = 55%
Ensure "Resize all layers" is UNCHECKED
Resample using WEIGHTED AVERAGE
ADJUST >>> SHARPNESS >>> SHARPEN
IMAGE >>> ROTATE >>> FREE ROTATE = LEFT 100
Ensure "All layers" is UNCHECKED
ADJUST >>> SHARPNESS >>> SHARPEN
Reposition with your MOVER tool to the top right corner
(See image below)
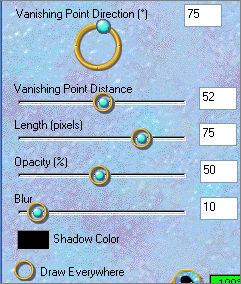
EFFECTS >>> PLUGINS >>> EYE CANDY 3 >>> PERSPECTIVE SHADOW
 . . 
ACTIVATE the MERGED layer
LAYERS >>> ARRANGE >>> BRING TO TOP
ACTIVATE RASTER 1
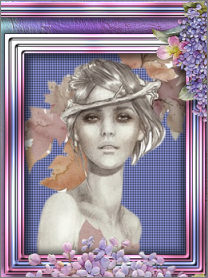
Maximize the autumnvision image in your PSP workspace
Right click on the Title Bar and select COPY from the options
Right click on the Title Bar of your frame image
and select PASTE AS NEW LAYER from the options.
IMAGE >>> RESIZE = 85%
Ensure "Resize all layers" is UNCHECKED
Resample using WEIGHTED AVERAGE
ADJUST >>> SHARPNESS >>> SHARPEN
Reposition with your MOVER tool
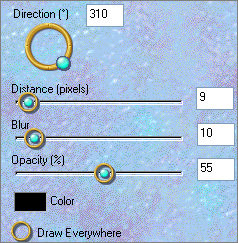
EFFECTS >>> PLUGINS >>> EYE CANDY 3 >>> DROP SHADOW
 . . 
ACTIVATE RASTER 2
Maximize the barrinha_fantastic1 image in your PSP workspace
Right click on the Title Bar and select COPY from the options
Right click on the Title Bar of your frame image
and select PASTE AS NEW LAYER from the options.
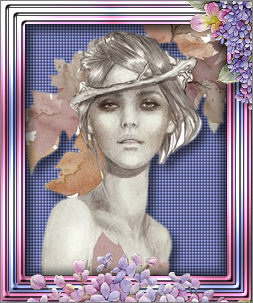
Reposition with your MOVER tool to the centre bottom as shown.
.

Select your TEXT tool and use the following settings.
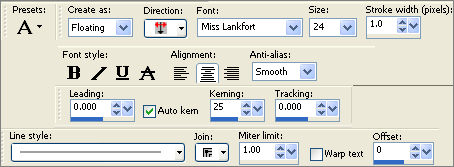
The colour I used for the foreground and background is
#9f474b
Insert your name... Click APPLY
Reposition if necessary.
SELECTIONS >>> SELECT NONE

LAYERS >>> MERGE >>> MERGE ALL (Flatten)
Save as .jpg image
Testers Results
Page designed by

for

http://www.artistrypsp.com/
Copyright ©
2000-2009 Artistry In PSP / PSP Artistry
All rights reserved.
Unless specifically made available for
download,
no graphics or text may be removed from
this site for any reason
without written permission from Artistry
In PSP / PSP Artistry
|