XMAS 2 - 2009
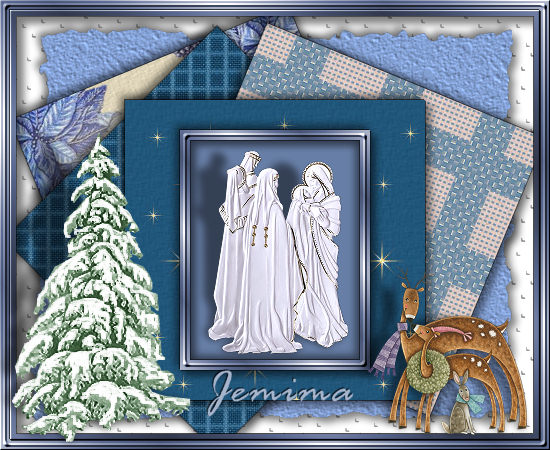
This tutorial was
created by Jemima using PSP9 ~ June 2009
BUT should be creatable using all versions of PSP
Copyright © 2009 ~ Jemima
~ All rights reserved
********************************
You will need the
following to complete this tutorial
Materials
Xmas209_Materials.zip
L&k53.bmp
Save to your PSP Textures folder
winni[1].bg.xmas13.4.jpg
winni[1].bg.xmas10.1.jpg
winni[1].bg.xmas14.35.jpg
xtra_woven_frame_bgtile_rosy04.jpg
(NOTE: You can save the above 4 images either to...
a folder on your computer OR
your PSP Patterns folder.)
TS Deer 3553 08.pspimage
True_Christmas_LCT_Nov_08.psp
CR-Green snowcovered-TG#-720-2007.psp
Save to a folder on your computer
JSC_Silverplate.PspGradient
Save to your PSP Gradients folder
Plugins
** EYE CANDY3 **
http://www.pircnet.com/downloads.html
********************************
REMEMBER TO SAVE YOUR WORK OFTEN
********************************
Open up the downloaded images in your PSP workspace
and minimize.
Open a new image 550 x 450
Transparent background
PSPX: Colour Depth = 8bits/channel
Flood fill with WHITE
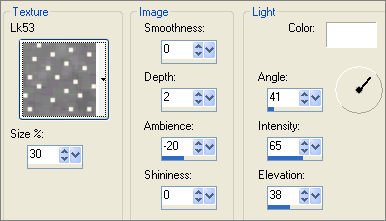
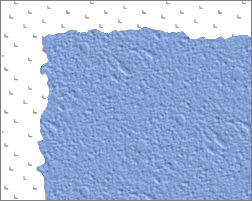
EFFECTS >>> TEXTURE EFFECTS >>> TEXTURE
Locate the "L&k53" texture

For some reason PSP doesn't like the ampersand "&"
LAYERS >>> NEW RASTER LAYER
Flood fill with BLUE #677ea6
IMAGE >>> RESIZE = 85%
Ensure "Resize all layers" is UNCHECKED
Resample using WEIGHTED AVERAGE
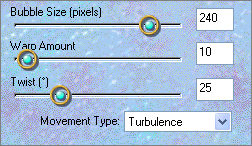
EFFECTS >>> PLUGINS >>> EYE CANDY 3 >>> JIGGLE

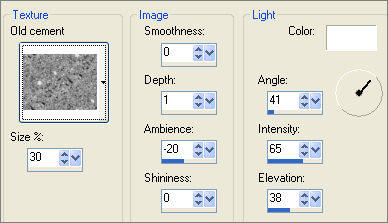
EFFECTS >>> TEXTURE EFFECTS >>> TEXTURE
COLOUR = WHITE
LAYERS >>> NEW RASTER LAYER
In your MATERIALS PALETTE
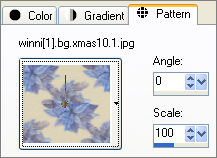
Load the ' winni[1].bg.xmas10.1 ' pattern in your foreground
Load the ' winni[1].bg.xmas14.35 ' pattern in your background
using the settings below.
 . . 
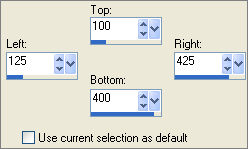
Choose your SELECTION TOOL then click on the CUSTOM SELECTION symbol
and enter these coordinates.
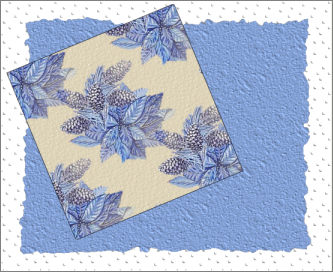
Flood fill with the foreground pattern
EFFECTS >>> 3D EFFECTS >>> DROP SHADOW
Vertical & Horizontal offsets = 1
Colour = Black
Opacity = 70
Blur = 0
Repeat Drop Shadow effect changing
Vertical & Horizontal Offsets to - ( minus ) 1
Click OK
DESELECT
IMAGE >>> ROTATE >>> FREE ROTATE = LEFT 22.50
Ensure "All layers" is UNCHECKED
Reposition with your MOVER tool
LAYERS >>> NEW RASTER LAYER
Choose your SELECTION TOOL then click on the CUSTOM SELECTION symbol
and enter the same coordinates
Flood fill with the background pattern
EFFECTS >>> 3D EFFECTS >>> DROP SHADOW
Vertical & Horizontal offsets = 1
Colour = Black
Opacity = 70
Blur = 0
Repeat Drop Shadow effect changing
Vertical & Horizontal Offsets to - ( minus ) 1
Click OK
DESELECT
IMAGE >>> ROTATE >>> FREE ROTATE = RIGHT 45.00
Ensure "All layers" is UNCHECKED
Reposition with your MOVER tool
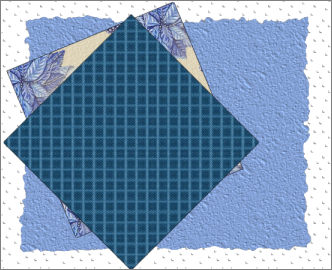
LAYERS >>> NEW RASTER LAYER
In your MATERIALS PALETTE
Load the ' xtra_woven_frame_bgtile_rosy04 ' pattern in your foreground
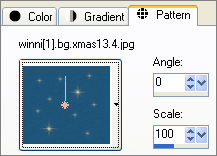
Load the ' winni[1].bg.xmas13.4 ' pattern in your background
using the settings below.
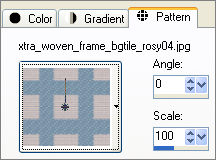 . . 
Choose your SELECTION TOOL then click on the CUSTOM SELECTION symbol
and enter the same coordinates
Flood fill with the foreground pattern
EFFECTS >>> 3D EFFECTS >>> DROP SHADOW
Vertical & Horizontal offsets = 1
Colour = Black
Opacity = 70
Blur = 0
Repeat Drop Shadow effect changing
Vertical & Horizontal Offsets to - ( minus ) 1
Click OK
DESELECT
IMAGE >>> ROTATE >>> FREE ROTATE = RIGHT 22.50
Ensure "All layers" is UNCHECKED
Reposition with your MOVER tool
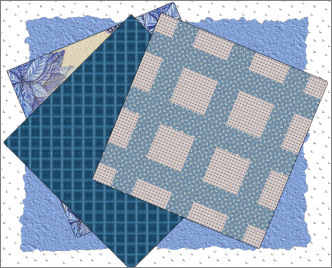
LAYERS >>> NEW RASTER LAYER
Choose your SELECTION TOOL then click on the CUSTOM SELECTION symbol
and enter the same coordinates
Flood fill with the background pattern
EFFECTS >>> 3D EFFECTS >>> DROP SHADOW
Vertical & Horizontal offsets = 1
Colour = Black
Opacity = 70
Blur = 0
Repeat Drop Shadow effect changing
Vertical & Horizontal Offsets to - ( minus ) 1
Click OK
DESELECT
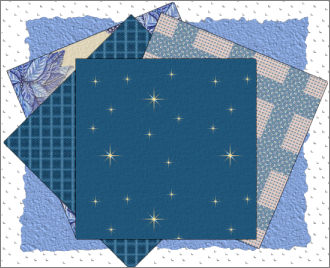
EFFECTS >>> PLUGINS >>> EYE CANDY 3 >>> DROP SHADOW
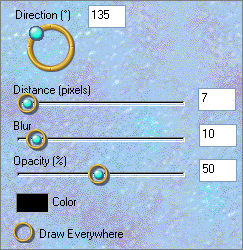
ACTIVATE RASTER 5
EDIT >>> Repeat Drop Shadow
ACTIVATE RASTER 4
EDIT >>> Repeat Drop Shadow
ACTIVATE RASTER 3
EDIT >>> Repeat Drop Shadow
ACTIVATE RASTER 2
EDIT >>> Repeat Drop Shadow
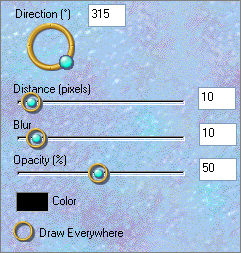
EDIT >>> Repeat Drop Shadow.. change DIRECTION to 315
ACTIVATE RASTER 3
EDIT >>> Repeat Drop Shadow
ACTIVATE RASTER 4
EDIT >>> Repeat Drop Shadow
ACTIVATE RASTER 5
EDIT >>> Repeat Drop Shadow
ACTIVATE RASTER 6
EDIT >>> Repeat Drop Shadow
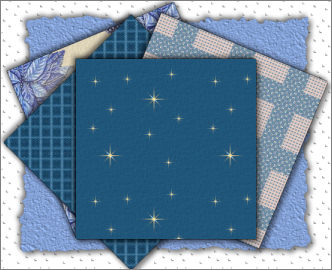
LAYERS >>> MERGE >>> MERGE VISIBLE
LAYERS >>> NEW RASTER LAYER
Choose your SELECTION TOOL then click on the CUSTOM SELECTION
symbol
and enter these coordinates.
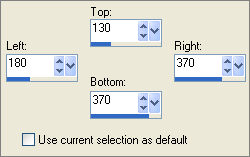
Flood fill with BLUE #677ea6
LAYERS >>> NEW RASTER LAYER
In your MATERIALS PALETTE
load
JSC_Silverplate gradient in the foreground
using these settings
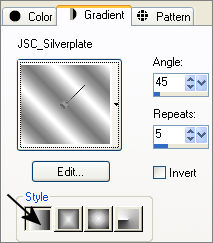
Flood fill with the gradient
SELECTIONS >>> MODIFY >>> CONTRACT = 10
EDIT >>> CLEAR
DESELECT
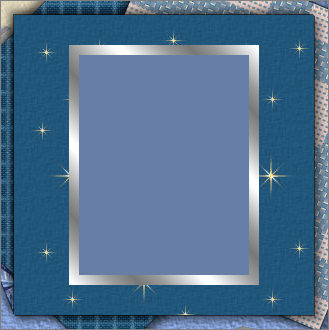
EFFECTS >>> 3D EFFECTS >>> INNER BEVEL
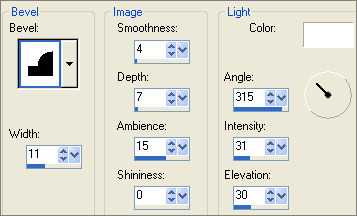
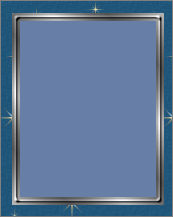
EFFECTS >>> 3D EFFECTS >>> DROP SHADOW
Vertical & Horizontal offsets = 1
Colour = Black
Opacity = 70
Blur = 0
Repeat Drop Shadow effect changing
Vertical & Horizontal Offsets to - ( minus ) 1
Click OK
EFFECTS >>> PLUGINS >>> EYE CANDY 3 >>> DROP SHADOW
Same settings
EDIT >>> Repeat Drop Shadow.. change DIRECTION to 135
LAYERS >>> NEW RASTER LAYER
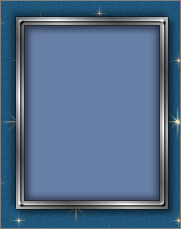
Flood fill with the gradient
SELECTIONS >>> MODIFY >>> CONTRACT = 10
EDIT >>> CLEAR
SELECTIONS >>> INVERT
EFFECTS >>> 3D EFFECTS >>> DROP SHADOW
Vertical & Horizontal offsets = 1
Colour = Black
Opacity = 70
Blur = 0
Repeat Drop Shadow effect changing
Vertical & Horizontal Offsets to - ( minus ) 1
Click OK
EFFECTS >>> 3D EFFECTS >>> INNER BEVEL
Same settings
ADJUST >>> HUE & SATURATION >>> COLORIZE

SELECTIONS >>> INVERT
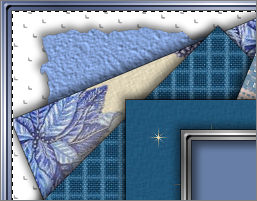
LAYERS >>> NEW RASTER LAYER
Flood fill with the gradient
SELECTIONS >>> MODIFY >>> CONTRACT = 6
EDIT >>> CLEAR
SELECTIONS >>> SELECT ALL
SELECTIONS >>> FLOAT
SELECTIONS >>> DEFLOAT
EFFECTS >>> 3D EFFECTS >>> DROP SHADOW
Vertical & Horizontal offsets = 1
Colour = Black
Opacity = 70
Blur = 0
EFFECTS >>> 3D EFFECTS >>> INNER BEVEL
Same settings
EDIT >>> Repeat Inner Bevel
ADJUST >>> HUE & SATURATION >>> COLORIZE
Same settings
DESELECT
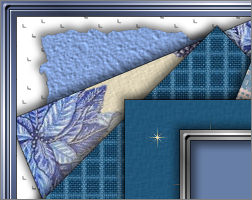
ACTIVATE RASTER 2
ADJUST >>> HUE & SATURATION >>> COLORIZE
Same settings
ACTIVATE RASTER 4
With your MAGIC WAND
Mode = Replace
Match Mode = RGB Value
Tolerance = 0
Feather = 0
Antialias = UNchecked
Sample Merged = UNCHECKED
PSP9/X: Check CONTIGUOUS
PSPX: There is no " Sample Merged"
PSPX: Use all layers = UNChecked
Select the CENTRE of the image
SELECTIONS >>> INVERT
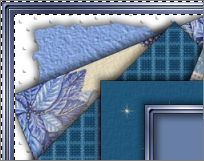
EFFECTS >>> PLUGINS >>> EYE CANDY 3 >>> DROP SHADOW
DESELECT
CLOSE THE MERGED LAYER & RASTER 1
LAYERS >>> MERGE >>> MERGE VISIBLE
OPEN ALL LAYERS
Save as .psp image
Open up the CR-Green snowcovered-TG#-720-2007 image in your PSP workspace
Right click on the Title Bar and select COPY from the options
Right click on the Title Bar of your frame image
and select PASTE AS NEW LAYER from the options.
Reposition with your MOVER tool
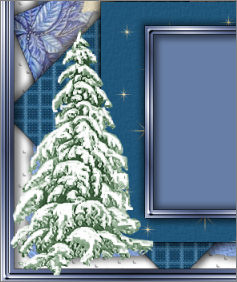
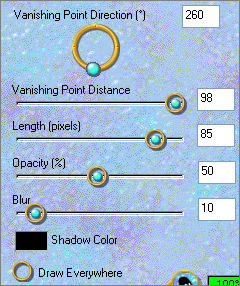
EFFECTS >>> PLUGINS >>> EYE CANDY 3 >>> PERSPECTIVE SHADOW
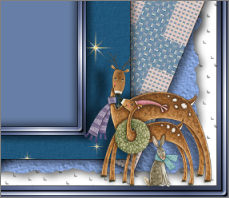
Open up the TS Deer 3553 08 image in your PSP workspace
Right click on the Title Bar and select COPY from the options
Right click on the Title Bar of your frame image
and select PASTE AS NEW LAYER from the options.
IMAGE >>> RESIZE = 40%
Ensure "Resize all layers" is UNCHECKED
Resample using WEIGHTED AVERAGE
IMAGE >>> MIRROR
ADJUST >>> SHARPNESS >>> SHARPEN
EFFECTS >>> PLUGINS >>> EYE CANDY 3 >>> PERSPECTIVE SHADOW
Same settings
Reposition with your MOVER tool
Save as .psp image
ACTIVATE RASTER 1
Open up the True_Christmas_LCT_Nov_08 image in your PSP workspace
Right click on the Title Bar and select COPY from the options
Right click on the Title Bar of your frame image
and select PASTE AS NEW LAYER from the options.
IMAGE >>> RESIZE = 35%
Ensure "Resize all layers" is UNCHECKED
Resample using WEIGHTED AVERAGE
ADJUST >>> SHARPNESS >>> SHARPEN
EFFECTS >>> PLUGINS >>> EYE CANDY 3 >>> PERSPECTIVE SHADOW
Same settings
Reposition with your MOVER tool
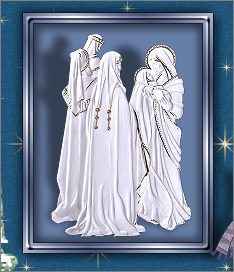
LAYERS >>> MERGE >>> MERGE ALL (Flatten)
Save as .jpg image
Testers Results
Page designed by

for

http://www.artistrypsp.com/
Copyright ©
2000-2009 Artistry In PSP / PSP Artistry
All rights reserved.
Unless specifically made available for
download,
no graphics or text may be removed from
this site for any reason
without written permission from Artistry
In PSP / PSP Artistry
|