GREYSCALE AND TEXTURE
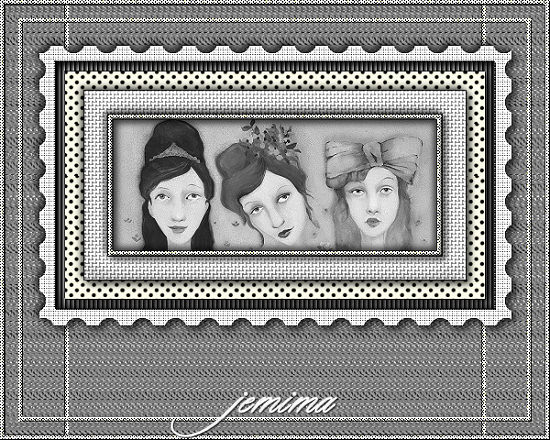
This tutorial was
created by Jemima using PSP9 ~ June 2009
BUT should be creatable using all versions of PSP
Copyright © 2009 ~ Jemima
~ All rights reserved
********************************
You will need the
following to complete this tutorial
Materials
GandT Materials ZIP
JF_StampFrame.pspimage
christensenbarney-bridesmaids.jpg
Save to a folder on your computer
tex-94.jpg
Grid.bmp
Save to your PSP Textures folder
blackspot.jpg
CJ_Stripe 10.jpg
sf_colorfulmemories_2007_bg045.jpg
Save to your PSP Patterns folder
Plugins
** EYE CANDY3 **
http://www.pircnet.com/downloads.html
********************************
In your MATERIALS PALETTE
Load the ' sf_colourful_memories ' pattern in your foreground
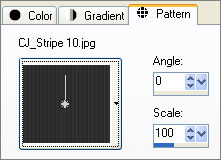
Load the ' CJ_Stripe 10 ' pattern in your background
using the settings below.
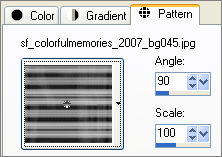 . . 
Open a new image 600 x 480
Transparent background
PSPX: Colour Depth = 8bits/channel
Flood fill with sf_colourful_memories
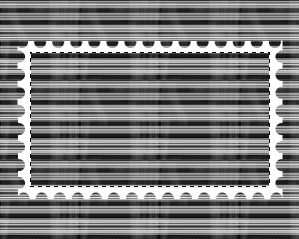
Open up the JF_StampFrame image in your PSP workspace
Right click on the Title Bar and select COPY from the options
Right click on the Title Bar of your frame image
and select PASTE AS NEW LAYER from the options.
Choose your SELECTION TOOL then click on the CUSTOM SELECTION
symbol
and enter these coordinates.
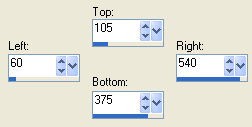
EDIT >>> CLEAR
EFFECTS >>> 3D EFFECTS >>> DROP SHADOW
Vertical & Horizontal offsets = 1
Colour = Black
Opacity = 70
Blur = 0
Repeat Drop Shadow effect changing
Vertical & Horizontal Offsets to - ( minus ) 1
Click OK
DESELECT
Choose your SELECTION TOOL then click on the CUSTOM SELECTION
symbol
and enter these coordinates.
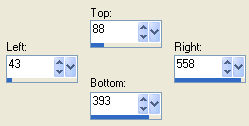
SELECTIONS >>> INVERT
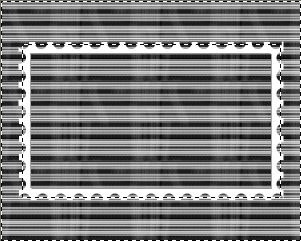
EDIT >>> CLEAR
DESELECT
EFFECTS >>> 3D EFFECTS >>> DROP SHADOW
Vertical & Horizontal offsets = 1
Colour = Black
Opacity = 70
Blur = 0
Repeat Drop Shadow effect changing
Vertical & Horizontal Offsets to - ( minus ) 1
Click OK
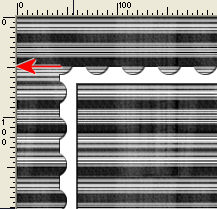
Reposition with your MOVER tool so the top is level
with the 50 pixel mark
on the left ruler
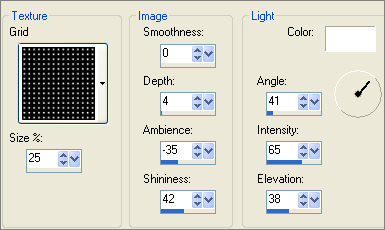
EFFECTS >>> TEXTURE EFFECTS >>> TEXTURE
ADJUST >>> SHARPNESS >>> SHARPEN MORE
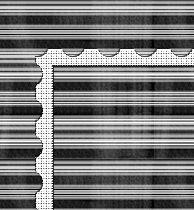
With your MAGIC WAND
Mode = Replace
Match Mode = RGB Value
Tolerance = 0
Feather = 0
Antialias = UNchecked
Sample Merged = UNCHECKED
PSP9/X: Check CONTIGUOUS
PSPX: There is no " Sample Merged"
PSPX: Use all layers = UNChecked
Select the CENTRE area of your image.
SELECTIONS >>> MODIFY >>> EXPAND = 5
ACTIVATE RASTER 1
EDIT >>> CLEAR
SELECTIONS >>> INVERT
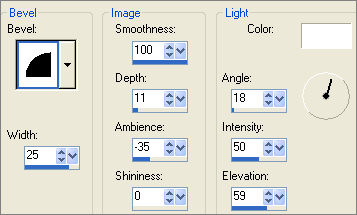
EFFECTS >>> 3D EFFECTS >>> INNER BEVEL
. SELECTIONS >>> INVERT
LAYERS >>> NEW RASTER LAYER
Flood fill with the ' CJ_Stripe 10 ' pattern
SELECTIONS >>> MODIFY >>> CONTRACT = 15
EDIT >>> CLEAR
DESELECT
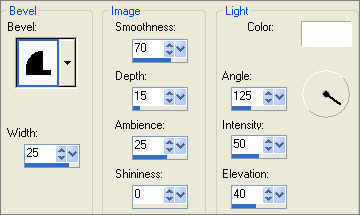
EFFECTS >>> 3D EFFECTS >>> INNER BEVEL
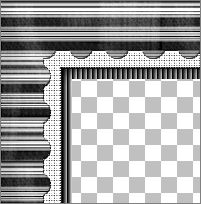
In your MATERIALS PALETTE
Load the ' blackspot ' pattern in your foreground
using the settings below.
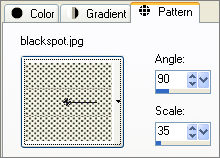
With your MAGIC WAND....
Same settings.
Select the CENTRE transparent area
LAYERS >>> NEW RASTER LAYER
Flood fill with the ' blackspot ' pattern
SELECTIONS >>> MODIFY >>> CONTRACT = 20
EDIT >>> CLEAR
DESELECT
EFFECTS >>> 3D EFFECTS >>> DROP SHADOW
Vertical & Horizontal offsets = 1
Colour = Black
Opacity = 70
Blur = 0
Repeat Drop Shadow effect changing
Vertical & Horizontal Offsets to - ( minus ) 1
Click OK
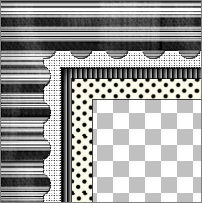
With your MAGIC WAND....
Same settings.
Select the CENTRE transparent area
LAYERS >>> NEW RASTER LAYER
Flood fill with WHITE
EFFECTS >>> TEXTURE EFFECTS >>> WEAVE
COLOUR = #808080
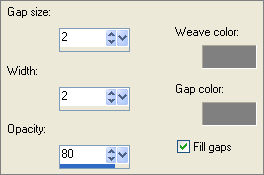
SELECTIONS >>> MODIFY >>> CONTRACT = 25
EDIT >>> CLEAR
DESELECT
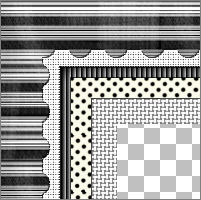
EFFECTS >>> 3D EFFECTS >>> INNER BEVEL

EFFECTS >>> 3D EFFECTS >>> DROP SHADOW
Vertical & Horizontal offsets = 1
Colour = Black
Opacity = 70
Blur = 0
Repeat Drop Shadow effect changing
Vertical & Horizontal Offsets to - ( minus ) 1
Click OK
In your MATERIALS PALETTE change the SCALE
of the
pattern in the foreground
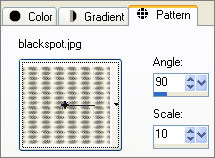
With your MAGIC WAND....
Same settings.
Select the CENTRE transparent area
LAYERS >>> NEW RASTER LAYER
Flood fill with the foreground pattern
SELECTIONS >>> MODIFY >>> CONTRACT = 5
EDIT >>> CLEAR
DESELECT
EFFECTS >>> 3D EFFECTS >>> DROP SHADOW
Vertical & Horizontal offsets = 1
Colour = Black
Opacity = 60
Blur = 0
Repeat Drop Shadow effect changing
Vertical & Horizontal Offsets to - ( minus ) 1
Click OK
EFFECTS >>> 3D EFFECTS >>> INNER BEVEL
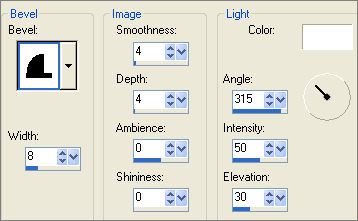
EFFECTS >>> EDGE >>> ENHANCE
Repeat Inner Bevel
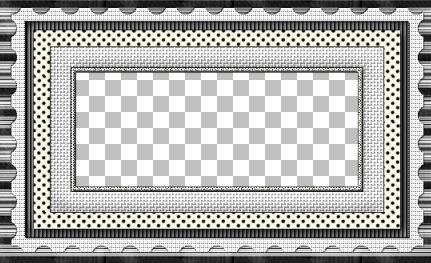
ACTIVATE RASTER 1
With your MAGIC WAND....
Same settings.
Select the CENTRE transparent area
SELECTIONS >>> INVERT
LAYERS >>> NEW RASTER LAYER
Flood fill with WHITE
In your LAYER PALETTE change the OPACITY to 65%
Change the BLEND MODE to EXCLUSION
DESELECT
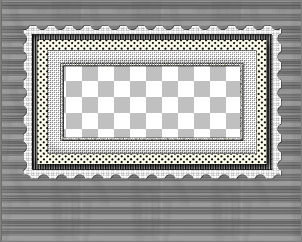
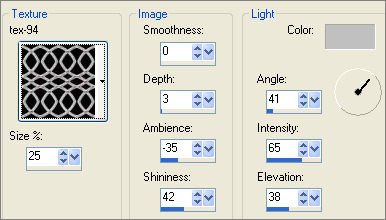
EFFECTS >>> TEXTURE EFFECTS >>> TEXTURE
COLOUR = #c0c0c0c
ACTIVATE RASTER 2
EFFECTS >>> PLUGINS >>> EYE CANDY 3 >>> DROP SHADOW
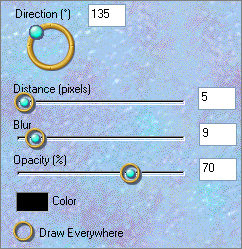
EDIT >>> Repeat Drop Shadow.. change DIRECTION to 135
ACTIVATE RASTER 5
EFFECTS >>> PLUGINS >>> EYE CANDY 3 >>> DROP SHADOW
Same settings
EDIT >>> Repeat Drop Shadow.. change DIRECTION to 315
ACTIVATE RASTER 6
EFFECTS >>> PLUGINS >>> EYE CANDY 3 >>> DROP SHADOW
Same settings
EDIT >>> Repeat Drop Shadow.. change DIRECTION to 135
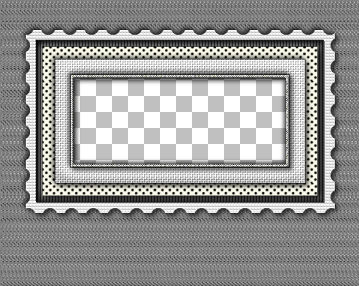
ACTIVATE RASTER 2
LAYERS >>> NEW RASTER LAYER
SELECTIONS >>> SELECT ALL
Flood fill with the foreground pattern
SELECTIONS >>> MODIFY >>> CONTRACT = 5
EDIT >>> CLEAR
SELECTIONS >>> INVERT
EFFECTS >>> 3D EFFECTS >>> INNER BEVEL
Same settings
EFFECTS >>> EDGE EFFECTS >>> ENHANCE MORE
EFFECTS >>> 3D EFFECTS >>> DROP SHADOW
Vertical & Horizontal offsets = 1
Colour = Black
Opacity = 70
Blur = 0
Repeat Drop Shadow effect changing
Vertical & Horizontal Offsets to - ( minus ) 1
Click OK
SELECTIONS >>> INVERT
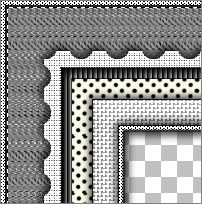
LAYERS >>> NEW RASTER LAYER
SELECTIONS >>> MODIFY >>> CONTRACT = 5
Flood fill with the foreground pattern
SELECTIONS >>> MODIFY >>> CONTRACT = 5
EDIT >>> CLEAR
DESELECT
EFFECTS >>> 3D EFFECTS >>> INNER BEVEL
Same settings
EFFECTS >>> EDGE EFFECTS >>> ENHANCE MORE
EFFECTS >>> 3D EFFECTS >>> DROP SHADOW
Vertical & Horizontal offsets = 1
Colour = Black
Opacity = 70
Blur = 0
Repeat Drop Shadow effect changing
Vertical & Horizontal Offsets to - ( minus ) 1
Click OK
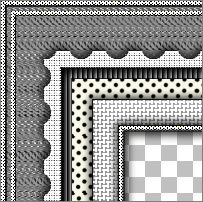
With your MAGIC WAND....
Same settings.
Click inside the second border.
LAYERS >>> NEW RASTER LAYER
SELECTIONS >>> MODIFY >>> CONTRACT = 5
Flood fill with the foreground pattern
SELECTIONS >>> MODIFY >>> CONTRACT = 5
EDIT >>> CLEAR
DESELECT
EFFECTS >>> 3D EFFECTS >>> INNER BEVEL
Same settings
EFFECTS >>> EDGE EFFECTS >>> ENHANCE MORE
EFFECTS >>> 3D EFFECTS >>> DROP SHADOW
Vertical & Horizontal offsets = 1
Colour = Black
Opacity = 70
Blur = 0
Repeat Drop Shadow effect changing
Vertical & Horizontal Offsets to - ( minus ) 1
Click OK
DESELECT
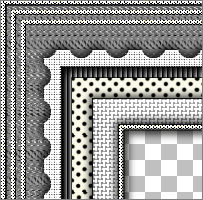
ACTIVATE RASTER 9
(The middle border)
IMAGE >>> ROTATE >>> FREE ROTATE = RIGHT 90
Ensure "All layers" is UNCHECKED
LAYERS >>> ARRANGE >>> SEND TO BOTTOM
LAYERS >>> ARRANGE >>> MOVE UP (Twice)
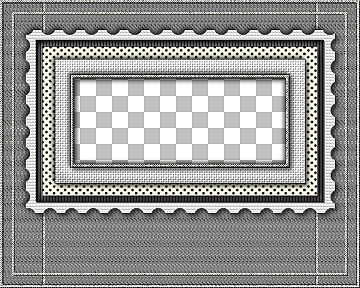
Open up the christensenbarney-bridesmaids image in your PSP workspace
WINDOW >>> DUPLICATE
Close the original Image
IMAGE >>> GREYSCALE
IMAGE >>> INCREASE COLOUR DEPTH >>> 16 MILLION COLOURS (24Bit)
Right click on the Title Bar and select COPY from the options
Right click on the Title Bar of your frame image
and select PASTE AS NEW LAYER from the options.
IMAGE >>> RESIZE = 52%
Ensure "Resize all layers" is UNCHECKED
Resample using WEIGHTED AVERAGE
ADJUST >>> SHARPNESS >>> SHARPEN
LAYERS >>> ARRANGE >>> SEND TO BOTTOM
Reposition with your MOVER tool
LAYERS >>> MERGE >>> MERGE ALL (Flatten)
Save as .jpg image
Testers Results
Page designed by

for

http://www.artistrypsp.com/
Copyright ©
2000-2009 Artistry In PSP / PSP Artistry
All rights reserved.
Unless specifically made available for
download,
no graphics or text may be removed from
this site for any reason
without written permission from Artistry
In PSP / PSP Artistry
|