Bachianas
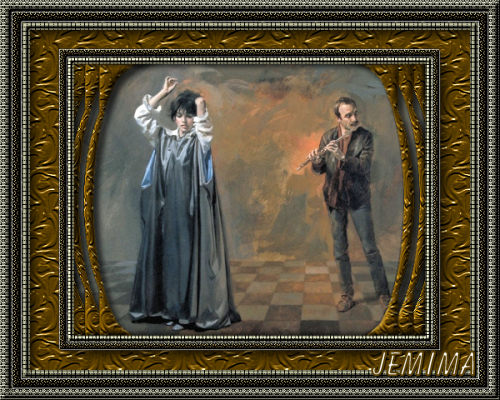
This tutorial was
created by Jemima using PSP9 ~ June 2009
BUT should be creatable using all versions of PSP
Copyright © 2009 ~ Jemima
~ All rights reserved
********************************
You will need the
following to complete this tutorial
Materials
Bachianas.jpg
Save to a folder on your computer
wood096.jpg
Save to your PSP Textures folder
Plugins
** EYE CANDY3 **
http://www.pircnet.com/downloads.html
** Cybia Screenworks **
download
********************************
Open a new image 640 x 480
Transparent background
PSPX: Colour Depth = 8bits/channel
Flood fill with GREEN #6b6c55
SELECTIONS >>> SELECT ALL
EFFECTS >>> PLUGINS >>> CYBIA >>> SCREENWORKS
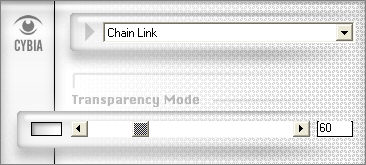
SELECTIONS >>> MODIFY >>> CONTRACT = 15
EDIT >>> CLEAR
SELECTIONS >>> INVERT
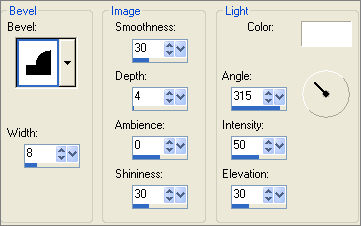
EFFECTS >>> 3D EFFECTS >>> INNER BEVEL

SELECTIONS >>> INVERT
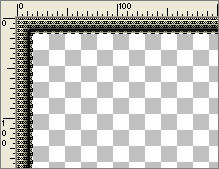
LAYERS >>> NEW RASTER LAYER
Flood fill with BROWN #583f01
EFFECTS >>> PLUGINS >>> CYBIA >>> SCREENWORKS
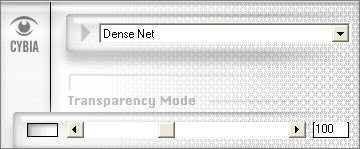
SELECTIONS >>> MODIFY >>> CONTRACT = 10
EDIT >>> CLEAR
DESELECT
EFFECTS >>> 3D EFFECTS >>> DROP SHADOW
Vertical & Horizontal offsets = 1
Colour = WHITE
Opacity = 70
Blur = 0
Repeat Drop Shadow effect changing
Vertical & Horizontal Offsets to - ( minus ) 1
Click OK
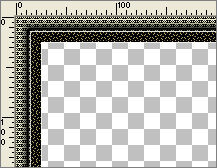
With your MAGIC WAND
Mode = Replace
Match Mode = RGB Value
Tolerance = 0
Feather = 0
Antialias = UNchecked
Sample Merged = UNCHECKED
PSP9/X: Check CONTIGUOUS
PSPX: There is no " Sample Merged"
PSPX: Use all layers = UNChecked
Select the CENTRE transparent area
LAYERS >>> NEW RASTER LAYER
Flood fill with GREEN
EFFECTS >>> PLUGINS >>> CYBIA >>> SCREENWORKS
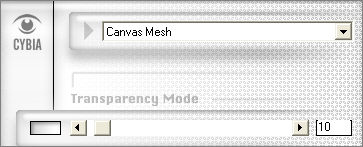
SELECTIONS >>> MODIFY >>> CONTRACT = 10
EDIT >>> CLEAR
DESELECT
EFFECTS >>> 3D EFFECTS >>> INNER BEVEL
Same settings
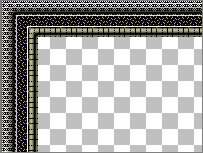
EFFECTS >>> 3D EFFECTS >>> DROP SHADOW
Vertical & Horizontal offsets = 1
Colour = BLACK
Opacity = 70
Blur = 0
Repeat Drop Shadow effect changing
Vertical & Horizontal Offsets to - ( minus ) 1
Click OK
ACTIVATE RASTER 2
EFFECTS >>> 3D EFFECTS >>> INNER BEVEL
Same settings
CLOSE RASTER 1
LAYERS >>> MERGE >>> MERGE VISIBLE
LAYERS >>> DUPLICATE
IMAGE >>> RESIZE = 80%
Ensure "Resize all layers" is UNCHECKED
Resample using WEIGHTED AVERAGE
ADJUST >>> SHARPNESS >>> SHARPEN MORE
OPEN RASTER 1
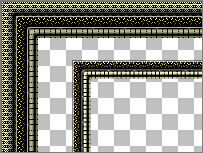
LAYERS >>> MERGE >>> MERGE VISIBLE
With your MAGIC WAND....
Same settings.
Select the transparent area between the 2 borders.
SELECTIONS >>> MODIFY >>> EXPAND = 3
LAYERS >>> NEW RASTER LAYER
LAYERS >>> ARRANGE >>> MOVE DOWN
Flood fill with BROWN
EFFECTS >>> TEXTURE EFFECTS >>> TEXTURE
COLOUR = #ebe4d9
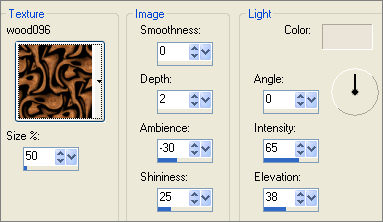
ADJUST >>> SHARPNESS >>> SHARPEN MORE
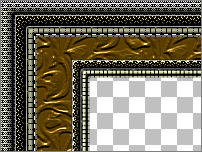
SELECTIONS >>> INVERT
LAYERS >>> NEW RASTER LAYER
EFFECTS >>> PLUGINS >>> EYE CANDY 3 >>> DROP SHADOW
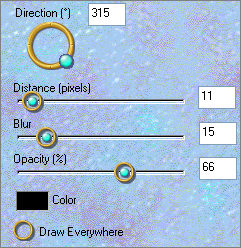
DESELECT
ACTIVATE RASTER 1
LAYERS >>> DUPLICATE
IMAGE >>> RESIZE = 80%
Ensure "Resize all layers" is UNCHECKED
Resample using WEIGHTED AVERAGE
EFFECTS>>> GEOMETRIC EFFECTS >>> SPHERIZE

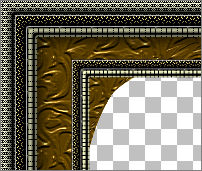
LAYERS >>> ARRANGE >>> SEND TO BOTTOM
EFFECTS >>> 3D EFFECTS >>> DROP SHADOW
Vertical & Horizontal offsets = 1
Colour = Black
Opacity = 70
Blur = 0
Repeat Drop Shadow effect changing
Vertical & Horizontal Offsets to - ( minus ) 1
Click OK
EFFECTS >>> 3D EFFECTS >>> INNER BEVEL
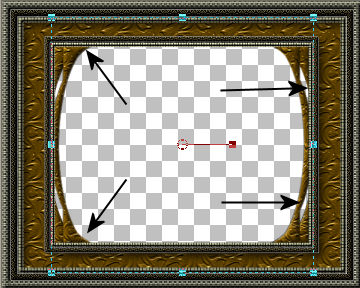
LAYERS >>> DUPLICATE
Select your DEFORMATION tool
Mode = SCALE
use default settings
PSPX/XI/XII:Select your PICK tool
Adjust the centre top, bottom and side nodes so the corners
meet the edge of the inner frame (as per left arrows) and
so that the gaps on each side are similar (as per right arrows)
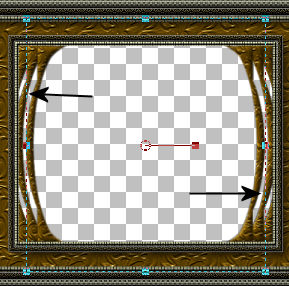
Click the RESET RECTANGLE arrow

LAYERS >>> DUPLICATE
Select your DEFORMATION tool ... same settings
Adjust the centre SIDE nodes
so there is a larger even gap between
this layer and the previous layer.
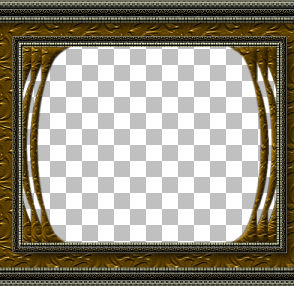
In your LAYER PALETTE close the top 3 layers
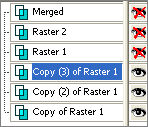
LAYERS >>> MERGE >>> MERGE VISIBLE
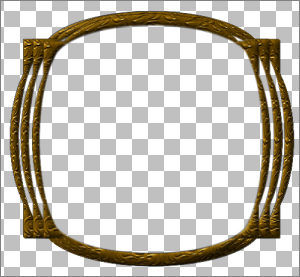
ADJUST >>> SHARPNESS >>> SHARPEN
EFFECTS >>> PLUGINS >>> EYE CANDY 3 >>> DROP SHADOW
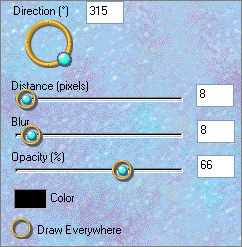
OPEN ALL LAYERS
ACTIVATE THE MERGED LAYER
With your MAGIC WAND....
Same settings.
Select the CENTRE transparent area
SELECTIONS >>> MODIFY >>> EXPAND = 3
SELECTIONS >>> INVERT
LAYERS >>> NEW RASTER LAYER
LAYERS >>> ARRANGE >>> MOVE DOWN
EFFECTS >>> PLUGINS >>> EYE CANDY 3 >>> DROP SHADOW
Same settings
EDIT >>> Repeat Drop Shadow.. change DIRECTION to 135
DESELECT
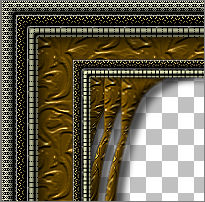
LAYERS >>> MERGE >>> MERGE VISIBLE
Save as .psp image
Open up the Bachianas.jpg image in your PSP workspace
Right click on the Title Bar and select COPY from the options
Right click on the Title Bar of your frame image
and select PASTE AS NEW LAYER from the options.
LAYERS >>> ARRANGE >>> MOVE DOWN
IMAGE >>> RESIZE = 65%
Ensure "Resize all layers" is UNCHECKED
Resample using WEIGHTED AVERAGE
LAYERS >>> MERGE >>> MERGE ALL (Flatten)
Save as .jpg image
(My example at the top of this page was reduced to 500 x 400)
Testers Results
Page designed by

for

http://www.artistrypsp.com/
Copyright ©
2000-2009 Artistry In PSP / PSP Artistry
All rights reserved.
Unless specifically made available for
download,
no graphics or text may be removed from
this site for any reason
without written permission from Artistry
In PSP / PSP Artistry
|