TAGS 3
PSP8/9/X
This tutorial was
written by Jemima ~ 2008
Copyright © 2008 ~ Jemima
~ All rights reserved
********************************
These were created using PSP9 but can be adapted for other versions of PSP.
You will need the
following to complete this tutorial
Materials
RIGHT CLICK >>> SAVE TARGET AS
tunnel-kris.PspShape
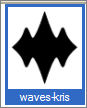
waves-kris.PspShape
youthere3-kris.PspShape
Rectangle.pspshape
Save to your PSP Shapes folder
********************************
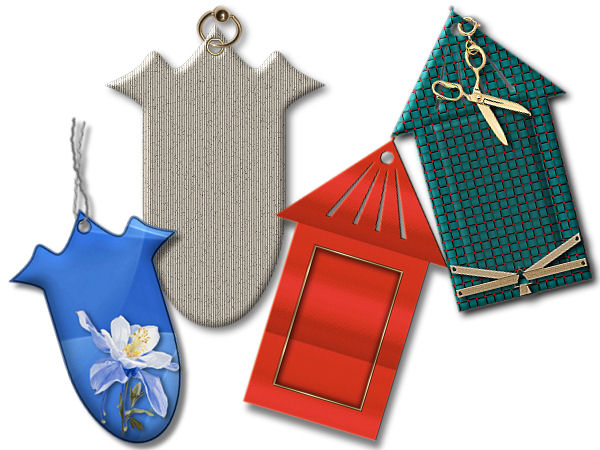
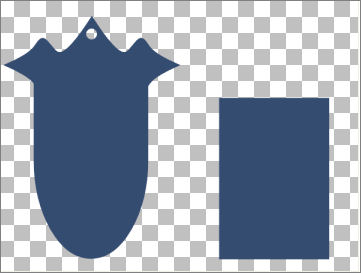
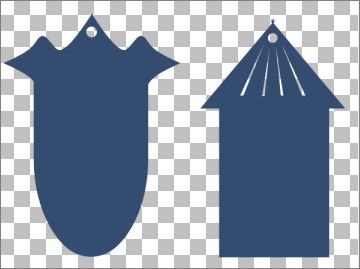
We are going to create some basic shapes that you can save,
then decorate as needed. Examples are shown above.
They are only limited by your imagination *S*
Open a new image 600 x 450
Transparent background
PSPX: Colour Depth = 8bits/channel
In your MATERIALS PALETTE
Load a SOLID colour of your choice in your foreground and background
I used BLUE " #354c71 "
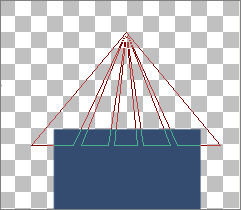
Select your PRESET SHAPES tool
Locate the "
tunnel " shape
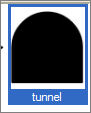
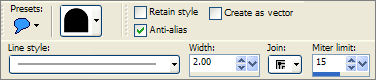
and use the followiing settings...
LINE STYLE = SOLID
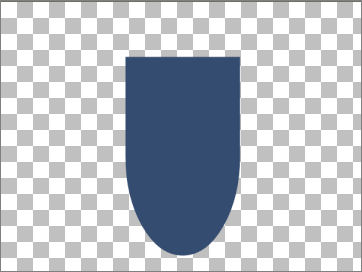
Draw the shape in the centre of your blank image
IMAGE >>> FLIP
LAYERS >>> NEW RASTER LAYER
Locate the " waves-kris " shape
Draw the shape in the centre TOP of your blank image
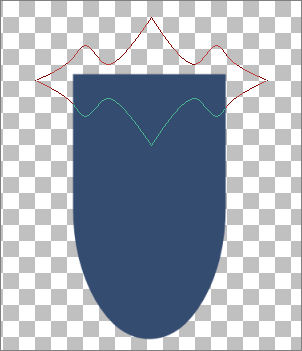
LAYERS >>> MERGE >>> MERGE VISIBLE
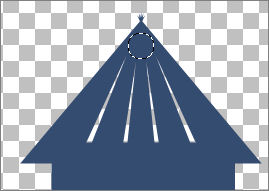
Choose your SELECTION TOOL
Selection Type = CIRCLE
Mode = Replace
Feather = 0
Antialias = Checked
Create a circle on the top centre point of the tag
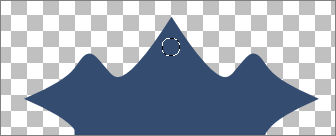
EDIT >>> CLEAR
DESELECT
Reposition with your MOVER tool
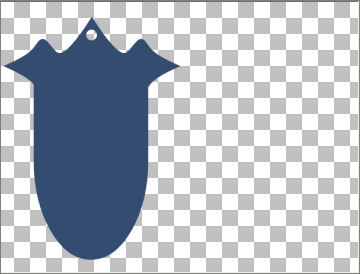
Save as .psp image
***************************************************
LAYERS >>> NEW RASTER LAYER
Select your PRESET SHAPES tool
Locate the " Rectangle" shape
Same settings
Draw the shape on the right side if your image.
LAYERS >>> NEW RASTER LAYER
Locate the " youthere3 " shape
Draw the shape in the centre TOP of your 'rectangle
CLOSE the MERGED layer
LAYERS >>> MERGE >>> MERGE VISIBLE
Rename this layer "Merged 2"
Choose your SELECTION TOOL ... same settings
Create a circle on the top centre point of the tag
If the circle is too big ....
SELECTIONS >>> MODIFY >>> CONTRACT = 5
(yours could be less or more than 5, depending on the original circle size)
EDIT >>> CLEAR
DESELECT
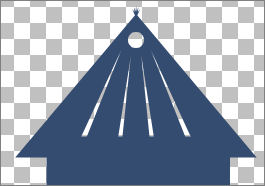
OPEN the MERGED layer
Save the image
*******************************
Now you can play around with them and decorate them as you wish.
Have fun!!
Page designed by

for
http://www.artistrypsp.com/
Copyright ©
2000-2008 Artistry In PSP / PSP Artistry
All rights reserved.
Unless specifically made available for
download,
no graphics or text may be removed from
this site for any reason
without written permission from Artistry
In PSP / PSP Artistry
|
