BELTS
PSP8/9/X
This tutorial was
written by Jemima ~ 2008
Copyright © 2008 ~ Jemima
~ All rights reserved
********************************
This was created using PSP9 but can be adapted for other versions of PSP.
You will need the
following to complete this tutorial
Materials
RIGHT CLICK >>> SAVE TARGET AS
h-gold45.jpg
Save to your PSP Patterns folder
ivy_texture01.bmp
Save to your PSP Textures folder
********************************
Open a new image 650 x 250
Transparent background
PSPX: Colour Depth = 8bits/channel
In your MATERIALS PALETTE
Load the ' h-gold45.jpg ' pattern in your background
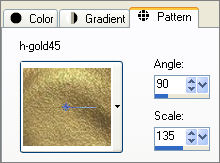
NULL THE FOREGROUND
Select your PRESET SHAPES tool (ELLIPSE)
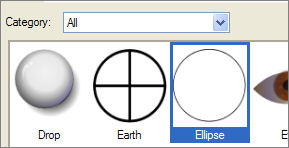
Use these settings

Starting at position 200 pixels across & 100 pixels down
draw an ellipse finishing at positions 350 across & 170 down
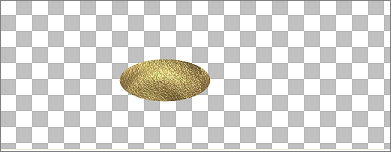
ADJUST >>> SHARPNESS >>> SHARPEN
In your MATERIALS PALETTE
Change your background to SOLID BLACK
LAYERS >>> NEW RASTER LAYER
With your PRESET SHAPES tool
Starting at position 220 pixels across & 115 pixels down
draw an ellipse finishing at positions 342 across & 160 down
Reposition with your MOVER tool
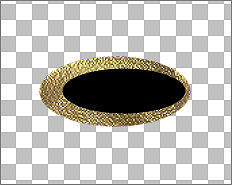
Choose your SELECTION TOOL
Selection Type = Rectangle
Mode = Replace
Feather = 0
Antialias = Checked
Draw a rectangle around the black ellipse,
click inside the rectangle to select the ellipse
ACTIVATE RASTER 1
EDIT >>> CLEAR
DESELECT
ACTIVATE RASTER 2
EDIT >>> CLEAR
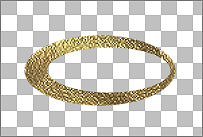
With your SELECTION TOOL (still on Raster 2)
draw a rectangle as shown below

Flood fill with the' h-gold45.jpg ' pattern
DESELECT
LAYERS >>> ARRANGE >>> MOVE DOWN
LAYERS >>> MERGE >>> MERGE VISIBLE
ADJUST >>> SHARPNESS >>> SHARPEN
EFFECTS >>> 3D EFFECTS >>> INNER BEVEL
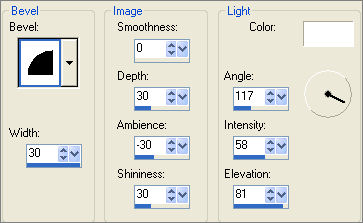
ADJUST >>> SHARPNESS >>> SHARPEN
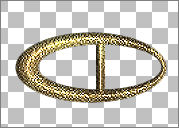
LAYERS >>> NEW RASTER LAYER
With your SELECTION TOOL
draw a rectangle as shown below
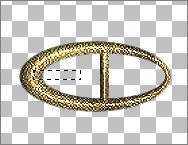
Flood fill with the pattern
ADJUST >>> SHARPNESS >>> SHARPEN
EFFECTS >>> 3D EFFECTS >>> INNER BEVEL
DESELECT
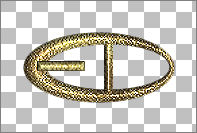
LAYERS >>> MERGE >>> MERGE VISIBLE
Right click on the Title Bar of your image
and select PASTE AS NEW LAYER from the options.
ACTIVATE THE MERGED LAYER
EDIT >>> CLEAR
(This centres the buckle)
STILL ON THE MERGED LAYER
Choose your SELECTION TOOL then click on the CUSTOM SELECTION
symbol
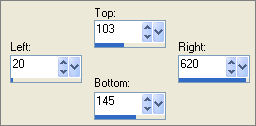
Flood fill with SOLID BLUE " #174275 "
EFFECTS >>> TEXTURE EFFECTS >>> TEXTURE
COLOUR = " #c0c0c0 "
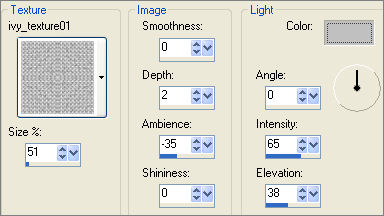
DESELECT

ACTIVATE RASTER 1
With your SELECTION TOOL ...same settings,
section off the area shown below.
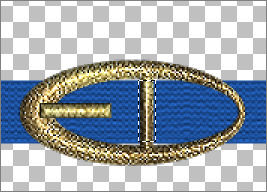
EDIT >>> CLEAR
DESELECT
ACTIVATE THE MERGED LAYER
LAYERS >>> NEW RASTER LAYER
Choose your SELECTION TOOL
Selection Type = CIRCLE
Mode = Replace
Feather = 0
Antialias = Checked
Draw a circle as shown ... starting at the centre right side of the prong
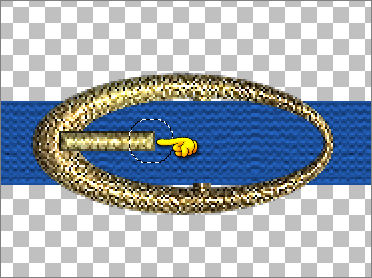
Flood fill with the' h-gold45.jpg ' pattern
SELECTIONS >>> MODIFY >>> CONTRACT = 4
EDIT >>> CLEAR
DESELECT
ADJUST >>> SHARPNESS >>> SHARPEN
EFFECTS >>> 3D EFFECTS >>> INNER BEVEL
Same settings
Reposition with your MOVER tool closer to the 'prong'
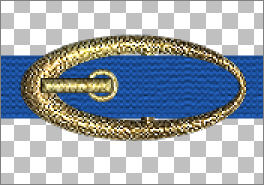
With your MAGIC WAND
Mode = Replace
Match Mode = RGB Value
Tolerance = 0
Feather = 0
Antialias = UNchecked
Sample Merged = UNCHECKED
PSP9/X: Check CONTIGUOUS
PSPX: There is no " Sample Merged"
PSPX: Use all layers = UNChecked
Select the centre of the 'eyelet'
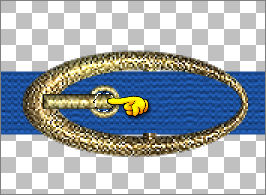
SELECTIONS >>> MODIFY >>> EXPAND = 2
ACTIVATE THE MERGED LAYER
EDIT >>> CLEAR
DESELECT
ACTIVATE RASTER 2
Right click on the Title Bar and select COPY from the options
LAYERS >>> NEW RASTER LAYER
Right click on the Title Bar of your image
and select PASTE AS NEW SELECTION from the options.
Repeat this 2 more times
DESELECT

With your MAGIC WAND
Same settings
and while holding down your SHIFT KEY
Select the centres of the 'eyelets'
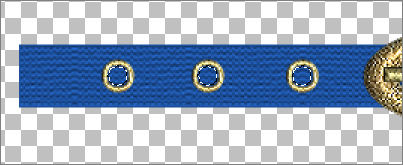
SELECTIONS >>> MODIFY >>> EXPAND = 2
ACTIVATE THE MERGED LAYER
EDIT >>> CLEAR
DESELECT
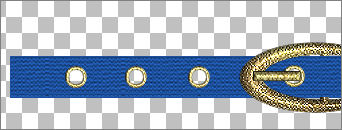
Choose your SELECTION TOOL
Selection Type = Rectangle
Mode = Replace
Feather = 0
Antialias = Checked
Draw a rectangle around to right side of the belt, then click inside the marching ants to select.
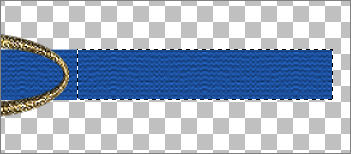
Right click on the Title Bar and select COPY from the options
DESELECT
ACTIVATE RASTER 1
Right click on the Title Bar of your image
and select PASTE AS NEW LAYER from the options.
Select your DEFORMATION tool
Mode = SHEAR (Shift)
use default settings
Pull the centre right node down
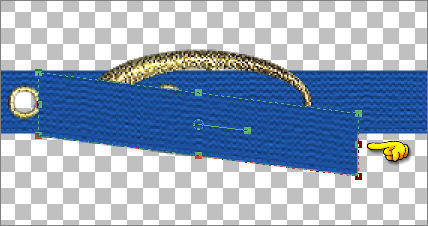
Click the RESET RECTANGLE arrow

Reposition with your MOVER tool
EFFECTS >>> 3D EFFECTS >>> DROP SHADOW
Vertical & Horizontal offsets = 1
Colour = Black
Opacity = 100
Blur = 0
Repeat Drop Shadow effect changing
Vertical & Horizontal Offsets to - ( minus ) 1
Click OK
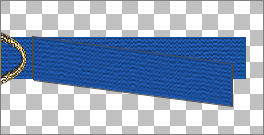
LAYERS >>> NEW RASTER LAYER
Choose your SELECTION TOOL
Selection Type = Rectangle
Mode = Replace
Feather = 0
Antialias = Checked
Draw a rectangle as shown below
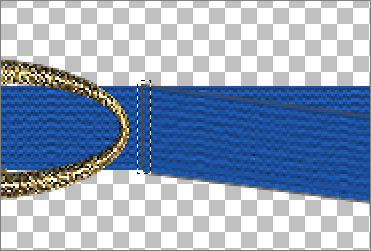
Flood fill with the' h-gold45.jpg ' pattern
ADJUST >>> SHARPNESS >>> SHARPEN
EFFECTS >>> 3D EFFECTS >>> INNER BEVEL
Same settings
DESELECT

CLOSE THE MERGED LAYER
ACTIVATE RASTER 4
Choose your FREEHAND SELECTION TOOL
Selection Type = Point to Point
Mode = Replace
Feather = 0
Antialias = Checked
Select the area shown below
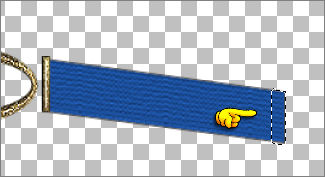
LAYERS >>> NEW RASTER LAYER
Flood fill with the' h-gold45.jpg ' pattern
ADJUST >>> SHARPNESS >>> SHARPEN
DESELECT
OPEN THE MERGED LAYER
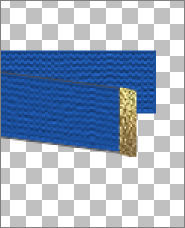
LAYERS >>> MERGE >>> MERGE VISIBLE
Save as .psp image
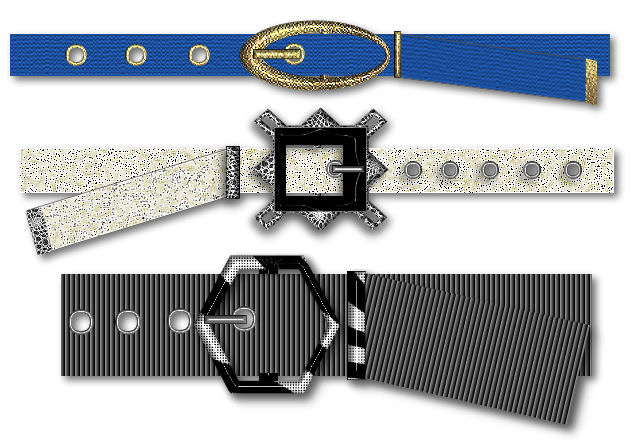
You can use many shapes to make unique belt buckles
as shown by the other 2 examples in the header image
.
Page designed by

for
http://www.artistrypsp.com/
Copyright ©
2000-2008 Artistry In PSP / PSP Artistry
All rights reserved.
Unless specifically made available for
download,
no graphics or text may be removed from
this site for any reason
without written permission from Artistry
In PSP / PSP Artistry
|