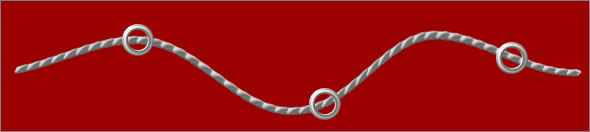
STRINGY BITS
PSP8/9/X

This tutorial was
written by Jemima ~ 2008
Copyright © 2008 ~ Jemima
~ All rights reserved
********************************
This was created using PSP9 but can be adapted for other versions of PSP.
You will need the
following to complete this tutorial
Materials
RIGHT CLICK >>> SAVE TARGET AS
Metal steel.PspGradient
Save to your PSP Gradients folder
********************************
Open a new image 600 x 450
Transparent background
PSPX: Colour Depth = 8bits/channel
Flood fill with " #9b0101 "
LAYERS >>> NEW RASTER LAYER
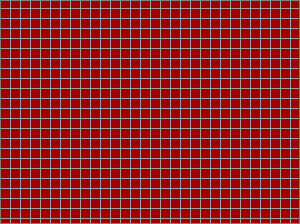
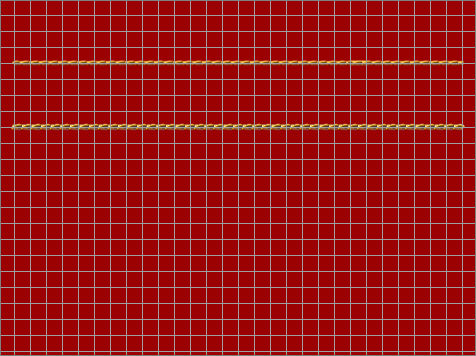
VIEW >>> GRID
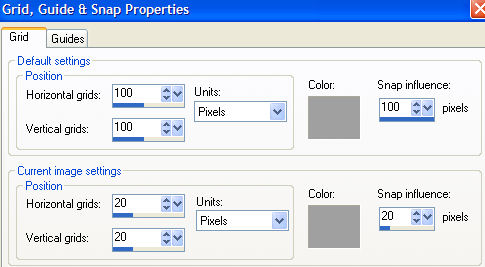
VIEW >>> CHANGE GRID, GUIDE & SNAP PROPERTIES
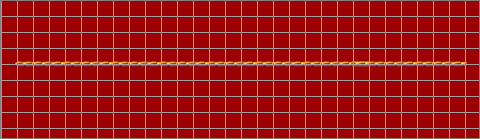
Select your TUBE tool

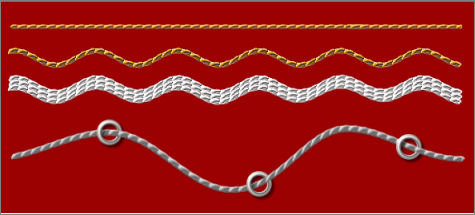
Starting 20 pixels from the left drag your cursor to the right on one of the grid lines.
This is your basic string.
ADJUST >>> SHARPNESS >>> SHARPEN
****************************************
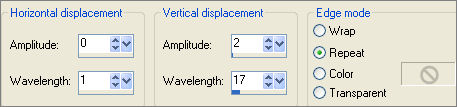
LAYERS >>> NEW RASTER LAYER
Change the SCALE on your TUBE settings to 40
Draw another line along one of the grids beneath the first 'string'
EFFECTS >>> EDGE EFFECTS >>> ENHANCE
VIEW >>> GRID (To get rid of the GRID)
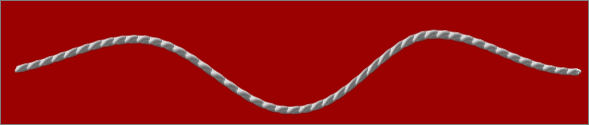
EFFECTS >>> DISTORTION EFFECTS >>> WAVE
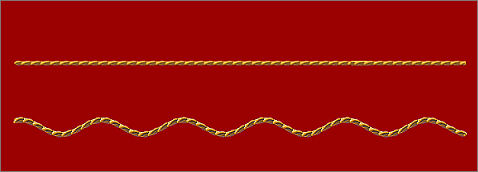
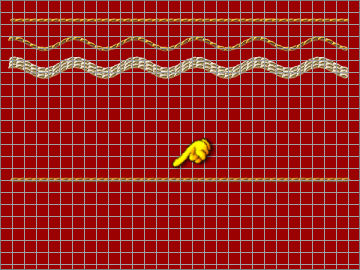
Reposition both strings with your MOVER tool to the top of your image
With Raster 3 active...
LAYERS >>> DUPLICATE
Drag the duplicated string down

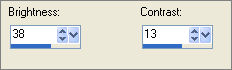
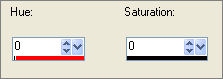
ADJUST >>> BRIGHTNESS and CONTRAST >>> BRIGHTNESS/CONTRAST
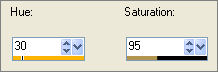
ADJUST >>> HUE & SATURATION >>> COLORIZE
CLOSE Raster 2 & 3

LAYERS >>> DUPLICATE
Reposition with your MOVER tool under the previous string as shown below.

LAYERS >>> DUPLICATE
Reposition with your MOVER tool under the previous string as shown below.
CLOSE RASTER 1

LAYERS >>> MERGE >>> MERGE VISIBLE
OPEN ALL LAYERS
*******************************************************
VIEW >>> GRID
LAYERS >>> NEW RASTER LAYER
Select your TUBE tool
Draw another 'string' about 2/3's of the way down
VIEW >>> GRID
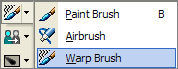
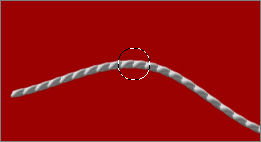
Select your WARP BRUSH tool
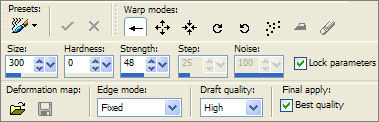
Place the cursor (with the arrow & brush) just on top of the string where indicated

and push up a little

Place the cursor on top of the string where indicated
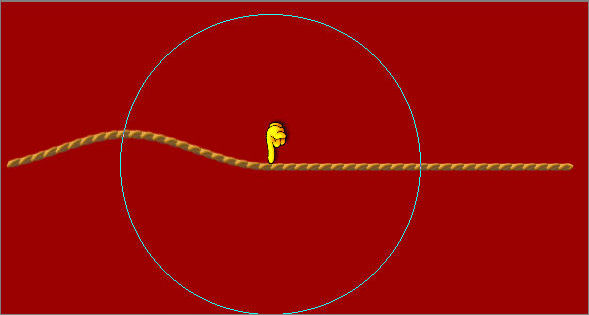
and push down a little

Place the cursor on top of the string where indicated
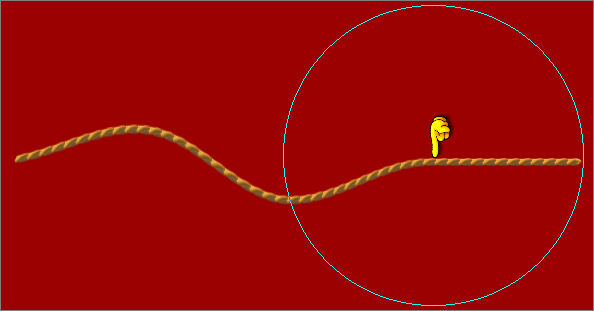
and push up a little

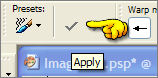
Click APPLY
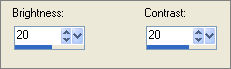
ADJUST >>> HUE & SATURATION >>> COLORIZE
ADJUST >>> BRIGHTNESS and CONTRAST >>> BRIGHTNESS/CONTRAST
LAYERS >>> NEW RASTER LAYER
Choose your SELECTION TOOL
Selection Type = CIRCLE
Mode = Replace
Feather = 0
Antialias = Checked
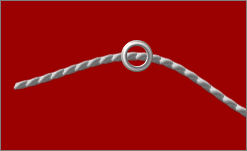
Place your cursor ON the string and create a small circle
In your MATERIALS PALETTE
Load the ' Metal steel ' gradient in your foreground
using the settings below.
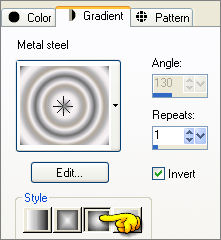
and SOLID BLACK in your background
Flood fill the selection with the gradient

SELECTIONS >>> MODIFY >>> CONTRACT = 6
EDIT >>> CLEAR
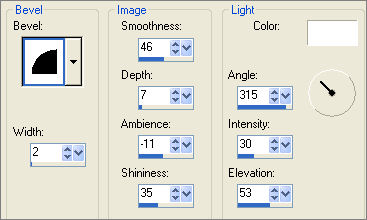
EFFECTS >>> 3D EFFECTS >>> INNER BEVEL
DESELECT
Right click on the Title Bar and select COPY from the options
Right click on the Title Bar and select PASTE AS NEW SELECTION from the options
Right click on the Title Bar and select PASTE AS NEW SELECTION from the options
DESELECT
EFFECTS >>> 3D EFFECTS >>> DROP SHADOW

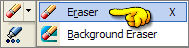
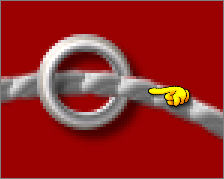
Select your ERASER tool

You may have to adjust the SIZE to accommodate the size of eyelet you created.
ZOOM IN and carefully erase the right side of the eyelet where it meets the string,
and erase the shadow on top of the string as well.
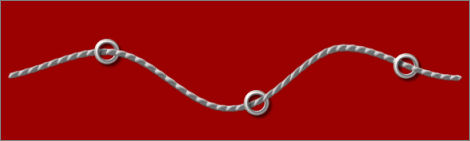
Repeat this process with the other 2 eyelets
Close all but the top 2 layers
LAYERS >>> MERGE >>> MERGE VISIBLE
Open all layers
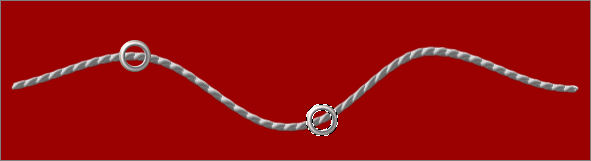
Reposition with your MOVER tool
Use your SELECTION TOOL to CUT any excess blank area from the image
Save as .psp image
Page designed by

for
http://www.artistrypsp.com/
Copyright ©
2000-2008 Artistry In PSP / PSP Artistry
All rights reserved.
Unless specifically made available for
download,
no graphics or text may be removed from
this site for any reason
without written permission from Artistry
In PSP / PSP Artistry
|