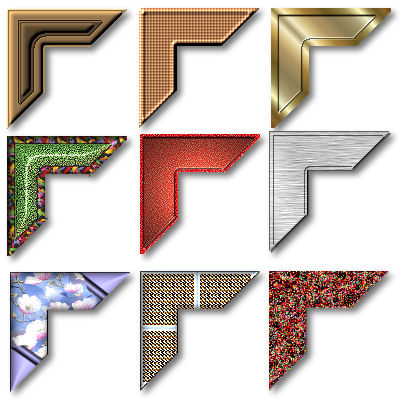
PHOTO CORNERS
PSP8/9/X
This tutorial was
written by Jemima ~ 2008
Copyright © 2008 ~ Jemima
~ All rights reserved
********************************
This was created using PSP9 but can be adapted for other versions of PSP.
You will need the
following to complete this tutorial
Materials
RIGHT CLICK >>> SAVE TARGET AS
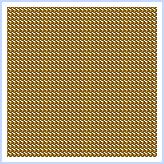
goldbeads.jpg
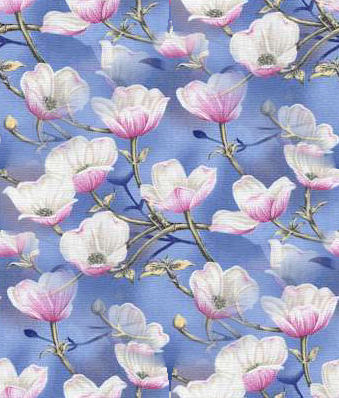
floralmagnolia.jpg
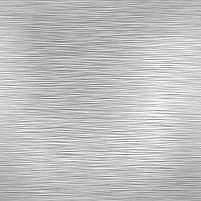
cs_greymetallic.jpg
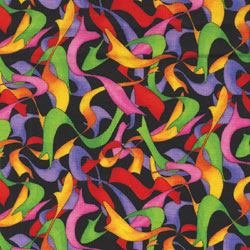
BTR3879B.jpg
Save to your PSP Patterns folder
Metal brass.PspGradient
Save to your PSP Gradients folder
********************************
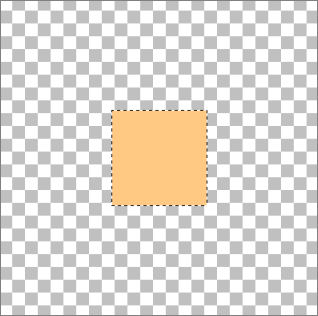
Open a new image 400 x 400
Transparent background
PSPX: Colour Depth = 8bits/channel
Choose your SELECTION TOOL then click on the CUSTOM SELECTION
symbol

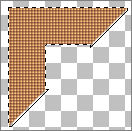
Flood fill with #ffc983
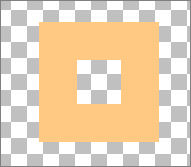
SELECTIONS >>> MODIFY >>> CONTRACT = 38
EDIT >>> CLEAR
DESELECT
Choose your FREEHAND SELECTION TOOL
Selection Type = Point to Point
Mode = Replace
Feather = 1
Antialias = Checked
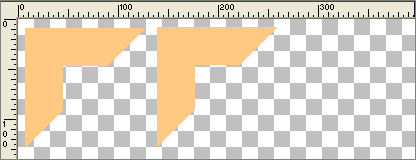
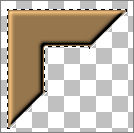
Follow the direction of the numbers, starting at 1 and finishing at 4 to create a triangle
cutting the image in half
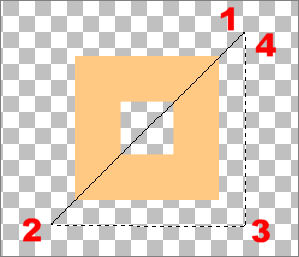
EDIT >>> CLEAR
DESELECT
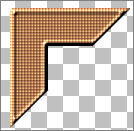
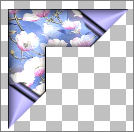
Reposition with your MOVER tool as shown below

LAYERS >>> DUPLICATE
Reposition with your MOVER tool as shown below
LAYERS >>> DUPLICATE
Reposition with your MOVER tool as shown below
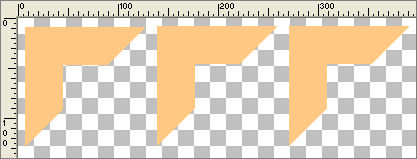
LAYERS >>> DUPLICATE
Reposition with your MOVER tool as shown below
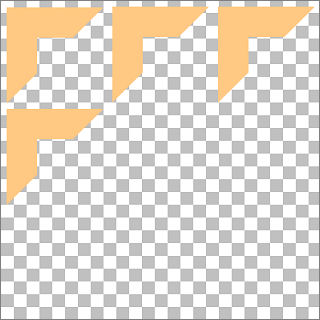
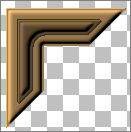
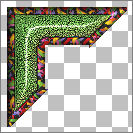
Continue in this manner until you have 9 corners
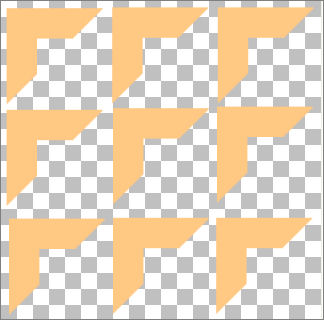
Save as corners.psp image
*********************************************************************************
ACTIVATE RASTER 1
With your MAGIC WAND
Mode = Replace
Match Mode = RGB Value
Tolerance = 0
Feather = 0
Antialias = UNchecked
Sample Merged = UNCHECKED
PSP9/X: Check CONTIGUOUS
PSPX: There is no " Sample Merged"
PSPX: Use all layers = UNChecked
PSP9/X: ANTIALIAS = Inside
Select the first corner
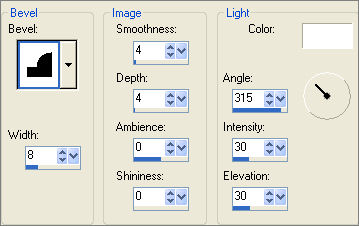
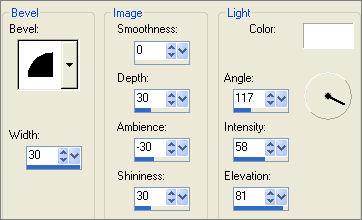
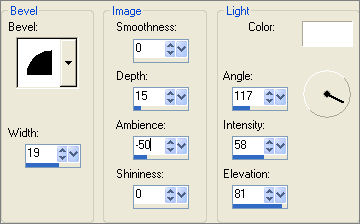
EFFECTS >>> 3D EFFECTS >>> INNER BEVEL
SELECTIONS >>> MODIFY >>> CONTRACT = 12
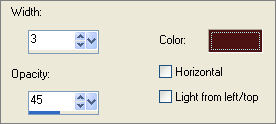
EFFECTS >>> 3D EFFECTS >>> DROP SHADOW
Vertical & Horizontal offsets = 1
Colour = Black
Opacity = 60
Blur = 0
Repeat Drop Shadow effect changing
Vertical & Horizontal Offsets to - ( minus ) 1
Click OK
EFFECTS >>> 3D EFFECTS >>> INNER BEVEL
Same settings
DESELECT
ADJUST >>> SHARPNESS >>> SHARPEN
Rename this layer CORNER 1
Save your image
*********************************************************************************
ACTIVATE Copy of Raster 1
With your MAGIC WAND ... same settings
Select the second corner
EFFECTS >>> TEXTURE EFFECTS >>> BLINDS
COLOUR = #4c1212
Repeat BLINDS effect but this time check HORIZONTAL
EFFECTS >>> 3D EFFECTS >>> INNER BEVEL

DESELECT
Rename this layer CORNER 2
Save your image
*********************************************************************************
ACTIVATE Copy (2) of Raster 1
With your MAGIC WAND ... same settings
Select the third corner
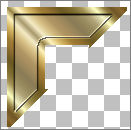
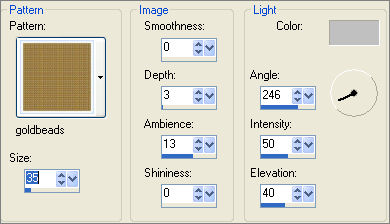
In your MATERIALS PALETTE
Load the ' Metal brass ' gradient in your foreground
using the settings below.
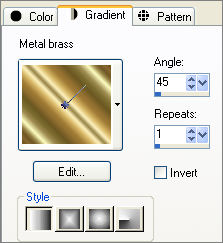
Flood fill with the gradient
SELECTIONS >>> MODIFY >>> CONTRACT = 8
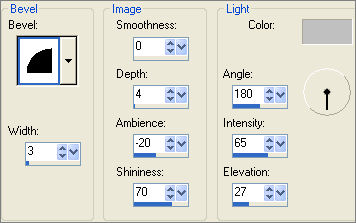
EFFECTS >>> 3D EFFECTS >>> OUTER BEVEL

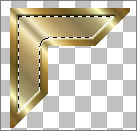
EFFECTS >>> 3D EFFECTS >>> DROP SHADOW
Vertical & Horizontal offsets = 1
Colour = Black
Opacity = 60
Blur = 0
Repeat Drop Shadow effect changing
Vertical & Horizontal Offsets to - ( minus ) 1
Click OK
DESELECT
Rename this layer CORNER 3
Save your image
*********************************************************************************
ACTIVATE Copy (3) of Raster 1
With your MAGIC WAND ... same settings
Select the fourth corner
In your MATERIALS PALETTE
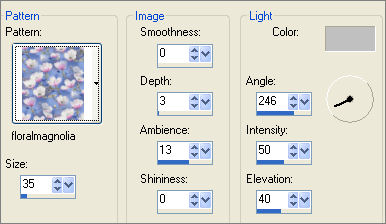
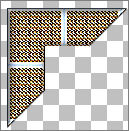
Load the ' BTR3879B ' pattern in your foreground
using the settings below.
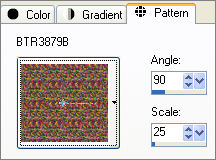
Flood fill with the pattern
SELECTIONS >>> MODIFY >>> CONTRACT = 8
EDIT >>> CLEAR
Flood fill with #568541
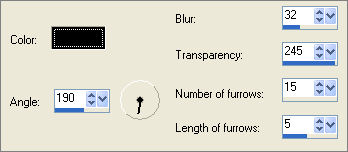
EFFECTS >>> TEXTURE EFFECTS >>> FINE LEATHER
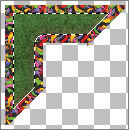
EFFECTS >>> EDGE EFFECTS >>> ENHANCE
EFFECTS >>> 3D EFFECTS >>> DROP SHADOW
Vertical & Horizontal offsets = 1
Colour = Black
Opacity = 60
Blur = 0
Repeat Drop Shadow effect changing
Vertical & Horizontal Offsets to - ( minus ) 1
Click OK
DESELECT
EFFECTS >>> 3D EFFECTS >>> INNER BEVEL
Rename this layer CORNER 4
Save your image
*********************************************************************************
ACTIVATE Copy (4) of Raster 1
With your MAGIC WAND ... same settings
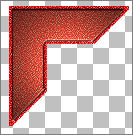
Select the fifth corner
Flood fill with #df1313
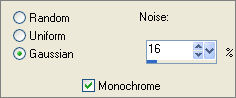
ADJUST >>> ADD/REMOVE NOISE >>> ADD NOISE
EFFECTS >>> EDGE EFFECTS >>> ENHANCE
SELECTIONS >>> MODIFY >>> CONTRACT = 4
EFFECTS >>> 3D EFFECTS >>> OUTER BEVEL
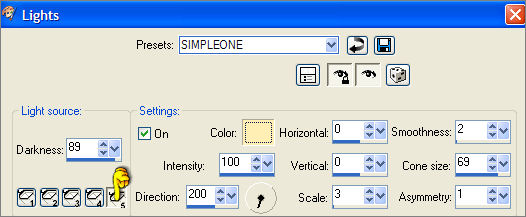
EFFECTS >>> ILLUMINATION EFFECTS >>> LIGHTS
COLOUR =
#ffefb5
EFFECTS >>> 3D EFFECTS >>> DROP SHADOW
Vertical & Horizontal offsets = 1
Colour = Black
Opacity = 60
Blur = 0
Repeat Drop Shadow effect changing
Vertical & Horizontal Offsets to - ( minus ) 1
Click OK
DESELECT
Rename this layer CORNER 5
Save your image
*********************************************************************************
ACTIVATE Copy (5) of Raster 1
With your MAGIC WAND ... same settings
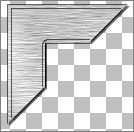
Select the sixth corner
EFFECTS >>> TEXTURE EFFECTS >>> SCULPTURE
COLOUR = LIGHT GREY
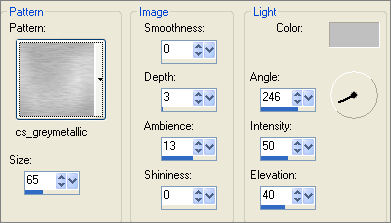
SELECTIONS >>> MODIFY >>> CONTRACT = 4
EFFECTS >>> 3D EFFECTS >>> DROP SHADOW
Vertical & Horizontal offsets = 1
Colour = Black
Opacity = 60
Blur = 0
Repeat Drop Shadow effect changing
Vertical & Horizontal Offsets to - ( minus ) 1
Click OK
DESELECT
EFFECTS >>> 3D EFFECTS >>> DROP SHADOW
Vertical & Horizontal offsets = 1
Colour = Black
Opacity = 60
Blur = 0
Repeat Drop Shadow effect changing
Vertical & Horizontal Offsets to - ( minus ) 1
Click OK
Rename this layer CORNER 6
Save your image
*********************************************************************************
ACTIVATE Copy (6) of Raster 1
With your MAGIC WAND ... same settings
Select the seventh corner
EFFECTS >>> TEXTURE EFFECTS >>> SCULPTURE
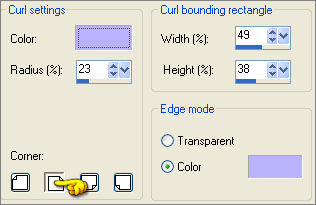
EFFECTS >>> IMAGE EFFECTS >>> PAGE CURL
COLOUR = #b8b3fb
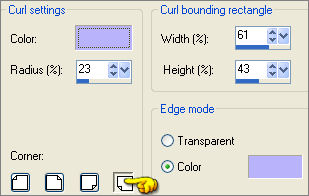
EFFECTS >>> IMAGE EFFECTS >>> PAGE CURL

EFFECTS >>> 3D EFFECTS >>> INNER BEVEL
DESELECT
Rename this layer CORNER 7
Save your image
*********************************************************************************
ACTIVATE Copy (7) of Raster 1
With your MAGIC WAND ... same settings
Select the eighth corner
EFFECTS >>> TEXTURE EFFECTS >>> SCULPTURE
EFFECTS >>> EDGE EFFECTS >>> ENHANCE
EFFECTS >>> 3D EFFECTS >>> INNER BEVEL
Same settings
DESELECT
Rename this layer CORNER 8
Save your image
*********************************************************************************
ACTIVATE Copy (8) of Raster 1
With your MAGIC WAND ... same settings
Select the eighth corner
ADJUST >>> ADD/REMOVE NOISE >>> ADD NOISE
EFFECTS >>> ARTISTIC EFFECTS >>>COLOURED EDGES

DESELECT

Rename this layer CORNER 9
Save your image
Page designed by

for
http://www.artistrypsp.com/
Copyright ©
2000-2008 Artistry In PSP / PSP Artistry
All rights reserved.
Unless specifically made available for
download,
no graphics or text may be removed from
this site for any reason
without written permission from Artistry
In PSP / PSP Artistry
|
