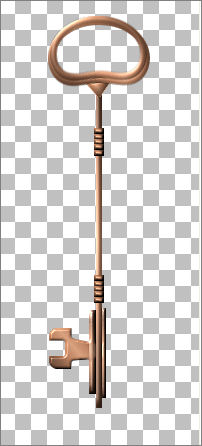
KEYS
PSP8/9/X
This tutorial was
written by Jemima ~ 2008
Copyright © 2008 ~ Jemima
~ All rights reserved
********************************
This was created using PSP9 but can be adapted for other versions of PSP.
You will need the
following to complete this tutorial
Materials
RIGHT CLICK >>> SAVE TARGET AS
BuffBronze_CC
Save to your PSP Gradients folder
********************************
In your MATERIALS PALETTE
Load the ' BuffBronze_CC ' gradient in your foreground
using the settings below.
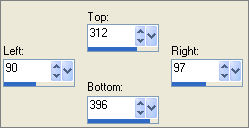
Open a new image 200 x 450
Transparent background
PSPX: Colour Depth = 8bits/channel
Choose your SELECTION TOOL
Selection Type = Ellipse
Mode = Replace
Feather = 0
Antialias = Checked
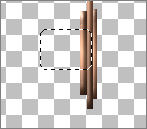
Starting at 100 pixels across and 60 pixels down
drag your cursor to 150 pixels across and 100 pixels down and release
Flood fill with the gradient
SELECTIONS >>> MODIFY >>> CONTRACT = 7
EDIT >>> CLEAR
DESELECT
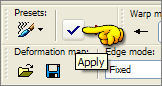
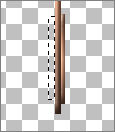
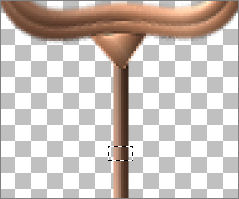
Select your WARP BRUSH tool
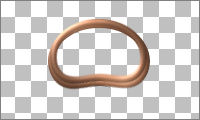
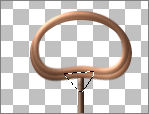
Position your cursor as shown and push up slightly
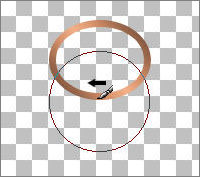 . . 
Click APPLY
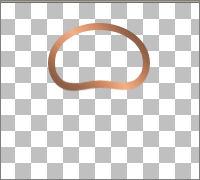
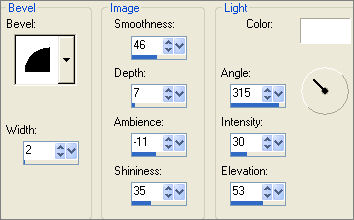
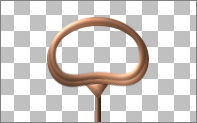
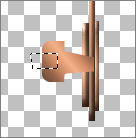
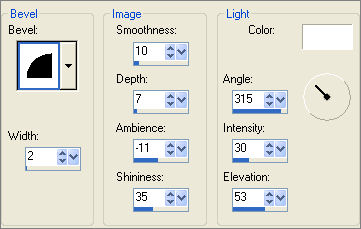
EFFECTS >>> 3D EFFECTS >>> INNER BEVEL
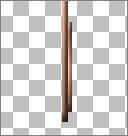
LAYERS >>> DUPLICATE
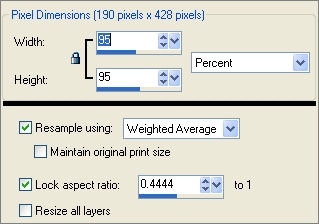
IMAGE >>> RESIZE
Reposition with your MOVER tool as shown
LAYERS >>> MERGE >>> MERGE VISIBLE
LAYERS >>> NEW RASTER LAYER
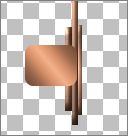
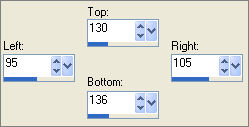
Choose your SELECTION TOOL then click on the CUSTOM SELECTION
symbol
Flood fill with the gradient
EFFECTS >>> 3D EFFECTS >>> INNER BEVEL
Same settings
EDIT >>> Repeat Inner Bevel
DESELECT
LAYERS >>> ARRANGE >>> MOVE DOWN
LAYERS >>> NEW RASTER LAYER
Choose your FREEHAND SELECTION TOOL
Selection Type = Point to Point
Mode = Replace
Feather = 0
Antialias = Checked
Create a triangular selection as hown below
Flood fill with the gradient
EFFECTS >>> 3D EFFECTS >>> INNER BEVEL
Same settings
DESELECT
LAYERS >>> MERGE >>> MERGE VISIBLE
LAYERS >>> NEW RASTER LAYER
Choose your SELECTION TOOL then click on the CUSTOM SELECTION symbol
 . . 
EFFECTS >>> 3D EFFECTS >>> INNER BEVEL
Same settings
EDIT >>> Repeat Inner Bevel
DESELECT
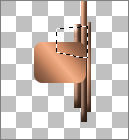
Choose your SELECTION TOOL then click on the CUSTOM SELECTION
symbol
 . . 
Flood fill with the gradient
EFFECTS >>> 3D EFFECTS >>> INNER BEVEL
Same settings
EDIT >>> Repeat Inner Bevel
DESELECT
LAYERS >>> NEW RASTER LAYER
Choose your SELECTION TOOL
Selection Type = ROUNDED Rectangle
Mode = Replace
Feather = 0
Antialias = Checked
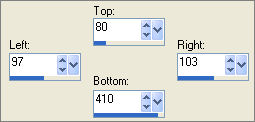
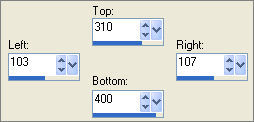
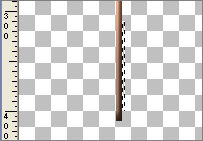
Starting at 50 pixels across and 330 pixels down
drag your cursor to 100 pixels across and 370 pixels down and release
Flood fill with the gradient
DESELECT
Choose your FREEHAND SELECTION TOOL
Selection Type = Point to Point
Mode = Replace
Feather = 0
Antialias = Checked
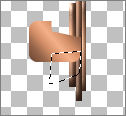
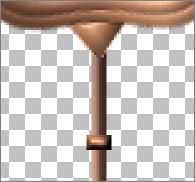
Section off the area shown below
EDIT >>> CLEAR
DESELECT
Section off the area shown below
EDIT >>> CLEAR
DESELECT
Section off the area shown below
EDIT >>> CLEAR
DESELECT
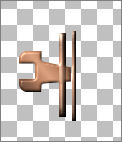
LAYERS >>> ARRANGE >>> MOVE DOWN
CLOSE THE MERGED LAYER
LAYERS >>> MERGE >>> MERGE VISIBLE
EFFECTS >>> 3D EFFECTS >>> INNER BEVEL
OPEN AND ACTIVATE THE BOTTOM MERGED LAYER
LAYERS >>> ARRANGE >>> MOVE UP
ADJUST >>> SHARPNESS >>> SHARPEN
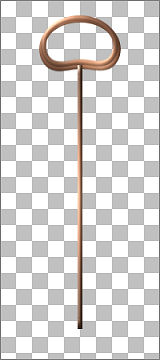
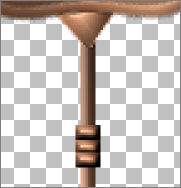
We're not finished but to be safe....
Save as key1.psp image
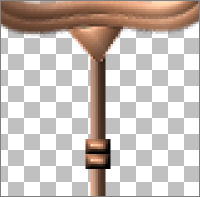
LAYERS >>> NEW RASTER LAYER
Choose your SELECTION TOOL then click on the CUSTOM SELECTION
symbol
 . .
Flood fill with the gradient
EFFECTS >>> 3D EFFECTS >>> INNER BEVEL
Same settings
DESELECT
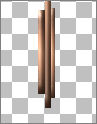
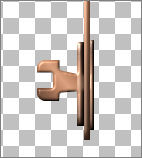
LAYERS >>> DUPLICATE
Reposition with your MOVER tool
LAYERS >>> DUPLICATE
Reposition with your MOVER tool
Do this 2 more times until you have 5 sections
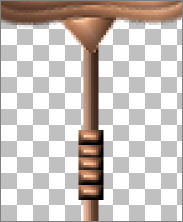
CLOSE THE MERGED LAYER
LAYERS >>> MERGE >>> MERGE VISIBLE
LAYERS >>> DUPLICATE
OPEN THE BOTTOM MERGED LAYER
Reposition with your MOVER tool
LAYERS >>> MERGE >>> MERGE VISIBLE
Save as key1.psp image
KEY 2
Page designed by

for
http://www.artistrypsp.com/
Copyright ©
2000-2008 Artistry In PSP / PSP Artistry
All rights reserved.
Unless specifically made available for
download,
no graphics or text may be removed from
this site for any reason
without written permission from Artistry
In PSP / PSP Artistry
|
