HINGES
PSP8/9/X
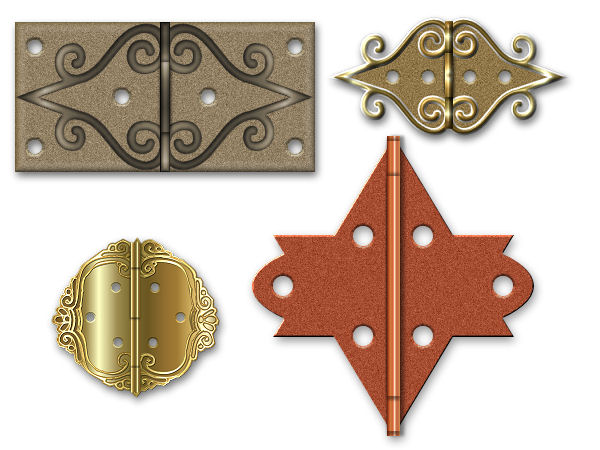
This tutorial was
written by Jemima ~ 2008
Copyright © 2008 ~ Jemima
~ All rights reserved
********************************
This was created using PSP9 but can be adapted for other versions of PSP.
You will need the
following to complete this tutorial
Materials
RIGHT CLICK >>> SAVE TARGET AS
to and from.ttf
Save to your WINDOWS >>> FONTS folder
(If the download shows up as an html file, click on the arrow
for "Save As Type" and select ALL FILES.)
or
to a folder where you store your extra fonts.
Metal brass.PspGradient
Save to your PSP Gradients folder
Plugins
** EYE CANDY3 **
http://www.pircnet.com/downloads.html
OR
http://www.fleursauvage.be/utilitaire/filtres/filtres.htm
********************************
HINGE 1
Open a new image 500 x 400
Transparent background
PSPX: Colour Depth = 8bits/channel
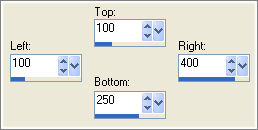
Choose your SELECTION TOOL then click on the CUSTOM SELECTION
symbol
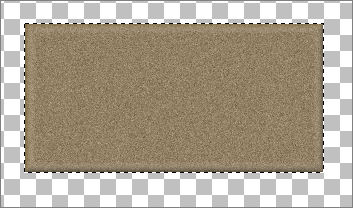
Flood fill with " #928065"
ADJUST >>> ADD/REMOVE NOISE >>> ADD NOISE

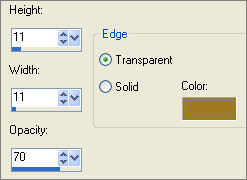
EFFECTS >>> 3D EFFECTS >>> BUTTONIZE
COLOUR = " #9f791d "
 . . 
DESELECT
EFFECTS >>> EDGE EFFECTS >>> ENHANCE
To centre the image....
Right click on the Title Bar and select COPY from the options
Right click on the Title Bar
and select PASTE AS NEW LAYER from the options.
DELETE RASTER 1
LAYERS >>> NEW RASTER LAYER
Select your TEXT tool
In your MATERIALS PALETTE
Load WHITE in your background
Use these settings and enter the letter " O " (Upper case)

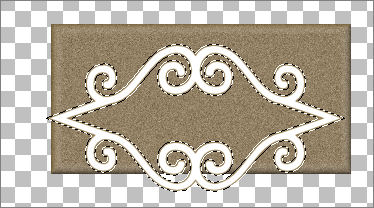
In your MATERIALS PALETTE
Load the ' Metal brass ' gradient in your background
using the settings below.
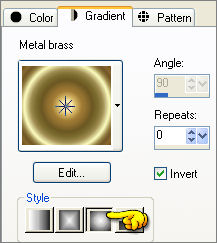
Flood fill the selection with the gradient
DESELECT
To centre the image....
Right click on the Title Bar and select COPY from the options
Right click on the Title Bar and select PASTE AS NEW LAYER from the options.
DELETE RASTER 1
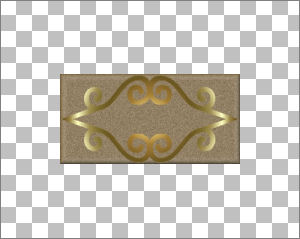
ACTIVATE RASTER 3
EFFECTS >>> 3D EFFECTS >>> INNER BEVEL
COLOUR = " #7b604f "
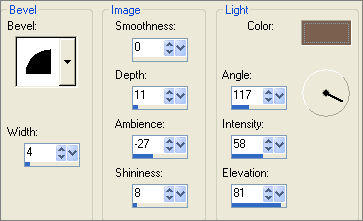
ADJUST >>> HUE & SATURATION >>> COLORIZE

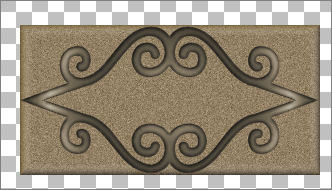
LAYERS >>> MERGE >>> MERGE VISIBLE
LAYERS >>> NEW RASTER LAYER
Choose your SELECTION TOOL then click on the CUSTOM SELECTION
symbol
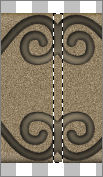
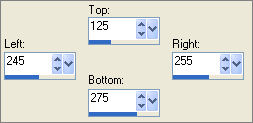 . . 
In your MATERIALS PALETTE
Change the gradient settings
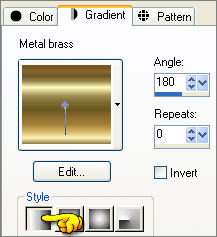
Flood fill with the gradient
EFFECTS >>> 3D EFFECTS >>> INNER BEVEL
Same settings
ADJUST >>> HUE & SATURATION >>> COLORIZE
Same settings
DESELECT
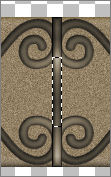
Choose your SELECTION TOOL then click on the CUSTOM SELECTION
symbol
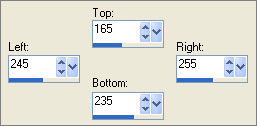 . . 
EFFECTS >>> PLUGINS >>> EYE CANDY 3 >>> DROP SHADOW
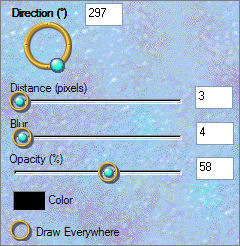
REPEAT DROP SHADOW, changing DIRECTION to 111
DESELECT
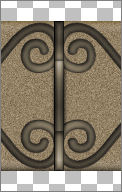
LAYERS >>> MERGE >>> MERGE VISIBLE
LAYERS >>> NEW RASTER LAYER
Choose your SELECTION TOOL
Selection Type = CIRCLE
Mode = Replace
Feather = 0
Antialias = Checked
Starting at 120 pixels across and 150 pixels down
drag your cursor to 127 pixels across and 157 pixels down and release
Flood fill with BLACK
DESELECT
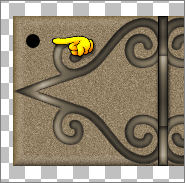
LAYERS >>> DUPLICATE
IMAGE >>> FLIP
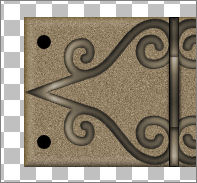
CLOSE THE MERGED LAYER
LAYERS >>> MERGE >>> MERGE VISIBLE
LAYERS >>> DUPLICATE
IMAGE >>> MIRROR
LAYERS >>> MERGE >>> MERGE VISIBLE
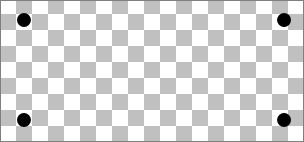
Choose your SELECTION TOOL
Selection Type = Rectangle
Mode = Replace
Feather = 0
Antialias = Checked
Draw a rectangle around all 4 circles
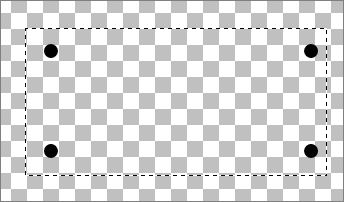
Click inside the marching ants to select the 4 circles (be careful not to MOVE the selections)
OPEN AND ACTIVATE THE BOTTOM MERGED LAYER

EDIT >>> CLEAR
DESELECT
With your SELECTION TOOL select one of the black dots
Click inside the marching ants to select the dot
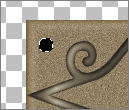
Right click on the Title Bar and select COPY from the options
DESELECT
LAYERS >>> NEW RASTER LAYER
Right click on the Title Bar
and select PASTE AS NEW SELECTION from the options.
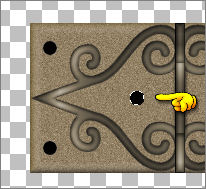
DESELECT
LAYERS >>> DUPLICATE
IMAGE >>> MIRROR
CLOSE THE 2 MERGED LAYERS
 . . 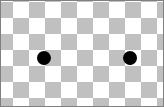
LAYERS >>> MERGE >>> MERGE VISIBLE
Choose your SELECTION TOOL
Selection Type = Rectangle
Mode = Replace
Feather = 0
Antialias = Checked
Draw a rectangle around the 2 dots
Click inside the marching ants to select the 2 dots (be careful not to MOVE the selections)
OPEN AND ACTIVATE THE BOTTOM MERGED LAYER
EDIT >>> CLEAR
DESELECT
DELETE THE 2 TOP MERGED LAYERS
With your MAGIC WAND
Mode = Replace
Match Mode = RGB Value
Tolerance = 0
Feather = 1
Antialias = Checked
Sample Merged = UNCHECKED
PSP9/X: Check CONTIGUOUS
PSPX: There is no " Sample Merged"
PSPX: Use all layers = UNChecked
PSP9/X: ANTIALIAS = OUTside
and while depressing your SHIFT KEY select all 6 holes
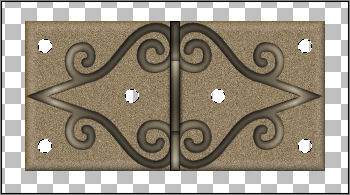
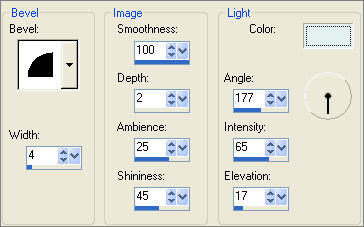
EFFECTS >>> 3D EFFECTS >>> OUTER BEVEL
COLOUR = " #e3f1f1 "
DESELECT
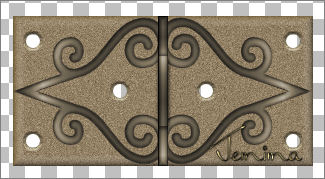
Reduce excess transparent area and
Save as hinge 1.psp image
***********************************************************
HINGE 2
For a variation on the above hinge.....
Open a new image 400 x 300
Transparent background
PSPX: Colour Depth = 8bits/channel
In your MATERIALS PALETTE
Load WHITE in your foreground
Load the ' Metal brass ' gradient in your background
using the settings below.

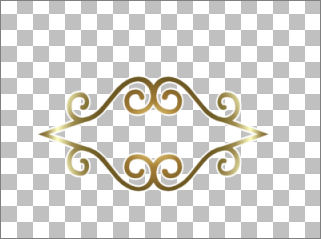
Select your TEXT tool
Use the same settings EXCEPT change the STROKE WIDTH to 2
and enter the letter " O " (Upper case)
DESELECT
To centre the image....
Right click on the Title Bar and select COPY from the options
Right click on the Title Bar and select PASTE AS NEW LAYER from the options.
DELETE RASTER 1
With your MAGIC WAND
Mode = Replace
Match Mode = RGB Value
Tolerance = 0
Feather = 1
Antialias = Checked
Sample Merged = UNCHECKED
Select the OUTER transparent area
SELECTIONS >>> INVERT
LAYERS >>> NEW RASTER LAYER
LAYERS >>> ARRANGE >>> MOVE DOWN
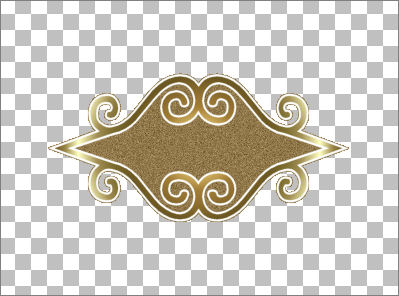
Flood fill with " #90784a "
ADJUST >>> ADD/REMOVE NOISE >>> ADD NOISE

DESELECT
ACTIVATE RASTER 2
LAYERS >>> NEW RASTER LAYER
Choose your SELECTION TOOL then click on the CUSTOM SELECTION symbol
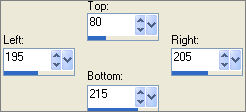 . . 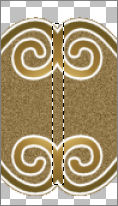
Flood fill with the gradient
EFFECTS >>> 3D EFFECTS >>> INNER BEVEL
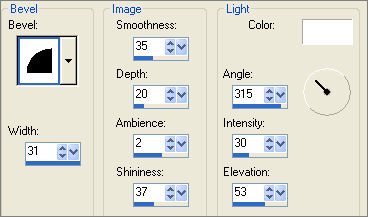
DESELECT
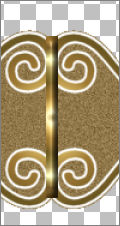
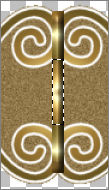
Choose your SELECTION TOOL then click on the CUSTOM SELECTION symbol
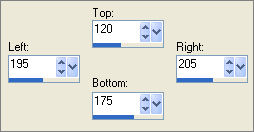 , , 
EFFECTS >>> PLUGINS >>> EYE CANDY 3 >>> DROP SHADOW
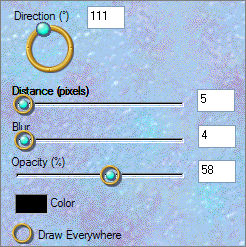
REPEAT DROP SHADOW, changing DIRECTION to 297
DESELECT
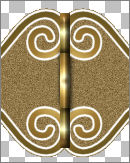
ACTIVATE RASTER 2
EFFECTS >>> 3D EFFECTS >>> INNER BEVEL
Same settings
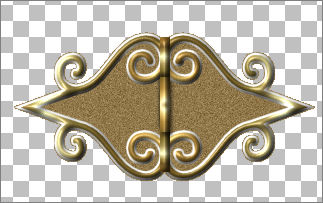
ACTIVATE RASTER 1
Choose your SELECTION TOOL
Selection Type = Rectangle
Mode = Replace
Feather = 0
Antialias = Checked
Draw a rectangle around the hinge
Click inside the marching ants to select the background
SELECTION >>> DEFLOAT
SELECTIONS >>> MODIFY >>> CONTRACT = 3
SELECTIONS >>> INVERT
EDIT >>> CLEAR
DESELECT
(now we have nice clean edges)
LAYERS >>> MERGE >>> MERGE VISIBLE
LAYERS >>> NEW RASTER LAYER
Choose your SELECTION TOOL
Selection Type = CIRCLE
Mode = Replace
Feather = 0
Antialias = Checked
Starting at 130 pixels across and 150 pixels down
drag your cursor down to create a small circle
Flood fill with BLACK
DESELECT
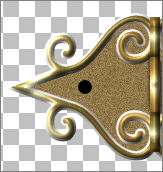
Right click on the Title Bar and select COPY from the options
Right click on the Title Bar
and select PASTE AS NEW SELECTION from the options.
DESELECT
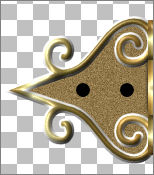
LAYERS >>> DUPLICATE
IMAGE >>> MIRROR
CLOSE THE MERGED LAYER
LAYERS >>> MERGE >>> MERGE VISIBLE
Choose your SELECTION TOOL
Selection Type = Rectangle
Mode = Replace
Feather = 0
Antialias = Checked
Draw a rectangle around all 4 dots
Click inside the marching ants to select the dots

OPEN & ACTIVATE THE BOTTOM MERGED LAYER
EDIT >>> CLEAR
DESELECT
DELETE THE TOP MERGED LAYER
With your MAGIC WAND
Mode = Replace
Match Mode = RGB Value
Tolerance = 0
Feather = 1
Antialias = Checked
Sample Merged = UNCHECKED
PSP9/X: Check CONTIGUOUS
PSPX: There is no " Sample Merged"
PSPX: Use all layers = UNChecked
PSP9/X: ANTIALIAS = OUTside
and while depressing your SHIFT KEY select all 4 holes
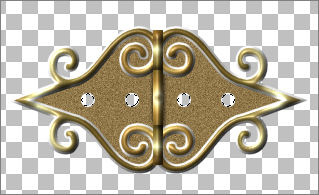
EFFECTS >>> 3D EFFECTS >>> OUTER BEVEL
COLOUR = " #e3f1f1 "

DESELECT
Save as hinge2.psp image
HINGE 3
Page designed by

for
http://www.artistrypsp.com/
Copyright ©
2000-2008 Artistry In PSP / PSP Artistry
All rights reserved.
Unless specifically made available for
download,
no graphics or text may be removed from
this site for any reason
without written permission from Artistry
In PSP / PSP Artistry
|