HEARTS
PSP8/9/X

This tutorial was
written by Jemima ~ 2008
Copyright © 2008 ~ Jemima
~ All rights reserved
********************************
This was created using PSP9 but can be adapted for other versions of PSP.
You will need the
following to complete this tutorial
Materials
RIGHT CLICK >>> SAVE TARGET AS
cg-pastels4.jgd
Save to your PSP Gradients folder
HSD Heart.jsl
heart1213044.PspShape
heart1213043.PspShape
Save to your PSP Shapes folder
Gold_glitter.bmp
Save to your PSP Patterns folder
********************************
HEART 1
In your MATERIALS PALETTE
NULL your foreground
Load the ' cg-pastels4 ' gradient in your background
using the settings below.
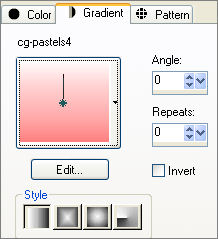
Open a new image 400 x 500
Transparent background
PSPX: Colour Depth = 8bits/channel
Select your PRESET SHAPES tool
Locate the " HSD Heart " shape
and use the followiing settings...
LINE STYLE = SOLID

Starting at 100 pixels across and 100 pixels down
drag your cursor to 300 pixels across and 400 pixels down and release
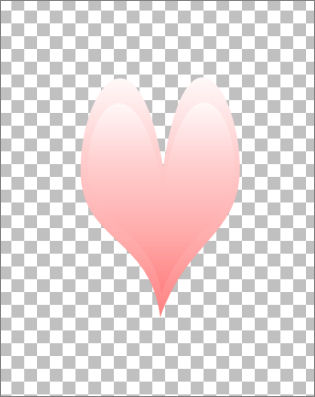
LAYERS >>> DUPLICATE
IMAGE >>> RESIZE = 90%
Ensure "Resize all layers" is UNCHECKED
EFFECTS >>> PLUGINS >>> EYE CANDY 3 >>> DROP SHADOW
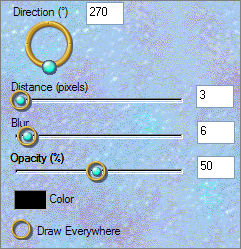
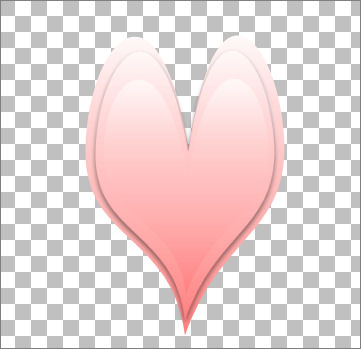
LAYERS >>> DUPLICATE
IMAGE >>> RESIZE = 90%
Ensure "Resize all layers" is UNCHECKED
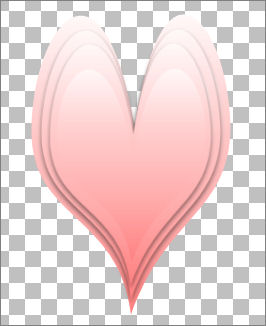
LAYERS >>> DUPLICATE
IMAGE >>> RESIZE = 90%
Ensure "Resize all layers" is UNCHECKED
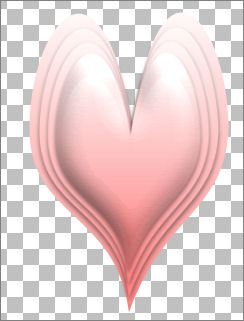
EFFECTS >>> 3D EFFECTS >>> INNER BEVEL
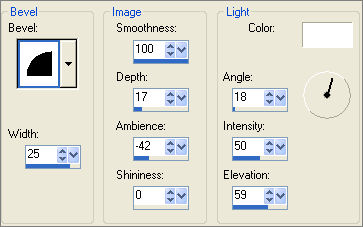 . . 
ACTIVATE Copy of Raster 1
EFFECTS >>> 3D EFFECTS >>> INNER BEVEL
Same settings
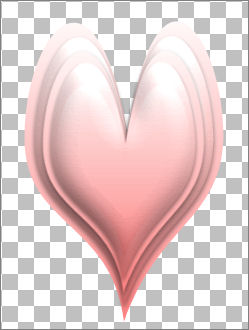
ADJUST >>> SHARPNESS >>> UNSHARP MASK
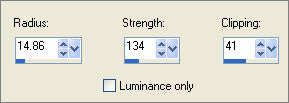
ACTIVATE Copy (3) of Raster 1
ADJUST >>> SHARPNESS >>> UNSHARP MASK
LAYERS >>> MERGE >>> MERGE VISIBLE
Choose your SELECTION TOOL
Selection Type = Rectangle
Mode = Replace
Feather = 0
Antialias = Checked
Draw a rectangle around the heart
IMAGE >>> CROP TO SELECTION
(To remove excess transparent space)
Save as heart1.psp image
*******************************************************************************
HEART 2
Open a new image 400 x 500
Transparent background
PSPX: Colour Depth = 8bits/channel
Select your PRESET SHAPES tool
Locate the " heart4 " shape

and use the same settings...
Starting at 50 pixels across and 100 pixels down
drag your cursor to 300 pixels across and 400 pixels down and release
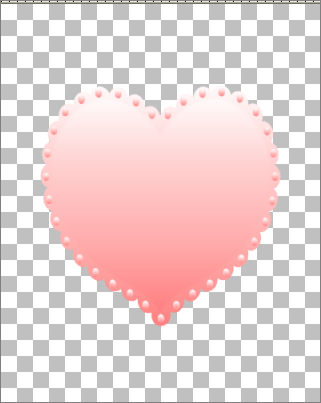
Choose your SELECTION TOOL
Selection Type = Rectangle
Mode = Replace
Feather = 0
Antialias = Checked
Draw a rectangle around the heart.. click inside the 'marching ants' to select the heart
SELECTION >>> DEFLOAT
SELECTIONS >>> MODIFY >>> CONTRACT = 14
EDIT >>> CLEAR
DESELECT
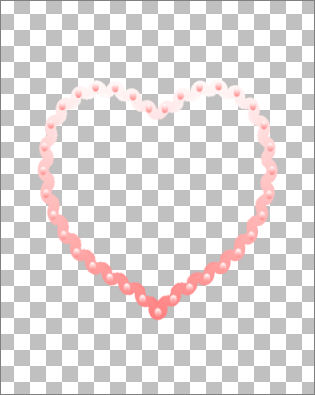
EFFECTS >>> 3D EFFECTS >>> INNER BEVEL
Same settings
LAYERS >>> DUPLICATE
IMAGE >>> RESIZE = 95%
Ensure "Resize all layers" is UNCHECKED
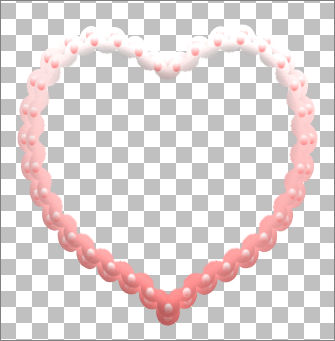
LAYERS >>> DUPLICATE
IMAGE >>> RESIZE = 95%
Ensure "Resize all layers" is UNCHECKED
LAYERS >>> MERGE >>> MERGE VISIBLE
EFFECTS >>> EDGE EFFECTS >>> ENHANCE
Save as heart2.psp image
****************************************************************
HEART 3
In your MATERIALS PALETTE
Change the settings on the foreground gradient
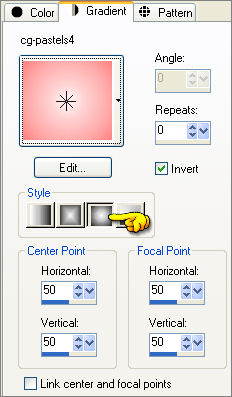
Load SOLID PINK " #ffe5e5 " in your background
Open a new image 400 x 400
Transparent background
PSPX: Colour Depth = 8bits/channel
Select your PRESET SHAPES tool
Locate the " heart3 " shape

and use the same settings...
Starting at 50 pixels across and 50 pixels down
drag your cursor to 350 pixels across and 350 pixels down and release
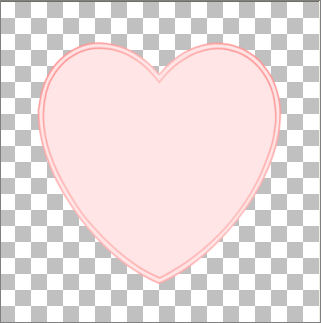
LAYERS >>> DUPLICATE
IMAGE >>> RESIZE = 70%
Ensure "Resize all layers" is UNCHECKED
EFFECTS >>> 3D EFFECTS >>> INNER BEVEL
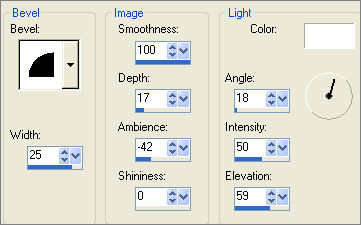
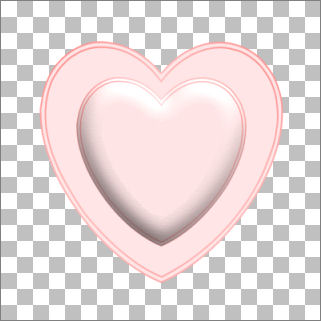
ACTIVATE RASTER 1
With your MAGIC WAND
Mode = Replace
Match Mode = RGB Value
Tolerance = 2
Feather = 0
Antialias = Checked
Sample Merged = UNCHECKED
PSP9/X: Check CONTIGUOUS
PSPX: There is no " Sample Merged"
PSPX: Use all layers = UNChecked
PSP9/X: ANTIALIAS = OUTside
Select the pink centre section of the large heart
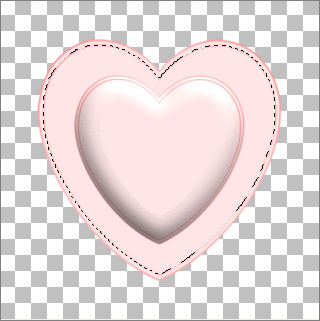
Flood fill with BLACK
DESELECT
With your MAGIC WAND
Tolerance = 90
Select the outer border of the large heart

EFFECTS >>> 3D EFFECTS >>> INNER BEVEL
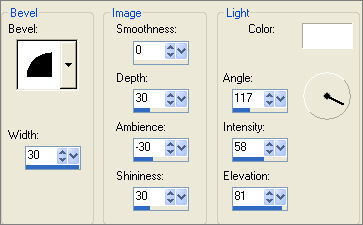
DESELECT

ACTIVATE Copy of Raster 1
LAYERS >>> NEW RASTER LAYER
Choose your SELECTION TOOL
Selection Type = ELLIPSE
Mode = Replace
Feather = 0
Antialias = Checked
Draw a small ellipse as shown below ...
start with your cursor over the "V" section of the heart
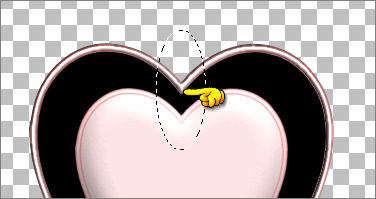
Flood fill with SOLID PINK
SELECTIONS >>> MODIFY >>> CONTRACT = 7
EDIT >>> CLEAR
DESELECT
EFFECTS >>> 3D EFFECTS >>> INNER BEVEL
Same settings
LAYERS >>> ARRANGE >>> SEND TO BOTTOM
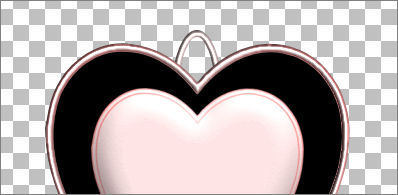
ACTIVATE Copy of Raster 1
LAYERS >>> DUPLICATE
IMAGE >>> RESIZE = 50%
Ensure "Resize all layers" is UNCHECKED
With your MAGIC WAND
Same settings.
Select the CENTRE heart
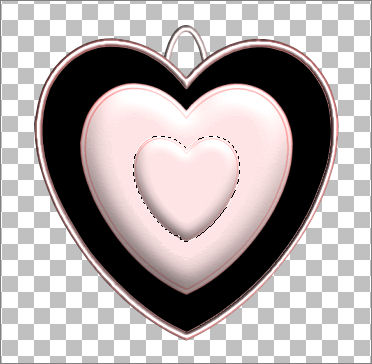
In your MATERIALS PALETTE
Load the ' Gold_glitter ' pattern in your background
using the settings below.
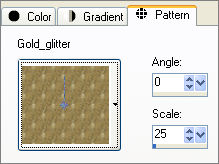
Flood fill the selection with the gold pattern
EFFECTS >>> EDGE EFFECTS >>> ENHANCE MORE
ADJUST >>> HUE & SATURATION >>> COLORIZE
HUE = 0
SATURATION = 0
EFFECTS >>> 3D EFFECTS >>> INNER BEVEL

DESELECT

LAYERS >>> MERGE >>> MERGE VISIBLE
Save as heart3.psp image
Page designed by

for
http://www.artistrypsp.com/
Copyright ©
2000-2008 Artistry In PSP / PSP Artistry
All rights reserved.
Unless specifically made available for
download,
no graphics or text may be removed from
this site for any reason
without written permission from Artistry
In PSP / PSP Artistry
|