FRAME 2
PSP8/9/X
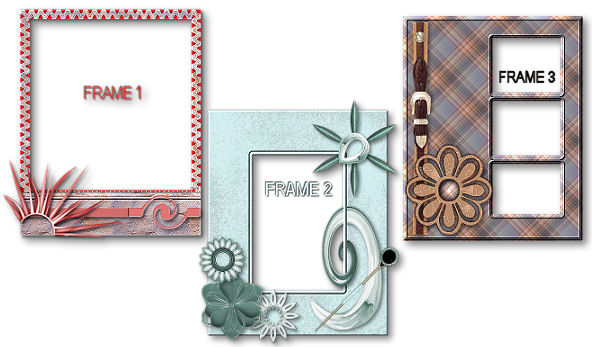
This tutorial was
written by Jemima ~ 2008
Copyright © 2008 ~ Jemima
~ All rights reserved
********************************
This was created using PSP9 but can be adapted for other versions of PSP.
You will need the
following to complete this tutorial
Materials - Frame 2
RIGHT CLICK >>> SAVE TARGET AS
ivy_bk0510b.jpg
Save to your PSP Patterns folder
JF_Flower_Element.psp
JF_elements_shapes77.psp
Save to a folder on your computer
Plugins
** EYE CANDY3 **
FREE
http://www.geocities.com/why2kspace/
http://www.pircnet.com/downloads.html
OR
http://www.fleursauvage.be/utilitaire/filtres/filtres.htm
********************************
In your MATERIALS PALETTE
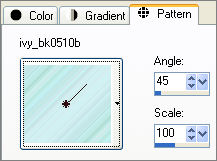
Load the ' ivy_bk0510b.jpg ' pattern in your BACKground
using the settings below.
Open a new image 500 x 600
Transparent background
PSPX: Colour Depth = 8bits/channel
Choose your SELECTION TOOL then click on the CUSTOM SELECTION
symbol
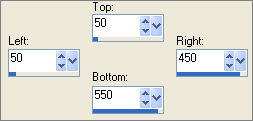
Flood fill with the pattern
LAYERS >>> NEW RASTER LAYER
CLOSE RASTER 1
Select your AIRBRUSH tool


So you can see what you are doing we are going to add a layer temporarily..
LAYERS >>> NEW RASTER LAYER
Flood fill with BLACK
LAYERS >>> ARRANGE >>> SEND TO BOTTOM
ACTIVATE RASTER 2
In your MATERIALS PALETTE
Load ' #d4f1f3 ' in your foreground
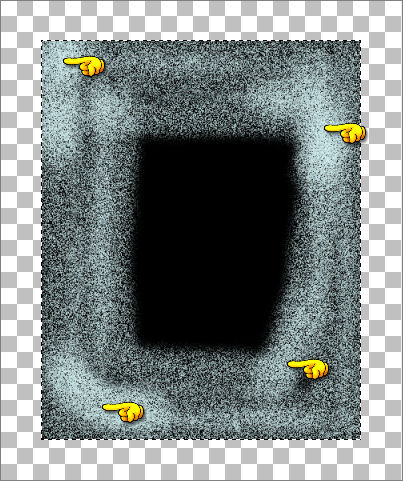
With your left mouse button depressed drag your cursor around your image in
an anti clockwise motion, then go over a couple of areas so they are a little more 'dense'.
These 'dense' areas will show up flat in the finished image.
DESELECT
With your MAGIC WAND
Mode = Replace
Match Mode = RGB Value
Tolerance = 24
Feather = 0
Antialias = UNchecked
Sample Merged = UNCHECKED
PSP9/X: Check CONTIGUOUS
PSPX: There is no " Sample Merged"
PSPX: Use all layers = UNChecked
Click on the image to pick up some of the brush effect
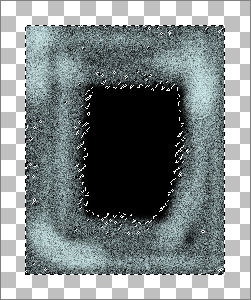
SELECTIONS >>> INVERT
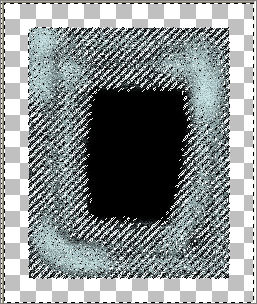
EFFECTS >>> 3D EFFECTS >>> DROP SHADOW
Vertical & Horizontal offsets = 1
Colour = Black
Opacity = 38
Blur = 2.00
DESELECT
In your LAYER PALETTE ... DELETE Raster 3 (the black layer)
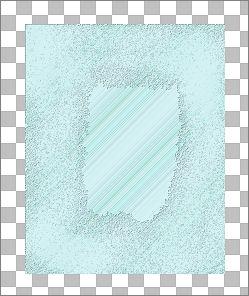
ACTIVATE RASTER 2
Choose your SELECTION TOOL then click on the CUSTOM SELECTION
symbol
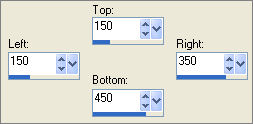
EDIT >>> CLEAR
ACTIVATE RASTER 1
EDIT >>> CLEAR
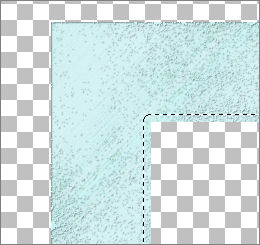
CLOSE RASTER 2
SELECTIONS >>> MODIFY >>> EXPAND = 8
Right click on the Title Bar and select CUT from the options
Right click on the Title Bar of your frame image
and select PASTE AS NEW LAYER from the options.
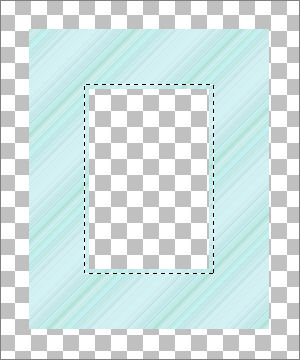
DESELECT
EFFECTS >>> 3D EFFECTS >>> INNER BEVEL
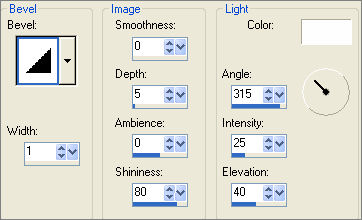
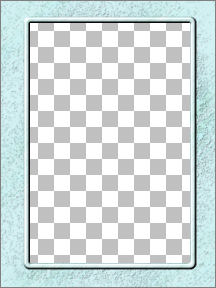
ACTIVATE RASTER 1
EFFECTS >>> 3D EFFECTS >>> INNER BEVEL
Same settings
This is to eliminate the ragged outer edges created by the brush effect.
With your MAGIC WAND ...Same settings
Select the OUTER transparent area
SELECTIONS >>> INVERT
SELECTIONS >>> MODIFY >>> CONTRACT = 2
OPEN & ACTIVATE RASTER 2
SELECTIONS >>> INVERT
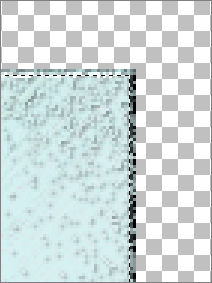
EDIT >>> CLEAR
DESELECT
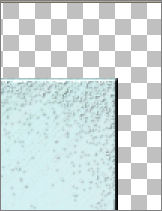
This is to eliminate the ragged INNER edges created by the brush effect.

ACTIVATE RASTER 1
With your MAGIC WAND ...Same settings
Select the INNER transparent area
SELECTIONS >>> MODIFY >>> EXPAND = 2
ACTIVATE RASTER 2
EDIT >>> CLEAR
DESELECT

LAYERS >>> MERGE >>> MERGE VISIBLE
Save as .psp image
NOW WE'RE READY TO DECORATE!!!
***************************
Open up the JF_Flower_Element.psp image in your PSP workspace
Right click on the Title Bar and select COPY from the options
Right click on the Title Bar of your frame image
and select PASTE AS NEW LAYER from the options.
ADJUST >>> HUE & SATURATION >>> COLORIZE

IMAGE >>> RESIZE = 50%
Ensure "Resize all layers" is UNCHECKED
Reposition with your MOVER tool
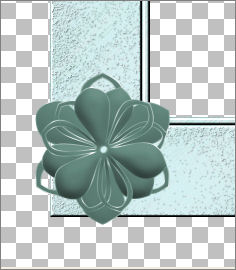
ADJUST >>> SHARPNESS >>> SHARPEN
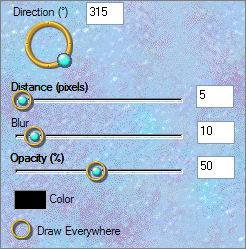
EFFECTS >>> PLUGINS >>> EYE CANDY 3 >>> DROP SHADOW
*-*-*-*-*-*-*-*-*-*-*-*-*-*-*-*-*
Open up the JF_elements_shapes77.psp image in your PSP workspace
ACTIVATE RASTER 2
Right click on the Title Bar and select COPY from the options
Right click on the Title Bar of your frame image
and select PASTE AS NEW LAYER from the options.
ADJUST >>> HUE & SATURATION >>> COLORIZE
EFFECTS >>> 3D EFFECTS >>> INNER BEVEL
Same settings
IMAGE >>> RESIZE = 50%
Ensure "Resize all layers" is UNCHECKED
Reposition with your MOVER tool
LAYERS >>> ARRANGE >>> MOVE DOWN
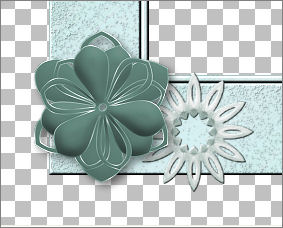
ADJUST >>> SHARPNESS >>> SHARPEN
EFFECTS >>> PLUGINS >>> EYE CANDY 3 >>> DROP SHADOW
Same settings
*-*-*-*-*-*-*-*-*-*-*-*-*-*-*-*-*
ACTIVATE RASTER 1
Go back to the JF_elements_shapes77.psp image
ACTIVATE RASTER 4
Right click on the Title Bar and select COPY from the options
Right click on the Title Bar of your frame image
and select PASTE AS NEW LAYER from the options.
ADJUST >>> HUE & SATURATION >>> COLORIZE
IMAGE >>> RESIZE = 50%
Ensure "Resize all layers" is UNCHECKED
Reposition with your MOVER tool
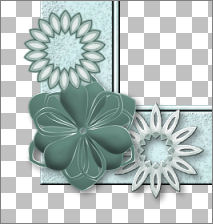
ADJUST >>> SHARPNESS >>> SHARPEN
EFFECTS >>> PLUGINS >>> EYE CANDY 3 >>> DROP SHADOW
Same settings
*-*-*-*-*-*-*-*-*-*-*-*-*-*-*-*-*
Go back to the JF_elements_shapes77.psp image
ACTIVATE RASTER 3
Right click on the Title Bar and select COPY from the options
Right click on the Title Bar of your frame image
and select PASTE AS NEW LAYER from the options.
ADJUST >>> HUE & SATURATION >>> COLORIZE
IMAGE >>> RESIZE = 50%
Ensure "Resize all layers" is UNCHECKED
EFFECTS >>> EDGE EFFECTS >>> ENHANCE
Reposition with your MOVER tool
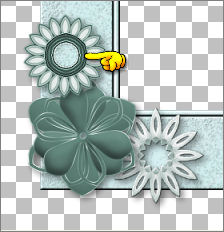
*-*-*-*-*-*-*-*-*-*-*-*-*-*-*-*-*
Go back to the JF_elements_shapes77.psp image
ACTIVATE RASTER 6
Right click on the Title Bar and select COPY from the options
Right click on the Title Bar of your frame image
and select PASTE AS NEW LAYER from the options.
ADJUST >>> HUE & SATURATION >>> COLORIZE
IMAGE >>> RESIZE = 75%
Ensure "Resize all layers" is UNCHECKED
EFFECTS >>> 3D EFFECTS >>> INNER BEVEL
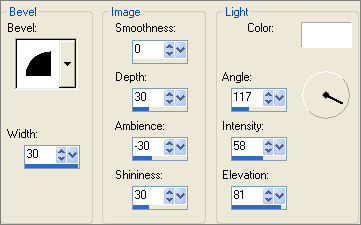
Reposition with your MOVER tool
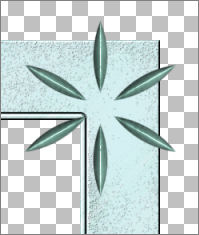
EFFECTS >>> PLUGINS >>> EYE CANDY 3 >>> DROP SHADOW
Same settings
*-*-*-*-*-*-*-*-*-*-*-*-*-*-*-*-*
Go back to the JF_elements_shapes77.psp image
ACTIVATE RASTER 5
Right click on the Title Bar and select COPY from the options
Right click on the Title Bar of your frame image
and select PASTE AS NEW LAYER from the options.
ADJUST >>> HUE & SATURATION >>> COLORIZE
IMAGE >>> RESIZE = 55%
Ensure "Resize all layers" is UNCHECKED
ADJUST >>> SHARPNESS >>> SHARPEN MORE
Reposition with your MOVER tool
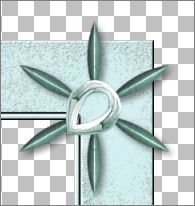
EFFECTS >>> PLUGINS >>> EYE CANDY 3 >>> DROP SHADOW
Same settings
*-*-*-*-*-*-*-*-*-*-*-*-*-*-*-*-*
Go back to the JF_elements_shapes77.psp image
ACTIVATE RASTER 8
Right click on the Title Bar and select COPY from the options
Right click on the Title Bar of your frame image
and select PASTE AS NEW LAYER from the options.
ADJUST >>> HUE & SATURATION >>> COLORIZE
EFFECTS >>> PLUGINS >>> EYE CANDY 3 >>> DROP SHADOW
Same settings
Reposition with your MOVER tool
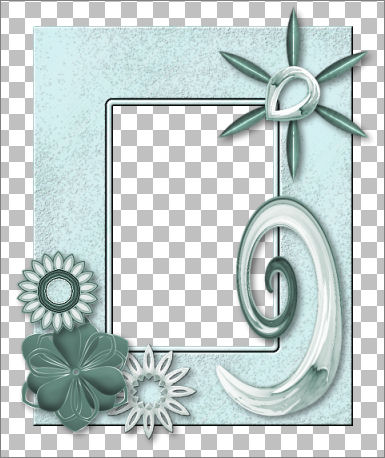
Choose your SELECTION TOOL
Selection Type = Rectangle
Mode = Replace
Feather = 0
Antialias = Checked
and section off the area shown below
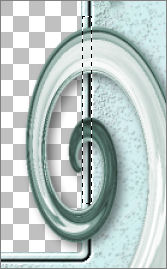
EDIT >>> CLEAR
DESELECT
*-*-*-*-*-*-*-*-*-*-*-*-*-*-*-*-*
Go back to the JF_elements_shapes77.psp image
ACTIVATE RASTER 7
Right click on the Title Bar and select COPY from the options
Right click on the Title Bar of your frame image
and select PASTE AS NEW LAYER from the options.
IMAGE >>> ROTATE >>> FREE ROTATE = LEFT 45
Ensure "All layers" is UNCHECKED
Reposition with your MOVER tool
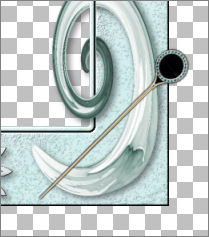
Choose your FREEHAND SELECTION TOOL
Selection Type = Point to Point
Mode = Replace
Feather = 0
Antialias = Checked
Section off the area shown below
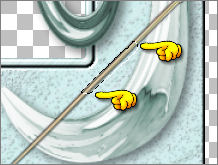
EDIT >>> CLEAR
ACTIVATE the MERGED layer
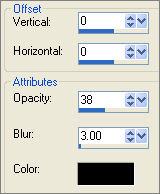
EFFECTS >>> 3D EFFECTS >>> DROP SHADOW
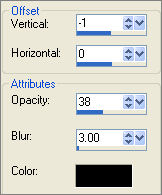
EFFECTS >>> 3D EFFECTS >>> DROP SHADOW
LAYERS >>> MERGE >>> MERGE VISIBLE
Save as .psp image
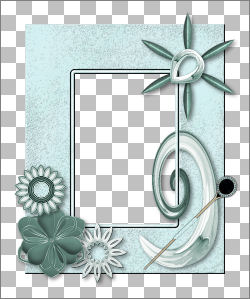
********************************************************
FRAME 3
Page designed by

for
 |
http://www.artistrypsp.com/
Copyright ©
2000-2008 Artistry In PSP / PSP Artistry
All rights reserved.
Unless specifically made available for
download,
no graphics or text may be removed from
this site for any reason
without written permission from Artistry
In PSP / PSP Artistry
|